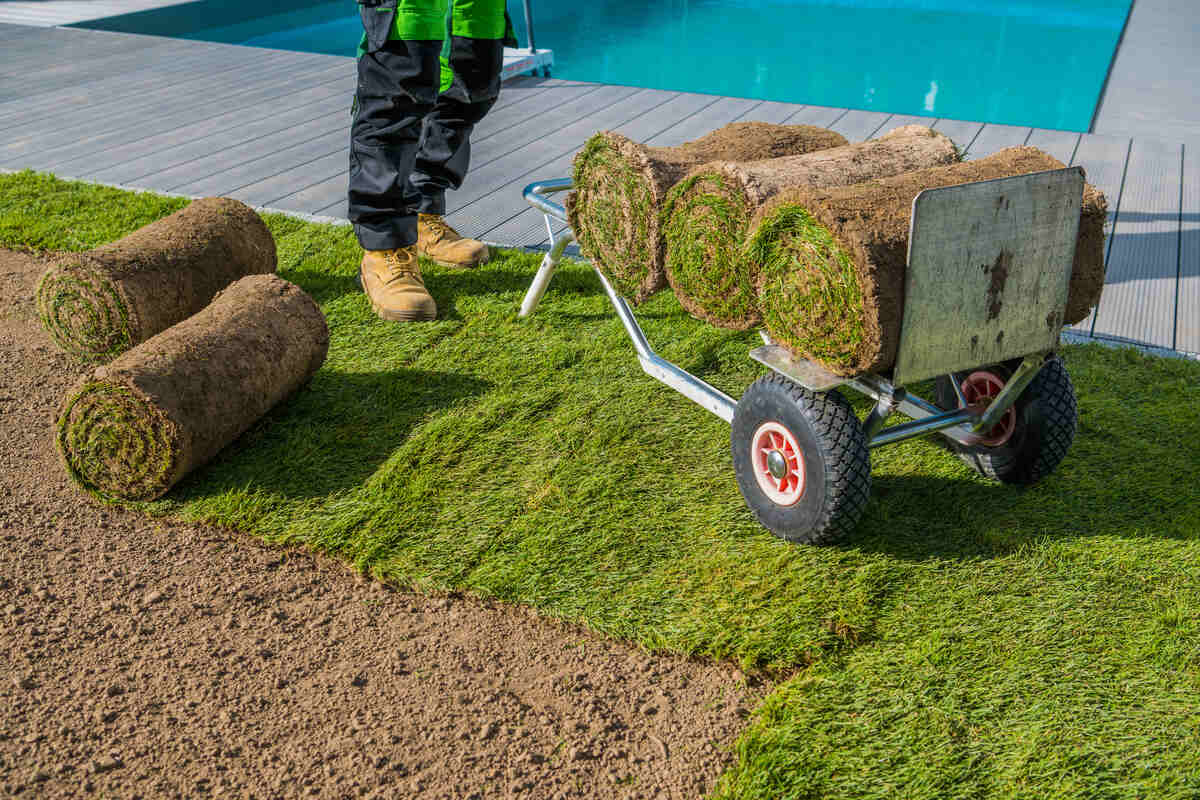
If you want an instant, healthy lawn, laying sod is the way to go. Learning how to lay sod is a fairly easy DIY project.
Apart from the sod installation, there are several steps to do beforehand. I’ll also share how to care for your sod after installation — from watering to fertilization.
| Project Difficulty: Intermediate Estimated Time to Complete: Soil preparation takes 1 to 1.5 days (1,000 square feet); sod installation will take another 1 to 1.5 days Project Cost: The cost to install sod DIY ranges from $0.31 to $0.82 per square foot, depending on the type of grass. With professional installation, the cost can double to around $0.86 to $1.75 per square foot. |
Pre-Installation Steps
While you can have sod installed nearly year-round, the best time for laying sod will depend on the type of grass. For cool-season grasses, it’s best to lay sod in late summer to early fall, while late spring to early summer is best for warm-season grasses.
Remember that you can’t install sod on frozen ground, and you’ll need to keep the sod moist to root successfully. Plus, check if your city restricts watering during summer, and ask if they can make an exception since you’re establishing a new lawn.
Test the Soil
Before laying sod, know the current condition of your soil because you’ll need this information during the soil preparation step. You can use an at-home soil test kit or get a comprehensive analysis by sending your soil sample to a soil testing lab.
Since it can take up to 10 business days (even longer during peak season) for testing labs to process soil samples, I recommend doing it first. This way, you can do the other pre-installation steps while waiting for the test results.
Gather Materials/Supplies
Other than the sod, you’ll also need to use other materials, such as:
- Stakes
- Aerator
- Sod cutter
- Leveling rake
- Markers or flags
- Rototiller or plow
- Lawn roller or tamper
- Measuring tape or wheel
Measure the Space
To determine how much sod to purchase, you’ll need to measure your yard first.
With an open reel tape measure or measuring wheel, determine the square footage by measuring the length and width of the area where you’ll be installing the sod. You might need to break down the measurements into pieces or chunks, as shown in the sample image below, and add the values to get the total square footage of your project area.
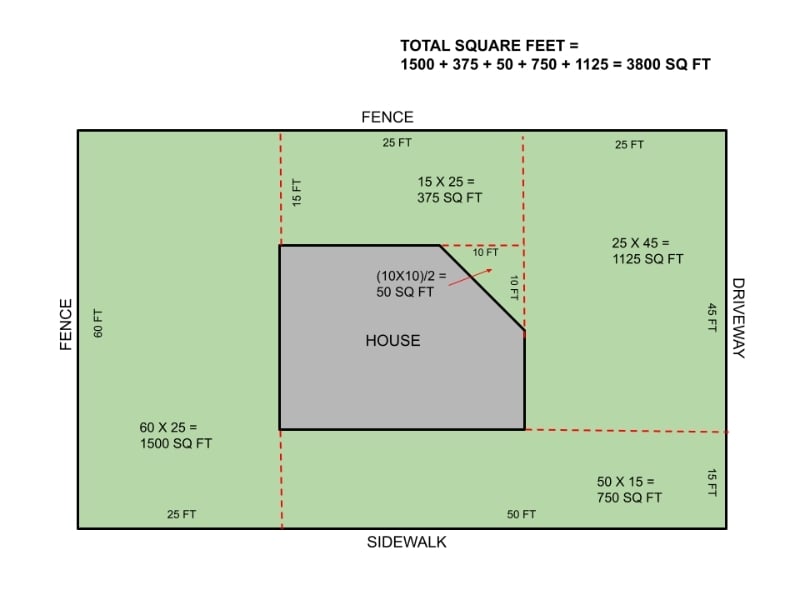
Pro Tip: When you’re done calculating the total square footage, increase the number by 5% to 10%. Doing so will help account for any measurement errors, damaged pieces, and filling odd spaces. If this process is more than you bargained for, hire a landscaping pro who can do all the steps involved in your sod installation project.
Purchase Sod

Before purchasing sod, know what type of sod grows well in your area. Apart from location, other factors to consider when buying pre-grown grass include sun exposure, maintenance requirements, and the lawn’s intended use.
- Cool-season or warm-season grasses: If you’re living in a colder region, I recommend cool-season grasses like Kentucky bluegrass, perennial ryegrass, and fine fescue. For southern states, warm-season grasses like Bermudagrass, St. Augustinegrass, and Zoysiagrass that thrive in warmer temperatures are best.
- Sunlight conditions: Check if your lawn gets a lot of sunlight. Some grasses require full sun, while other varieties can thrive in partial sun.
- Maintenance requirements: Consider the level of maintenance required by your sod lawn. Some grasses need frequent mowing, fertilizing, and other care practices.
- Intended use: Some grass types are preferred for their aesthetic appeal, while others can tolerate high-traffic areas.
Additionally, you should check if the sod dealer can deliver the sod to your home. Most dealers can deliver sod. But if your dealer doesn’t, you may have to rent or borrow a friend’s pickup truck to bring the sod home from the farm or store.
Since sod can dry out and deteriorate, schedule your sod delivery and installation to fall on the same day. If it’s not possible, try to install the sod within 24 hours after delivery. And don’t be tempted to water your sod before installing it, even in the summer. Only water your sod after installation.
Note: Preparing the soil for sod installation can take at least a day to complete. So, you should consider this when scheduling the delivery date of your sod.
If you’re struggling to decide which type of grass to buy, you can check out our guide: How to Choose the Right Grass for Your Lawn.
Prepare the Soil
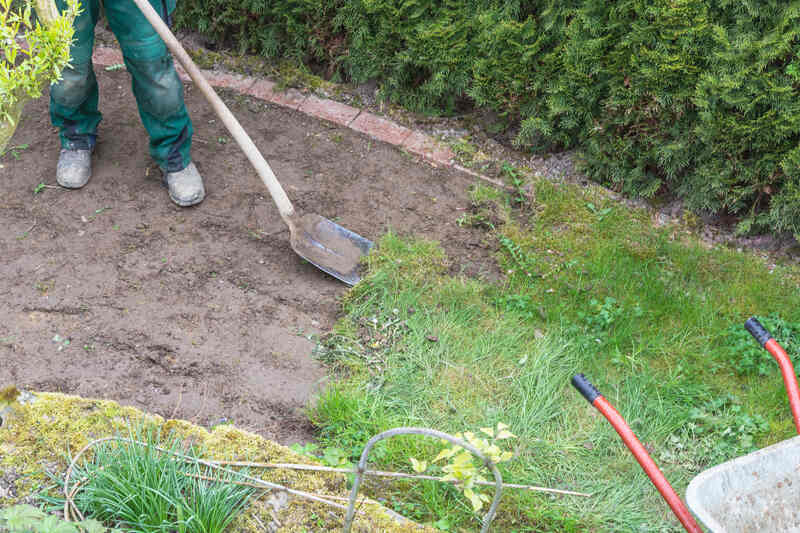
Preparing the soil is the most labor-intensive of all pre-installation tasks, but the effort is well worth it. You can help your grass grow healthy if you do the following steps properly:
- Clear the space: You’ll want to remove everything from the area, including patches of live grass, weeds, debris, and other obstructions. If you need to remove existing grass, avoid using herbicides like glyphosate, as their residue can stay in the soil for up to 4 months and harm new sod.
- Till the soil: Break up the soil and alleviate soil compaction by tilling the soil to a depth of 4 to 6 inches. This step will help the grass roots to have an easy reach deep into the soil after sod installation. Mark sprinkler heads and know how deep the lines are buried to avoid damaging them as you till.
- Amend the soil: Depending on the soil test results, you might have to adjust the soil pH by adding lime or acidifying products. If needed, you can also add compost or other organic matter.
- Level the soil: Leaving mounds and low spots will make mowing difficult. So, take the time to level the yard before installing sod. Also, ensure the soil next to your concrete driveway or walkway is 1 to 2 inches lower than the concrete surface. Sod resting too high next to concrete will dry out and die.
Depending on your lawn’s condition, you may be able to skip some of these steps.
Installation Day
I must admit that installing sod is a good workout. But it’s a hot, sweaty, and dirty process. So, you’ll need to prepare yourself for this challenging task. Put on loose, comfortable clothes, drink plenty of fluids, apply sunscreen, and wear a hat.
Moisten Soil in the Morning
Another key to a successful sod installation project is ensuring the soil is moist before laying the sod.
To do this, you can water the area where you’ll be laying sod on the morning of installation. But it’s not always necessary. For example, you can skip this step if the ground is still wet from a previous watering or rain.
Note: The ideal soil condition before installing sod is moist and not soggy or squishy.
Install the Sod
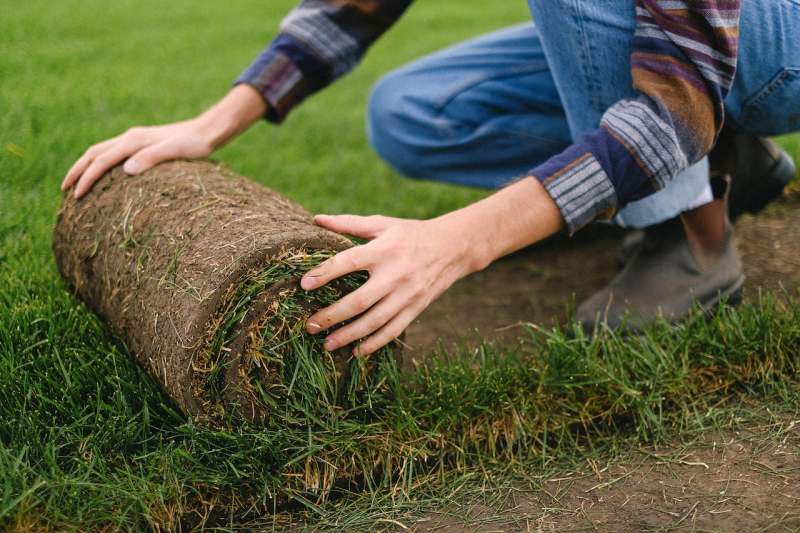
Now it’s time to get down to the nitty-gritty of how to lay sod:
- Determine which part of your lawn has the longest straight edge. It can be the area adjacent to your house, driveway, flower bed, or sidewalk. You’ll be laying the first row of sod along this continuous, straight edge.
- Create a brick-like pattern. After laying down the initial strip, begin laying subsequent rows by staggering the seams, similar to bricklaying. This way, you’ll avoid a straight-line pattern, which can lead to water channels and cause the seams to fall apart.
- Trim the edges. Using a sharp knife or sod cutter, trim the edges and cut around sprinkler heads and irregular shapes.
- Install the pieces tightly. Don’t leave gaps, as sod won’t naturally fill spaces over time. It actually shrinks, so gaps will widen after a while, exposing edges and roots.
- Remove air pockets between the sod and soil using a lawn roller. It will help encourage the new sod to make good contact with the underlying topsoil.
- Water your new sod immediately after installation. Provide your new sod with adequate moisture by watering it for 40 minutes to an hour. You want the top 4 inches of the soil to be moist.
Note: Sod on slopes can slide and shift, causing longer than normal root establishment. Prevent it by staking sod on sloped areas using sod staples. Skipping this part can eventually lead to sod drying out.
Here’s a quick video of how one homeowner laid sod in his yard:
See Related: How to Plant Grass Seed
Post-Installation Care
Compared to overseeding, laying sod is a piece of cake. But it’s still not a set-and-forget kind of project. Do the following to care for your new sod:
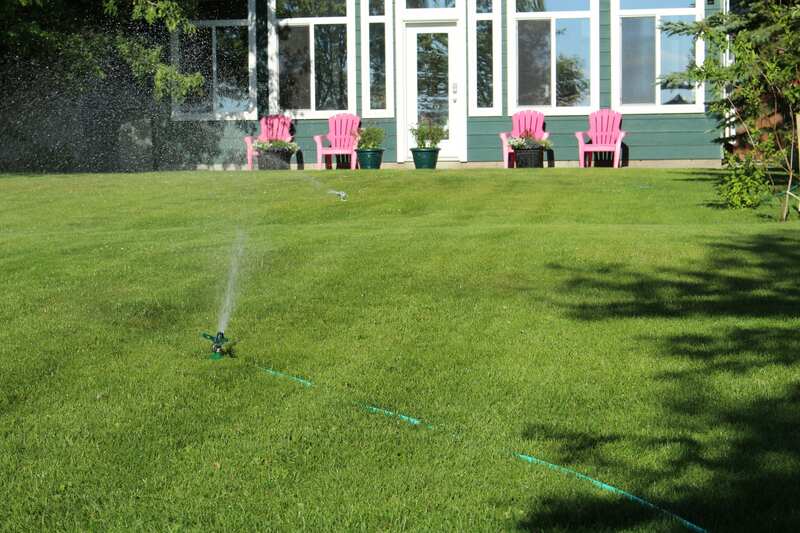
- Water: Whether you’re manually watering or using sprinklers for your lawn, the goal is to make the soil moist and encourage root development. So, water your lawn twice a day for the next 2 weeks, with each watering lasting 15 to 20 minutes.
- Avoid foot traffic: Don’t let anyone (including pets) walk on the lawn for 2 to 4 weeks after installation.
- Check for odd spots and lifting: For the next few days after installation, do a thorough visual inspection to see if the sod has been installed properly. There shouldn’t be any lifting or spots where there’s no coverage. If you find odd spots, use a lawn roller to press the sod into the soil and remove air pockets.
- Check for root growth and establishment: Two weeks after laying sod, start checking the status of its root growth. Simply tug on the grass blades lightly. Once you feel some resistance, it means the sod has already bonded with the soil and the roots have established.
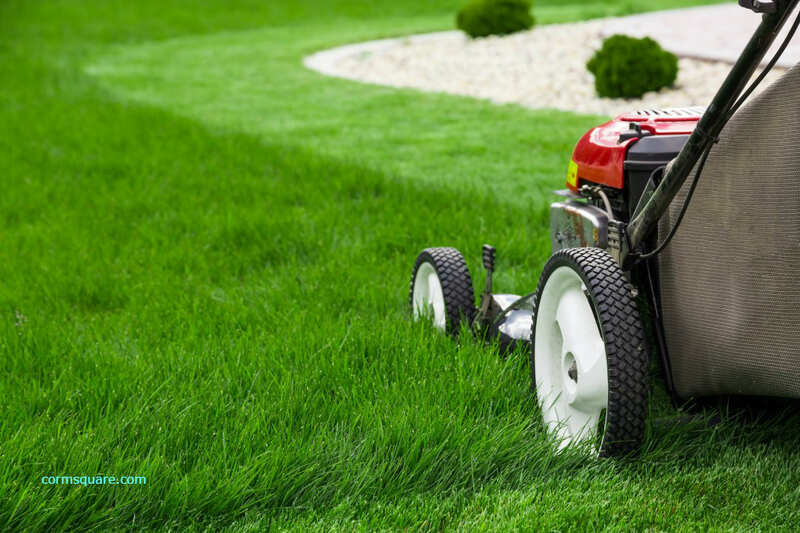
- Mow: After 3 to 4 weeks, your grass will have grown 1/2 inch to 1 inch higher than its recommended mowing height. This is the best time to do the first mow. Waiting longer would make the grass too long and negatively impact root growth.
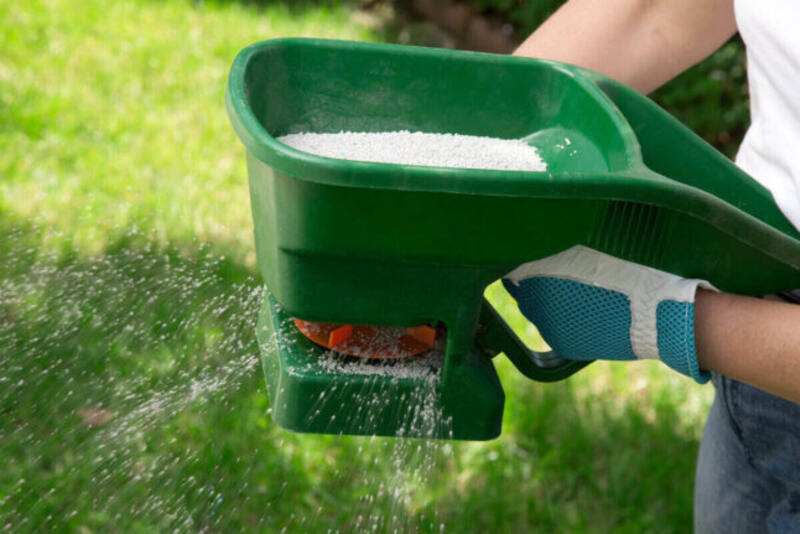
- Fertilize: Wait 30 to 60 days or until after the fourth mow before adding a starter fertilizer. If the grass is still too young, the roots won’t be able to absorb the nutrients.
See Related:
FAQ About Laying Sod
Improper watering, overfertilization, and other issues can lead to yellow grass. To avoid this problem, remember to take care of your new sod properly. Learn more about taking care of your new sod in our guide: How to Care for New Sod.
Yes, it’s possible to lay sod on top of an existing lawn. But it’s not advisable. If you do, your new lawn will have limited access to water and nutrients, making it hard to establish roots. As a result, your new sod will eventually die.
Let a Pro Install Your Sod
Laying sod may be simpler than reseeding, but that doesn’t mean it’s not labor-intensive. Even if you know how to install sod, you’ll still have to spend a lot of time and energy to complete your sod installation project. So, hire a local landscaping pro to do the work for you.
Sources:
- “Nine Steps for Establishing a New Lawn Using Sod.” By Suleiman Bughrara, soil expert. Michigan State University Extension.
- “Soil Testing.” By Steven Eilers, horticultural and natural resource coordinator. Iowa State University Extension and Outreach.
- “Sodding: Steps to an Instant Lawn.” By James A. Murphy, extension specialist, and Henry Indyk, extension specialist emeritus. Rutgers University New Jersey Agricultural Experiment Station.
- “Sod Installation and Maintenance.” By James Dewey McCurdy, associate professor, and Barry R. Stewart, professor. Mississippi State University Extension.
Main Image Credit: Tomasz Zajda / Adobe Stock Free / License