To revive a dead lawn you start by finding and removing the cause. Drought, thick thatch, fungi, pests, nitrogen burn, and salt are just a few of the factors that can turn your lawn brown. In most cases, grass is only dormant, and proper lawn care can bring it back to life. In other cases, the grass is dead, and you’ll need to renovate to revive your lawn back to green and lush.
Dormant vs Dead Grass
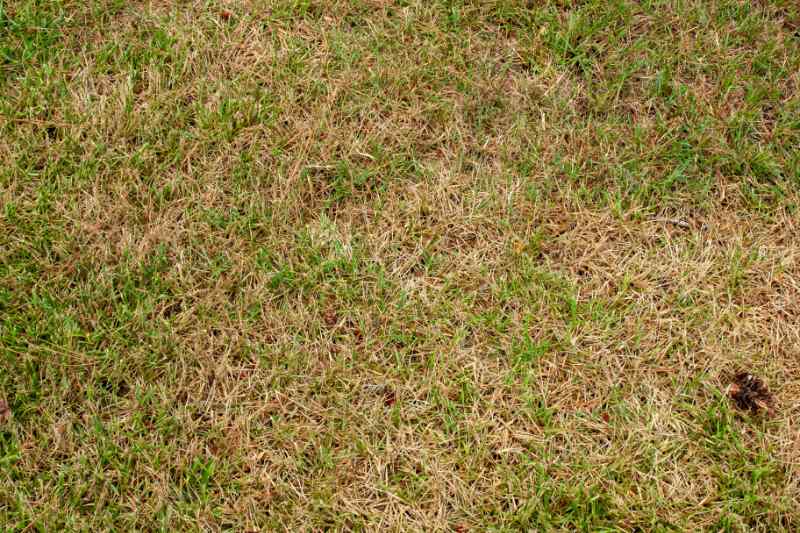
The first step to reviving a dead lawn is checking if your grass is truly dead or only dormant. The two look the same, but only dormant grass can be revived. If the brown turfgrass is dead, you’ll have to reseed or install new sod to fix the lawn.
What is Dormant Grass?
Dormant grass is hibernating. Turfgrass enters dormancy and turns brown when it doesn’t have suitable conditions to grow. Drought, poor soil, and very low or high temperatures can trigger dormancy. The top of the plant looks brown and dead, but the crown and roots are still alive and can support new growth. Dormant turf awaits friendlier conditions to start growing again.
Turfgrass dormancy is typically a seasonal thing and depends on the type of grass you grow.
- Cool-season grasses like tall fescue, ryegrass, or bluegrass go dormant during summer. They can’t withstand the mix of drought and high heat.
- With warm-season grasses like Zoysia and Bermudagrass, dormancy is a fall-winter thing. Summer grasses are sensitive to low temperatures.
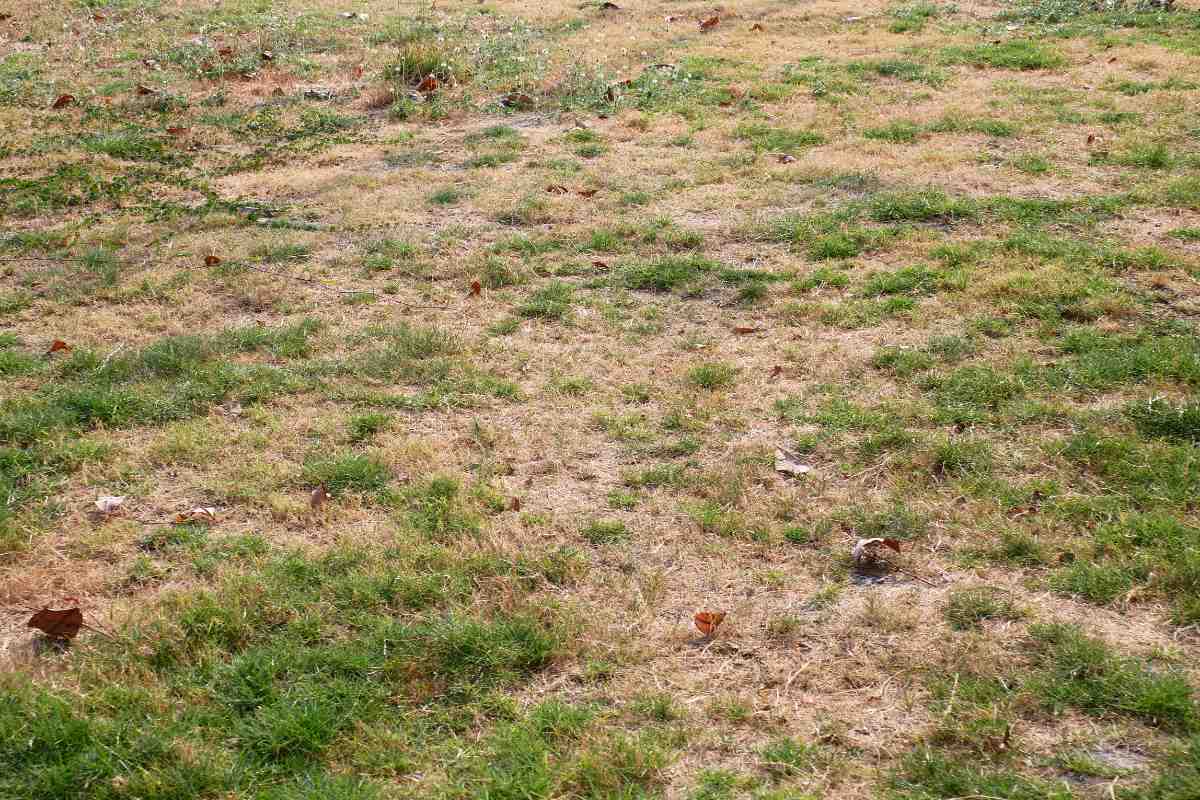
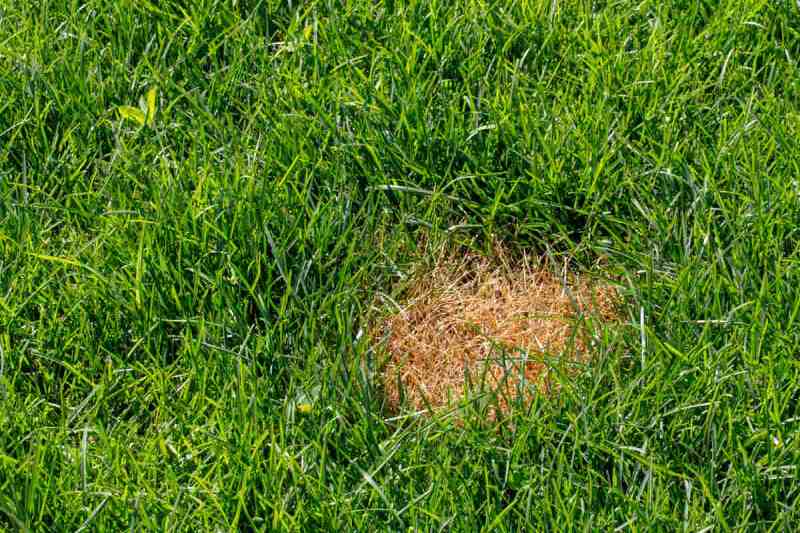
Note: A good clue you’re dealing with dormant grass is when most of your lawn turns brown roughly at the same time. Dead grass appears most often in well-defined patches.
How Do You Know Your Grass is Dead?
Two easy tests help you find the answer to this question:
- The tug test: Grab a handful of brownish grass blades in your hand and give it a good tug. If the grass pulls out without resistance, there are no healthy roots to keep it alive – it’s dead grass. If you can’t pull the grass out or it takes a lot of effort, the roots are still healthy – it is dormant grass you can save.
- The crown test: Check the crown on the brown grass plants. The crown is the whitish part between the lowest grass blade and the soil. If whitish and sturdy, the plant is okay and will grow new healthy leaves. A brown, dry, or mushy crown means the grass plant can’t grow any more leaves and is dead or dying.
How to Revive a Dead Lawn
There’s a lot you can do to revive a lawn with dead grass. Proper lawn care can help damaged and dormant plants come back to life and turn your lawn green again.
Clean the Lawn
Clean your lawn off all debris and objects. Start with outdoor furniture and toys and end with branches, twigs, and dead leaves.
Keep the foot traffic to a minimum and any heavy machinery off the lawn. Dormant grass is sensitive to mechanical stress.
Aerate and Dethatch
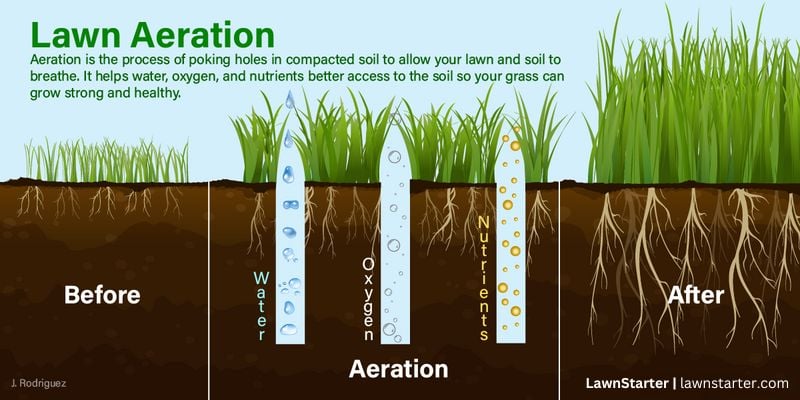
Core aeration pulls out hundreds of tiny cores from the soil. The small holes it leaves behind allow roots better access to oxygen, water, and nutrients. Lawn aeration is essential when reviving a lawn damaged by soil compaction, overwatering, or fungal diseases.
Removing the thatch layer helps your grass recover more easily. Dethatching improves airflow, water, and nutrient absorption and fights off fungi and pests. When you rake the thatch of your lawn, you also free grass crowns from the tight organic mat. Safe from excessive moisture and rot and exposed to sunlight, they’ll start growing new leaves.
Note: With a fungal infection, aerate and dethatch the diseased areas last to avoid spreading the infection in healthy grass.
Mow the Grass
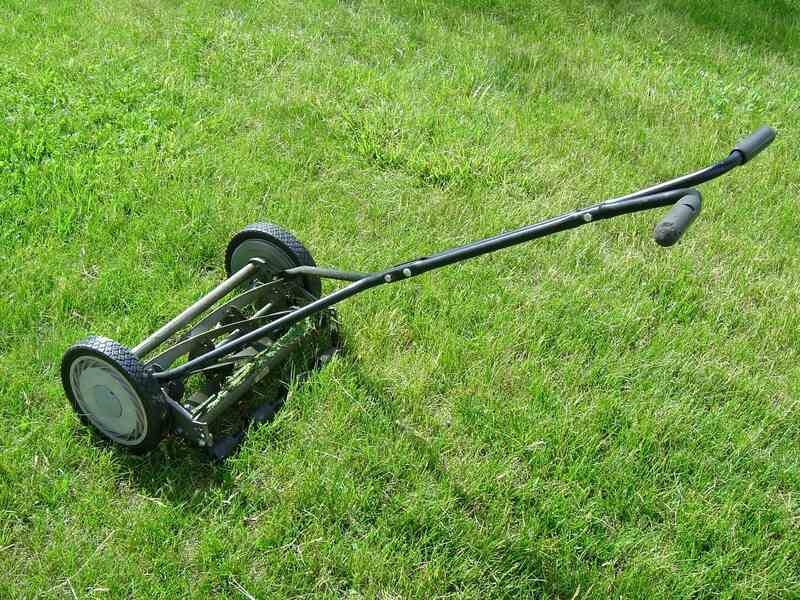
Sometimes, only the tip of the grass blades is brown or dry, and mowing brings back the green in a jiffy. Even with more severe damage, mowing the grass helps remove the dry part and allow new growth.
With healthy grass still on your lawn, follow these mowing rules:
- Mow the grass at the right height for your turf type and season. Keep the lawn taller in the summer to help it better fight the heat.
- Don’t cut more than 1/3 of the turf height.
- Keep the lawn mower blades sharp.
- Don’t mow wet grass.
- Take the grass clippings off the lawn. Leaving it as mulch can do more harm than good at this point.
Keep Weeds Under Control
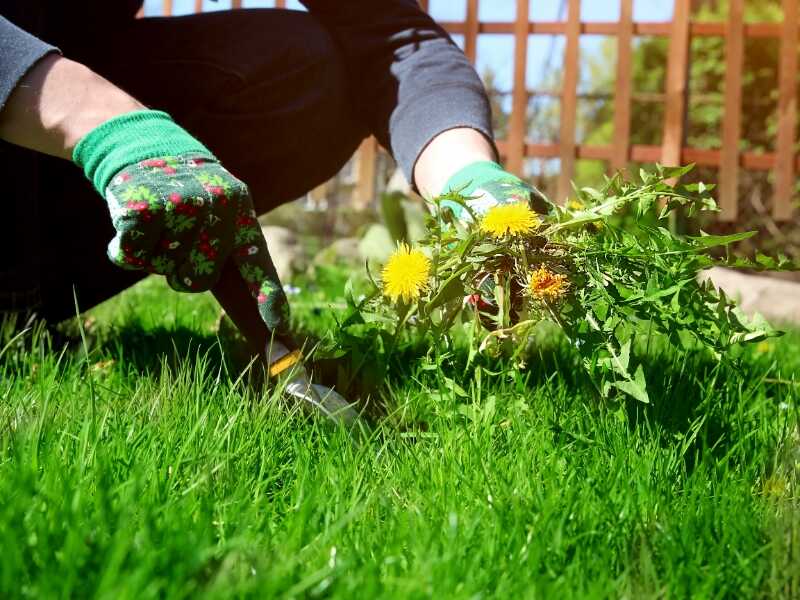
Weeds are sure to make a strong appearance whenever your turfgrass is suffering. They smother turf and steal water and nutrients, making lawn recovery harder.
Dormant and damaged grass is sensitive to chemicals. Remove stray weeds manually where possible and consider a herbicide for invaded areas. Unless you renovate the invaded areas, hire a professional to lead the weed control process. This way, you ensure the use of a suitable weed killer that can clear your lawn while protecting the grass.
Give Your Turf Some Water
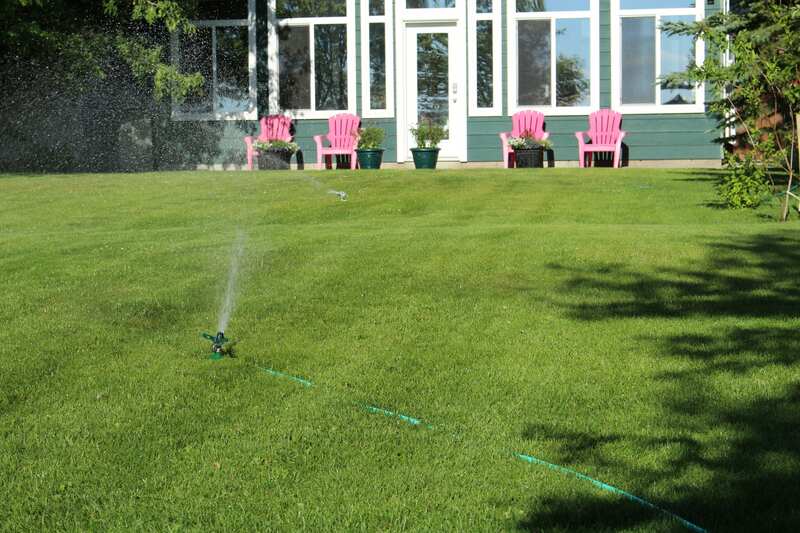
Providing enough water can help revive a dead lawn when affected by drought. It also helps the grass by diluting the harmful chemicals in:
- Fertilizer burns
- Brown patches due to pet urine
- Salt contamination
Check your sprinkler system. Reviving a dead lawn can be as easy as cleaning clogged sprinkler heads or changing the spraying direction to cover the entire lawn.
Overwatering also can lead to yellow grass and bare patches. If your soil feels spongy and you see mushrooms or other signs of fungal infection, you might give the grass too much water. Reduce watering to give the soil time to dry.
To provide healthy grass with just the right amount of water, follow these lawn irrigation rules:
- Apply 1 to 1.5 inches of water per week.
- Factor in rainfall. If it rains, postpone irrigation. A rain sensor can do this automatically.
- Water deeply to moisten the top 6 to 8 inches of soil.
- Irrigate once or twice a week. Wait for the grass to show drought stress before watering (changing color to a tern gray-green, wilting).
- Irrigate early in the morning. The best time to water the lawn is between 5-9 a.m.
Deal with Lawn Diseases and Pests
Fungal diseases and lawn pests are common causes of brown patches on your lawn. Check for signs of fungal infection and pest infestation. You’ll need to fight off the culprits before starting to heal your lawn.
Lawn fungi: You can’t revive your dead lawn without fighting off the fungal infection killing your grass. Aeration, dethatching, and proper fertilization help, but you’ll often need a fungicide. Hire a professional to apply the best and safest treatment for your lawn.
Some fungi are more deadly than others. Diseases like root rot and necrotic ring spot go for the roots and crowns. This type of damage reduces the chances of reviving all the brown grass, and you’ll most likely need to overseed.
Diseases like yellow patch and leaf rust are milder. They mostly harm the foliage and give you a good chance to see your grass green again in a few weeks with proper care.
Turf pests: As with lawn fungi, pests will continue to damage the grass if not deterred effectively. Grubs, chinch bugs, and sod webworms can turn a green lawn brown with ease. To keep them at bay, dethatch and clean the lawn of organic debris that pests can use as food or shelter.
If you suspect an infestation, hire a pest control specialist to identify what’s eating your lawn and get rid of it properly.
Test the Soil
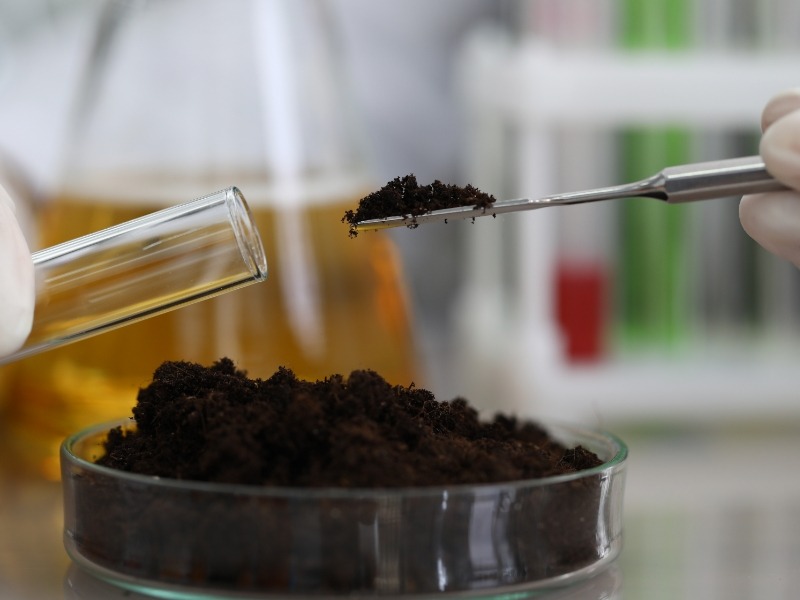
Test your soil for a pH imbalance. Acidic soil makes elements like manganese and aluminum available to grass plants in toxic amounts. Alkaline soil is not much better either – it prevents grass plants from absorbing iron, phosphorus, and other essential nutrients.
Most turfgrasses thrive when pH is between 6.0 and 7.0. You can treat acidic soil with lime and alkaline with sulfur.
Check the nutrient content. The same test tells you what nutrients are in your soil. If your grass looks dead because of a nutrient deficit or excess, you must know exactly what the problem is before deciding to fertilize. Nitrogen excess is a common cause of brown turf.
Where can you get a soil test? You can buy a soil test kit online or send a soil sample to the local Extension Office for professional lab tests.
Feed the Grass
Using the right lawn fertilizer can help your lawn bounce back. Products with phosphorus help weak roots recover faster. Grass with foliar damage responds better to formulas rich in nitrogen.
Use the soil test results to guide you and consult your local extension office or lawn care expert for the right product. Don’t spread more than 1 lb. of nitrogen per 1,000 square feet in one application.
Overseed the Lawn

Some brown grass might recover, others might not, leaving you with a thinned lawn. To get its beautiful thickness back, you’ll have to overseed. Fortunately, overseeding a thinned lawn is easy enough to DIY. Here are the steps to follow when adding new plant material to your lawn:
- Aerate and dethatch (if you haven’t already).
- Mow the grass low and rake the grass clippings.
- Spread a thin layer of compost as topdressing (about 1/2 inch thick to avoid burning healthy grass).
- Spread the new seeds across the lawn using a broadcast spreader.
- Rake the grass seeds lightly into the topsoil to ensure good seed-to-soil contact.
- Spread a starter fertilizer.
- Water the lawn twice daily during the first two weeks and apply ¼ to ½ inches daily. Aim to keep the top 1 – 2 inches of soil moist to ensure germination.
- Gradually reduce the watering frequency after week 3. By week 4 or 5, you should be back to the regular irrigation schedule.
Plan to overseed at the start of the growing season. That’s late summer to early fall for cool-season grasses, with a second option to overseed in the spring. Warm-season grasses are best overseed in spring to early summer.
Note: Take advantage of overseeding to introduce more resilient grass types. Consider climate, shade, common pests, and local fungal diseases.
Renovate Dead Patches
Sometimes, dead patches stay dead, and you need to start over. Also known as renovation, this involves removing all the vegetation from the treated areas. Homeowners can successfully renovate parts of an existing lawn. Hiring a pro to renovate the yard generally offers better results if the entire lawn (or most of it) is damaged.
Here’s how you can prepare dead patches for renovation:
- Remove the weeds and the old grass. Use a non-selective herbicide or a sod cutter.
- Aerate and dethatch the area.
- Spread a few inches of compost and till in the topsoil 6 to 8 inches deep.
Choose a suitable grass type for your climate, soil type, and sun exposure. Decide before spreading seed and installing sod. On small patches, planting plugs might be a good idea.
To revive dead patches by seeding grass, follow these steps:
- Spread the grass seed evenly over the prepared area.
- Rake the seeds lightly into the topsoil to get good seed-to-soil contact.
- Spread a thin layer of straw to protect seeds from birds and animals.
- Water the soil to moisten the top 1 to 2 inches. Irrigate daily until germination, then gradually reduce frequency.
Professional lawn seeding costs about $0.09 and $0.19 per square foot.
To revive dead patches of lawn by installing sod, do the following:
- Lay down the sod in a straight line and make sure to butt the pieces firmly up against each other. Don’t leave any gaps.
- Use a lawn roller over the sod to ensure the root section makes firm contact with the soil.
- Stake the installed sod to ensure it stays in place.
- Water immediately after installation for 20 to 30 minutes to get the soil moist.
- Irrigate two to four times a day in 10 to 15-minute sessions for the first 10 – 14 days until the sod establishes roots. Then reduce frequency and increase session length to promote deeper roots.
If the entire turf is damaged and you’re basically installing a new lawn, consider hiring a pro. Installing sod costs $0.86 and $1.75 per square foot.
Grass plugs are a good idea when repairing brown spots with dead grass. To plant plugs correctly, follow these steps:
- Use a hand trowel and dig into the soil deep enough to contain the root section. Make holes 6- to 12- inches apart.
- Moisten the soil.
- Plant grass plugs in holes.
- Cover the holes and make sure the plugs are level with the ground.
- After planting, lightly roll the area.
- Keep the area moist until the new grass becomes established – about one to two weeks.
What Causes Dead Grass?
To keep your revived lawn green and healthy, keep an eye on the common causes that can damage your turf.
Drought: Lack of water often leads to dry, brown, or straw-color grass blades. When water is scarce, turfgrass enters dormancy to protect itself. Some grass can last up to six weeks without water, but more than that is sure to start killing plants.
Overwatering: Too much water also can be damaging if the soil has poor drainage. Soggy ground exposes the turf to root rot and other nasty fungal diseases. In many ways, overwatering can be deadlier than underwatering.
Thick thatch: Thatch is a buildup of dead grass. When over 1/2 inch thick, it chokes the growing grass. It limits the oxygen, water, and nutrients reaching the grassroots. Thatch buildup also can cause aggressive fungal infections or pest attacks.
Soil compaction: Compacted soil chokes grassroots and limits their growth. It also limits the plant’s access to oxygen, water, and nutrients. Paired with drought or other stress factors, it can easily lead to a dying turf.
Aggressive mowing: Mowing too short harms the grass and limits its growth and healing ability. When it’s a habit, it can kill the turf. Using dull lawn mower blades and short mowing in the summer are especially damaging.
Lawn pests: Grubs, chinch bugs, mites, and nematodes are just a few insects that can damage your lawn to death. Pests that target the roots are more likely to cause dead grass.
Fungal diseases: Fungal infections are a common cause of brown patches on lawns. Many lawn diseases mimic drought symptoms and can be neglected until the damage is extensive.
Salt damage: Salt used to clear snow during winter may have gotten into your lawn. It typically causes browning along driveways, streets, and sidewalks. Salt deprives grass of water and can kill the turf if in high concentration in the soil.
Pet urine: Animal urine causes yellow patches on your lawn. If the pet keeps peeing in the same spot, the high nitrogen added daily to the soil will end up killing the grass.
Nitrogen burn: Too much fertilizer or the wrong type (fast-release) also can kill grass. In high amounts, nitrogen burns the grass and the turf starts to dry from the tip.
Herbicide damage: The wrong herbicide can damage your grass severely. Turfgrass affected by herbicides have yellow or redden veins and stems twist, corkscrew, or flatten.
FAQ About Reviving a Dead Lawn
How Long Does it Take to Revive a Dead Lawn?
If a lawn is truly dead, you can’t bring it back to life without reseeding or resodding. But it may not be dead. If the grass is only damaged or dormant, you can revive it in about a month. The time it needs to spring back depends on the cause of dormancy, how extensive the damage is, the weather conditions, and the treatment you apply.
Can Dead Grass be Watered Back to Life?
Sometimes. Brown grass that entered dormancy due to drought can be brought back to life by watering it. If the grass is dead, watering the lawn won’t revive it.
Should I Rake My Dead Grass?
Yes. You should rake your dead grass for multiple reasons.
- Your dead grass may just be dead thatch. Removing the dead thatch (dethatching) will allow air, nutrients, and water to reach your healthy lawn.
- Raking may reveal that not all your grass is dead. You may just need to seed parts of your lawn instead of replacing entire sections.
Warning: Don’t rake too much. If you have healthy grass within the dead turf, you risk damaging the delicate blades with overraking.
When to Call a Professional
Reviving a lawn can take you from watering a bit more to reinstalling the sod in your entire yard. It’s a gratifying experience, but in some cases, it can be exhausting, complicated, and frustrating.
Take a look at your brown patches and bare spots. If it’s more than you can chew, call a pro. Professional intervention guarantees the best results, and with LawnStarter it is easier than ever to find a lawn care expert nearby. Give your grass the right treatment and revive your dead lawn to its former green glory!
Main Image Credit: Supersmario / Canva Pro / License