You can test soil pH by shipping samples to a lab or using a home testing kit. Let’s go over how to test the soil pH of your lawn and the benefits of both methods.
Sending a Soil Sample to a Lab
While it sounds straightforward, sending your soil to a lab for testing isn’t as simple as digging up soil and shipping it in the mail. The soil has to be properly handled, and it can’t be any ol’ soil in your lawn. While the specifics of taking soil samples will vary from lab to lab, the general process is quite similar.
Tools and Materials
- Plastic bucket: Galvanized buckets can contaminate the soil sample.
- Shovel: Make sure it’s clean and has no rust.
- Hand trowel: Make sure it’s clean and has no rust.
- Plastic container or baggie: Prepare this if your lab didn’t send you a container for the soil sample(s).
- Newspaper
Step 1: Make a Map
You’ll need to collect about 10 to 15 samples from your lawn to mix into a final sample that accurately represents your lawn.
You’ll want to take samples in areas that are relatively the same in terms of an environment that’s free from contaminants.
Don’t take soil samples from these places:
- Soil that’s near a body of water.
- Soil from your vegetable garden, flowers, and other ornamental plants.
- Soil with fertilizer or chemical lawn products like pesticides, herbicides, or fungicides.
Take your samples in a way that makes you go through your lawn in a zigzag pattern to make sure you’re taking soil throughout your lawn evenly.
Step 2: Clear Organic Matter
Remove or set aside any thatch and growing or dead plants from your digging area. You don’t want any organic matter in your soil sample.
Step 3: Dig
Using your shovel, dig a hole about 6 inches deep. Usually, soil labs recommend taking a sample from the top 4-6 inches if you’re sampling for a lawn.
Dig straight down if you can. Cut a half-inch thick slice from the sides of the hole.
If you see any organic matter or animal life — like more thatch or worms — remove them.
Lastly, place the soil in your bucket.
Step 4: Take More Samples
Repeat steps two and three for every dig site. You should end up with a generous amount of soil in your bucket.
Step 5: Prepare the Final Sample
Use your trowel to mix up the dirt in the bucket, removing any rocks and crushing clumps until you have relatively smooth soil.
Then, take 1 to 2 cups of soil and let it air dry on the newspaper. Make sure it doesn’t get wet, as wet soil can skew the results.
Once it’s dry, place the soil in the plastic bag or container. This will be your final sample. Follow the lab’s instructions to mail them in.
For a visual demonstration, check out this video on how to collect a soil sample from the University of Arkansas:
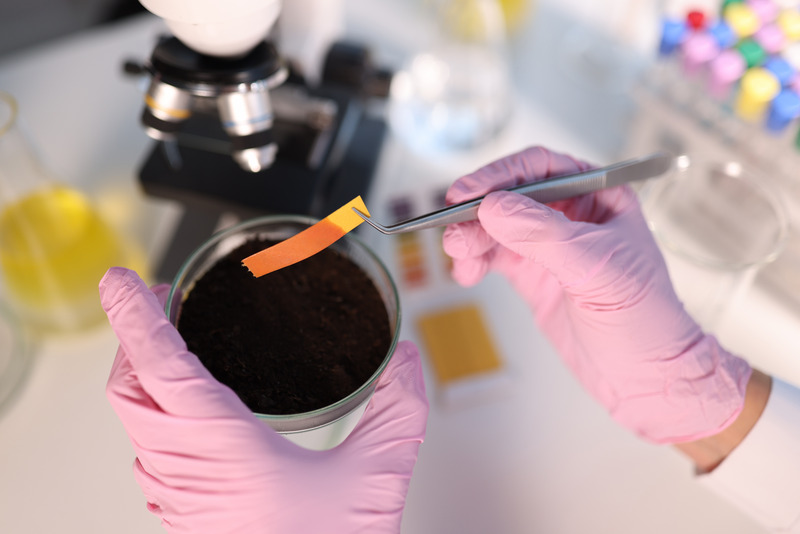
Testing With an At-Home Soil Testing Kit
At-home test kits vary hugely, so it’s absolutely critical to follow your chosen test’s instructions. The test kits can be as simple as a pH test you used in high school all the way to multiple tests with various chemicals.
Let’s go over how to test your soil’s pH using a La Motte soil test kit. These steps will be similar even if you use other soil test kits.
Tools and Materials
- Soil test kit
- Hand trowel: Make sure it’s clean and has no rust.
- Plastic bucket: Galvanized buckets can contaminate the soil sample.
- Newspaper
- Protective gear:
- Gloves
- Safety goggles
- Mask
- Distilled water
Step 1: Collect Your Soil Samples
The soil test kit should have instructions on how to take a soil sample.
If yours doesn’t, you can follow the instructions above on how to take a soil sample for lab testing or read our article, How to Prepare a Soil Sample (4 Easy Steps).
Step 2: Dry Your Soil
Make sure your lawn’s soil is dry when you take your soil sample.
Then, leave the soil to air dry on a sheet of newspaper. Wet soil can give you inaccurate results.
Step 3: Read the Instructions
Read the instructions carefully before fiddling with the sample. Make sure to wear your protective gear, as some chemicals that you’ll be using can irritate your skin and eyes.
Step 4: Fill the Test Tube
Fill a test tube to the fourth line with the pH indicator solution and add 1.5 grams of soil.
Other test kits may have you use different amounts of soil.
Step 5: Shake the Tube, Then Let it Settle
Put the cap on the tube and shake gently for 1 minute. Then, leave it alone for 12 minutes to let the solution settle.
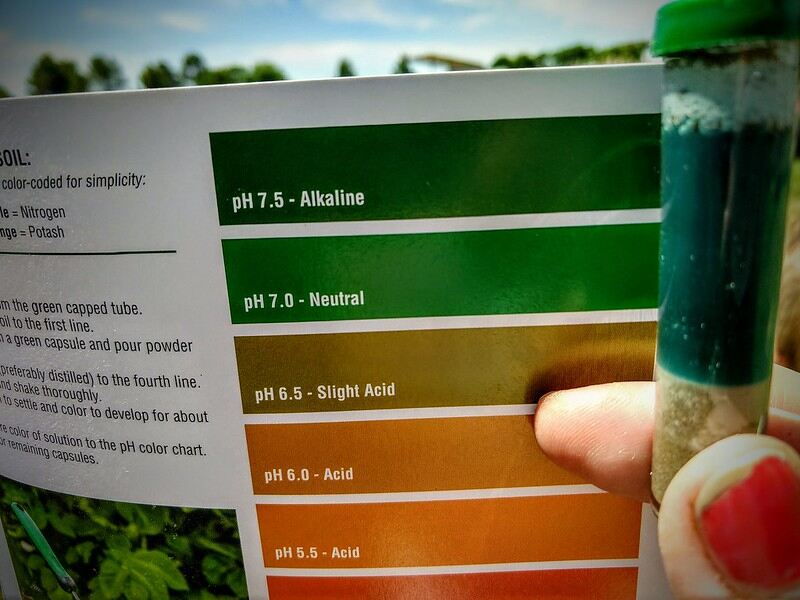
Step 6: Interpret the Results
Compare the color of the solution to the pH color card to determine your soil’s pH. Although the La Motte test kit doesn’t use a pH tester, there are several that do.
If you want to learn more about your soil, follow the instructions to find out more data, such as the levels of nitrogen, phosphorus, and potassium. Not all soil test kits test for other factors, though.
See Related: How to Use a Soil Test Kit
Sending to a Lab vs. Testing at Home
So, should you send your soil to a soil lab or use an at-home soil test kit? Let’s take a look at the advantages and disadvantages of each in the tables below:
| DIY Soil Testing Kit | |
| Pros | Cons |
| ✓ Convenient to use ✓ Gives results within an hour ✓ Inexpensive ✓ May also tell you if your nitrogen, phosphorus, and potassium levels are low, normal, or high | ✗ Can be inaccurate ✗ Won’t tell you how to fix your soil |
| Professional Soil Testing | |
| Pros | Cons |
| ✓ Can tell you your soil’s pH ✓ Can tell your soil’s nutrient levels ✓ Gives precise and detailed results ✓ Will recommend soil amendment and fertilizer amounts to fix soil issues ✓ Reasonably affordable | ✗ Not as convenient ✗ Can be costly if you need to do multiple tests ✗ Can take weeks before you get your results |
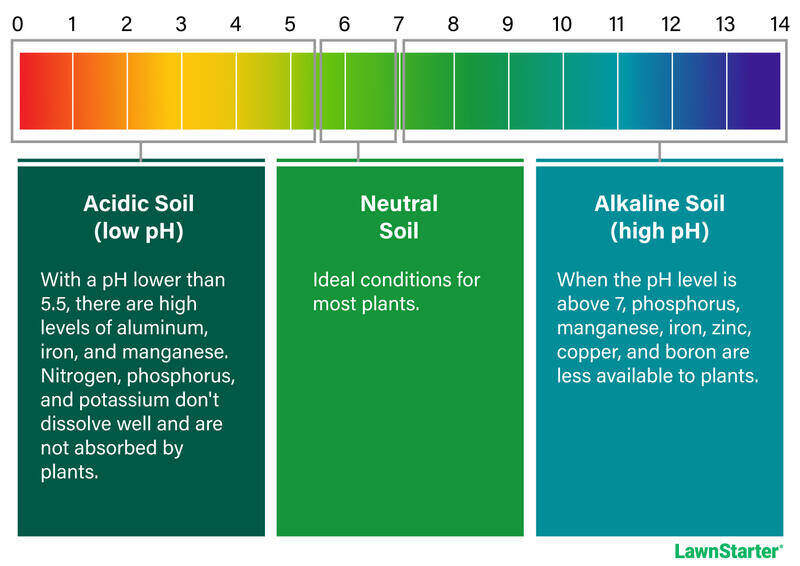
DIY soil testing is convenient, fast, and cheap, but it can give you misleading results. Numbers matter when it comes to the pH of your soil, and even a slight difference on the pH scale can mean a big change to your lawn’s acidity. If you’re willing to take the risk, you can pick up an at-home soil testing kit from your local garden center or home improvement store.
If you want precise results and recommendations on how to improve your soil, then sending soil samples to a laboratory is the way to go. The only sacrifices you have to make are the extra cost and the added wait.
While you can’t speed up time, there is a solution if you’re worried about the price tag: contacting your local Cooperative Extension Office. Nearly all Cooperative Extension Service offices offer low-cost soil testing services. Check with your local Cooperative Extension office for details on how to take a soil sample and where to send it for a pH test.
The Extension office can help you find a testing service that is familiar with your particular locale or send it for testing through their office. Just make sure to use the same lab every time you test your soil, as different labs have different tests.
FAQs About Testing the Soil pH of Your Lawn
Yes, you can test soil pH with vinegar. You can use baking soda, too. Here’s how to do it:
1. Mix some fresh soil with water and then vinegar in a 1:1 ratio to check for alkalinity. If it fizzes, that means your soil is alkaline.
2. If it doesn’t bubble up, then you need to mix a fresh soil sample with water and then add baking soda to it, also in a 1:1 ratio. If you get a reaction, it means your soil is acidic.
3. If nothing happens with either test, your soil is likely neutral.
Note: Testing your soil this way gives you only a vague idea of its pH range. It’s not very helpful if you need specific numbers.
You should test the pH of your lawn every three or five years. You may need to test it more often if you’ve applied soil amendments to your lawn or if it has a history of pH issues.
Meanwhile, the best time to test your lawn’s pH is during spring and early fall. However, the Louisiana State University AgCenter recommends late fall or winter testing for faster results.
See Related: When to Test the Soil pH of Your Lawn
The general signs of a soil pH imbalance are:
• Discolored turf (brown, whitish, or yellow grass)
• Thinning grass, bare patches, or dead grass
• More weeds, pests, and diseases
• Poor grass growth
• Ineffective fertilization
Call a Lawn Care Pro for a Healthy Lawn
Testing your soil’s pH is only one aspect of proper lawn care. Even if you fix your lawn’s soil pH levels, it can still suffer if it has too much thatch, the soil is compacted, weeds have taken over, or if you’re mowing improperly.
Not all homeowners have the time to care for their lawns themselves. If that sounds like you, consider hiring a professional. LawnStarter’s network of lawn care pros can pamper your turf so you can take care of yourself during your free time. Hire a lawn care pro through LawnStarter today to get one step closer to a well-manicured lawn.
Read More:
Main Image Credit: sherez / Adobe Stock