If you live in an area with freezing temperatures, winterizing your irrigation system is essential. Getting your sprinklers winter-ready is reasonably straightforward: Turn off the water and controller, drain everything, and insulate above-ground components.
Whether you tackle the project yourself or bring in a pro, winterizing your system before the first freeze in your area will help avoid expensive repairs come spring.
| Project difficulty: Intermediate Estimated time to complete: 1 to 2 hours, depending on system size Project cost: Professional sprinkler winterization costs, on average, $90. To do it yourself, you’ll need a high-volume, low-pressure air compressor, which may run $32 to $55 per day to rent. |
Winterizing Basics
Every type of sprinkler system and controller is different, but the principles of winterization are simple. You’ll shut off the system’s water supply, drain everything, and then power off the controller for the winter. Trapped water expands when frozen, potentially cracking pipes, valves, sprinkler heads, and backflow preventers. Sprinkler repair costs can run hundreds to thousands of dollars, depending on the severity of the damage.
“Winterizing an irrigation system is important because it ensures that all of the water is out of the entire system, eliminating any opportunity for freeze damage,” says Russ Jundt, founder of Conserva Irrigation, headquartered in Richmond, Virginia.
“In the northern climates where freezing temperatures are the norm, it is imperative that you winterize your irrigation system,” Jundt explains. “If you choose not to, severe and critical damage to the system will occur, and costly repairs will be necessary in order to resurrect the system.”
In mild climates with minimal freezing, you might avoid damage, but it is still beneficial to winterize your system. If a cold front moves through, you can rest assured that damage leading to costly repairs will not occur, he adds.
Note: Check your manufacturer’s warranty by contacting them directly or talking to a local authorized dealer to see if you need to hire a licensed irrigation pro to winterize the system or if you can DIY. You don’t want to winterize the system yourself and unintentionally void the warranty.
If you have a separate warranty with your installation company, check that, too. That warranty may be contingent upon having them winterize the system.
Step 1: Turn Off the Water Supply
Locate the stop and waste valve for your sprinkler system — i.e., the sprinkler main shutoff. It’s typically in the basement or crawl space where the main water line comes into the house. Turn it clockwise until it stops. This valve shuts the water off to the irrigation system, without turning it off to the house.
If your system has a backflow preventer, you’ll need to close both valves feeding into it. These valves prevent water from flowing backward into your home’s clean water supply.
My Experience: The stop and waste valve for my sprinklers is in the mechanical room in my basement. The main water line enters the house here and splits to serve the irrigation system and the house. After I shut off the water to the sprinklers, there is another valve I can open to drain the water from the stop and waste valve to the manifold outside.
How to Winterize Sprinkler System on Biteable.
Step 2: Disable Scheduled Watering
Head to your sprinkler controller and turn off the automatic water schedules. Don’t power it down, though. You may need it to activate zones when you’re draining them.
Step 3: Drain the System
You have 3 options for this step, depending on your system type and comfort level. The key is draining the main lines, the manifold, the valves, and the backflow preventer.
Automatic Drain Method
Systems with auto-drain valves handle most of the work themselves, making winterizing simple. These valves activate when pressure within the lines falls below a certain threshold, releasing water from the lines and sprinkler heads.
However, they won’t necessarily drain the valves themselves. Since configurations vary by manufacturer, check your system’s manual (or look online) for specific instructions on operating and draining the auto-drain valves.
Manual Drain Method
- Find the drain valves at the lowest point on each irrigation line. Open them one at a time, allowing each to drain completely before closing and moving to the next.
- Crack the drain valve on your backflow preventer to a 45-degree angle. Use a flathead screwdriver to turn the test cock screws to the same angle, allowing any trapped water to escape. Keep the ball valves at 45 degrees to prevent freeze damage.
- Locate the valve box for each zone and open the manifold’s manual drain.
- If any zone in the system lacks manual drains, use the controller to activate each zone sequentially to force out any lingering water.
- Open the faucet near the backflow preventer and the drain valve beside the main shutoff to purge remaining water. Use a bucket to catch the water if the valve is in a finished space.
Blow-Out Method

The blow-out method is the most complicated sprinkler winterization method and carries the highest risk of damaging the system. The basic idea is that you connect an air compressor to your sprinkler system and blow out the standing water, which means you need the right equipment and safety gear.
- For mainlines under 2 inches, you’ll need an air compressor rated for 50 to 100 CFM (cubic feet per minute) with 30 to 50 PSI (pounds per square inch) capability.
- Safety glasses are mandatory, too. Compressed air and sprinkler parts don’t mix well with unprotected eyes.
My Tip: Not confident in tackling this as a DIY project? Pay a pro $60 to $120 (the national average cost is $90) to winterize this year while you watch and learn. Next year, you can save money and do it yourself.
- Open any drains in the basement or exterior lines to release trapped water.
- Close the valve leading to your backflow preventer to protect it from compressed air.
- Remove the blowout line cap, attach your compressor adapter, and connect the air hose.
- Activate the zone furthest from the compressor using the controller. Never force air into a closed system.
- Fire up the air compressor and run 2 to 3 minute cycles at approximately 30 PSI for polyethylene pipes or 50 PSI for PVC. Do not exceed 50 PSI for poly or 80 PSI for PVC. The air coming from the compressor can get hot enough to melt the system’s pipes. Short cycles will prevent heat from building up. If water remains after 3 minutes, move on and circle back for a second round.
- Work your way toward the compressor, blowing out each zone as you go.
- Shut down the compressor and drain the tank.
- Disconnect the air hose and adapter, and loosely replace the blowout cap. Leave room for water to drip out if necessary.
- Set the ball valves on both sides of the backflow preventer and test cock screws to 45 degrees.
Step 4: Insulate Above-Ground Components
Grab some pipe foam from the hardware store and wrap all exposed pipes and other parts. Secure the insulation with electrical tape or zip ties.
You can purchase insulated covers for backflow preventers if you don’t want to hassle with wrapping them.
Step 5: Power Down the Controller
With all of the water removed, go ahead and shut your controller off. Most modern panels retain their programming when powered off, so you won’t lose your carefully crafted watering schedules.
My Tip: If you’re worried about losing the settings, use your cell phone to snap a photo of the schedule screen before shutting down.
FAQ about Winterizing Your Sprinkler System
No, shop vacs do not have the airflow volume and pressure needed to push water through the sprinkler system. Air compressors need to deliver 50 to 100 CFM at consistent pressure to blow out your sprinklers, which vacuums can’t match. Using inadequate equipment leaves water in the lines and other sprinkler parts, risking freeze damage.
After winterization, open a few sprinkler heads (you can turn them on manually through the controller). If no water drips out, they’ve been properly winterized.
Don’t turn your system on! Operating a damaged system can make problems worse and possibly cause flooding in your yard.
First, inspect visible pipes, valves, and the backflow preventer for cracks or splits. You can also call a LawnStarter irrigation specialist for a pressure test before running water through the lines.
Once you know there’s no damage, take the time to winterize it properly.
Yes, but there will be additional steps. Some pumps require specific winterizing steps, so always check your owner’s manual or hire a professional. But in most cases, you’ll need to drain the pump housing completely and remove the drain plugs. If the pump pulls water from a well or pond, those lines have to be drained, too.
Skip the DIY and Hire a Pro
By the time October rolls around, most homeowners are juggling a fall lawn care checklist that’s a mile long. Between raking leaves, final lawn mowing, aerating, and applying fertilizer, finding time to winterize your sprinkler system properly can feel overwhelming.
If you’d rather skip winterizing your system yourself, LawnStarter can connect you with experienced LawnStarter sprinkler pros in your area. Let an expert handle the draining, blowouts, and insulation, protecting your system from freeze damage while you focus on everything else that demands your attention.
Read Next:
- How to Winterize Your Lawn
- How to Winterize Your Lawn Mower: 10 Simple Steps
- 16 Tips for Cleaning Up Leaves in Your Yard
- When is the Best Time to Apply Fall Fertilizer?
Source:
Russ Jundt, founder of Conserva Irrigation, Richmond, VA. Personal interview by Lee Nelson.
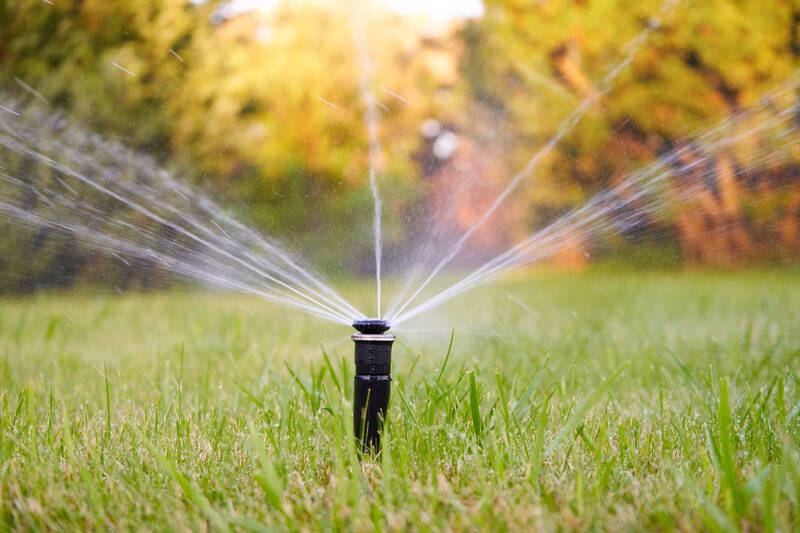
Main Image: Lawn sprinkler. Photo Credit: pridannikov | Adobe Stock