Sprinkler head problems like misaligned spray, low pressure, or poor rotation waste water and leave dry spots. The good news? Most issues require simple DIY adjustments or cleaning rather than replacement.
The process is straightforward: Turn on your system to identify problem heads, then adjust spray patterns with a screwdriver or clean clogged nozzles and filters. Most adjustments take 10-15 minutes. Replacing broken heads takes longer and requires digging around the head and matching the exact brand and model.
Whether you’re dealing with heads spraying the wrong direction or a broken sprinkler that needs replacement, this guide covers the most common fixes homeowners face.
| Need expert help? LawnStarter connects you with local irrigation professionals who can diagnose issues, adjust your system, and handle repairs in one visit. |
| Key Takeaways |
|---|
| ✓ Many issues require adjustments or cleaning, not head replacements ✓ Run your system during adjustments ✓ Clean nozzles and filters first when troubleshooting rotation problems ✓ Match brands exactly when replacing heads |
Quick Diagnosis: Adjustment, Cleaning, or Replacement?
Before grabbing tools, identify whether you need a simple adjustment, cleaning, or an actual replacement:
| What You See | Likely Issue | Solution | Time |
| Spraying sidewalk/driveway | Misaligned spray direction | Rotate head to reposition | 5 min |
| Weak or spotty spray | Clogged filter or nozzle | Clean filter screen and nozzle opening | 10 min |
| Won’t rotate | Debris or broken gear | Clean filter; replace if broken | 15 min |
| Water shooting straight up | Broken nozzle | Replace head | 15 min |
| Leaking at base | Cracked body, loose fitting, stripped threads | Tighten or replace head | 15 min |
| Head won’t pop up | Debris in mechanism | Clean and lubricate | 10 min |
| Entire zone won’t turn on | Electrical or valve problem | Call professional | N/A |
Most common finding: Most homeowners think they need to replace heads when they actually just need adjustments or cleaning.
Tools You’ll Need
For personal safety:
- Safety glasses
- Gardening gloves with grippy palms
For adjustments:
- Flathead screwdriver
- Vice grips or pliers
- Rotor adjustment key (optional, brand-specific)
- Small landscaping flags
For repairs:
- Replacement sprinkler head (exact brand/model match)
- Shovel or garden trowel
- Soft-bristled brush
- Teflon tape (for threaded connections)
How to Adjust Sprinkler Head Direction and Coverage
Adjusting sprinkler heads is crucial to ensuring efficient water distribution and preventing water waste. Misaligned heads that spray onto hardscapes can waste 1.6 to 8 gallons of water per minute — up to 5,760 gallons per month in a single zone, says nonprofit Resource Central, a Colorado conservation agency.
According to Boden Huffaker of True Flow Sprinklers, “The most common adjustment mistake homeowners make is not understanding how the heads actually work. A quick YouTube video on how to adjust the heads usually makes a huge difference.”
Step 1: Run a System Audit
Turn on your sprinkler system and walk your property to complete a sprinkler system audit. Look for:
- Heads spraying pavement, house siding, or fences
- Leaking sprinkler heads
- Dry spots where water isn’t reaching
- Oversaturated areas that are getting too much water
- Heads not rotating or popping up fully
Pro Tip: Do this during daylight so you can clearly see spray patterns. Mark problem heads with small landscaping flags.
Step 2: Adjust Based on Your Sprinkler Type
My Experience: Make all adjustments while the system is running. Running water naturally pushes heads out, reducing the risk of damage by manually pulling them up. Plus, you can see the spray patterns in real time. You’ll get wet, but it makes the process easier.
For each flagged head, adjust based on the specific sprinkler type:
Fixed Spray Heads
Fixed spray heads have a set fan width (90°, 180°, 270°, or 360°) that cannot be changed. You can only adjust the throw distance and where the head points.
To adjust spray distance:
- Locate the small radius adjustment screw on top of the head.
- Turn clockwise with a flathead screwdriver to spray water farther.
- Turn counterclockwise to shorten the spray distance.
To change direction:
- With the system running, firmly grip the sprinkler head with gloved hands.
- Rotate the entire head/riser to the position where you want the water to spray.
- If stuck, use vice grips carefully to move it, but don’t tighten them too much or you’ll crack the plastic.
Rotor Sprinkler Heads (Gear-Drive and Multi-Stream)
Rotor heads rotate in a circular or partial-arc pattern. You can adjust the spray distance and the coverage arc.
To adjust spray distance:
- Insert a flathead screwdriver into the radius adjustment screw on top.
- Turn clockwise to spray farther.
- Turn counterclockwise to spray closer.
To adjust the arc (coverage area):
- Turn the head counterclockwise by hand until it stops — this is the “left stop” where rotation begins.
- To move the “left stop,” use vice grips to carefully turn the stem so the directional arrow points where you want.
- Turn the head clockwise until it stops — this is the “right stop” where rotation ends.
- To adjust the “right stop,” hold the head at the correct stop position and insert the rotor adjustment key into the keyhole on top.
- Turn the key clockwise to widen the arc (cover more area), or counterclockwise to narrow it.
- Run the system and watch a full rotation to verify.
Brand note: Some rotor models require you to unscrew the top cap, reposition it, then screw it back on. Check your manufacturer’s website for instructions.
Impact Sprinkler Heads
Impact sprinklers (the classic “tick-tick-tick” style) can be used above ground or as pop-ups.
To adjust spray pattern:
- Locate the metal trip tabs or stops on the sides.
- Use pliers to move the tabs that control where the sprinkler starts and stops rotating.
To adjust throw distance:
- Turn the nozzle counterclockwise to lower the deflector arm (sprays closer).
- Turn the nozzle clockwise to raise the deflector arm (sprays farther).
How to Fix a Sprinkler Head That Won’t Rotate or Pop Up
Rotation and pop-up problems are among the most common sprinkler complaints. Here’s how to diagnose and fix both issues.
According to Huffaker, “The #1 reason sprinkler heads stop rotating is either hard water or sand built up in the head and gears.“
My Tip: If your sprinkler head won’t pop up or rotate smoothly, try this before taking it apart: Turn on the zone and use your foot to firmly press the riser all the way down into the body, then let it pop back up. Repeat this 4-5 times. This often flushes out sand or debris that’s wedged between the riser and cap. If it starts working again, you’ve just saved yourself a disassembly job.
For Heads That Won’t Rotate:
1. Check for visible debris
Look at the nozzle opening. Remove any grass clippings, dirt, or small rocks from the nozzle opening that could prevent it from rotating.
2. Clean the filter
- Turn the system on and let the head pop up.
- Clamp it with vice grips to keep it extended.
- Turn off the water.
- Unscrew the top of the head and pull out the small filter screen.
- Use a soft brush to remove debris.
- For mineral buildup (white crusty deposits), soak the filter in white vinegar for 15 minutes, then scrub.
- Reinstall the filter, screw the head back on, and release the vice grips.
- Turn the system back on to test.
My Experience: I need to clean the mineral buildup from my sprinkler heads yearly to keep them rotating well.
3. Test rotation
If the head still won’t rotate after cleaning, the internal gear mechanism or spring-loaded stem is likely broken. Don’t attempt to lubricate it — manufacturers recommend replacement instead, as incorrect lubricant can cause more damage.
Watch: How to clean a clogged sprinkler head (2-minute video)
For Heads That Won’t Pop Up:
1. Check for debris around the collar
Grass clippings, dirt, or mulch can build up around the sprinkler head and prevent it from rising. Clear away any material blocking the head.
2. Clean the filter
Follow the same filter-cleaning steps listed above for rotation issues. Debris in the filter can prevent proper water pressure from pushing the head up.
3. Check for damage
If the head still won’t pop up after these troubleshooting steps, the internal spring mechanism may be damaged or the riser may be bent. Replace the head.
How to Replace a Broken Sprinkler Head
Critical: Get the Exact Replacement
You must match three things:
- Brand: Rain Bird, Hunter, Toro, Orbit (don’t mix brands in the same zone)
- Type: Fixed spray heads have specific fan widths; rotor heads have specific rotation patterns
- Nozzle size: Must match the precipitation rate of other heads in that zone
According to Jeff Watson of Bright Water Irrigation and Lighting in Central Florida, if homeowners get the wrong one, the spray in that zone will be distributed unevenly. One common mistake, Watson warns, is an incorrect sprinkler head. For instance, you can’t use a RainBird sprinkler head in a Toro system.
“You’ve got to get the right head for the right spot, and have the right fittings,” Watson says. Also, don’t install a stationary mister and rotating sprinkler head in the same zone. “It takes 20 minutes for a stationary mister to cover an area, while it takes 75 minutes for a rotator. You can’t put them in the same sprinkler zone.”
Cost: Fixed spray heads run $3 to $25; rotor heads cost $5 to $30; impact heads range from $7 to $30.
Where to buy: Home improvement stores carry common brands, or remove your existing head and take it to a sprinkler supply shop for exact matching.
My experience: I bypass Lowe’s and Home Depot and buy parts at the sprinkler supply store. I initially pay more, but the customer service is top-notch, and they make sure I have everything I need, saving extra trips to town.
Replacement Steps:
- Turn off the water at the main sprinkler valve or controller.
- Dig around the head:
- Dig a small circle 1-2 inches extending out from the sprinkler on all sides.
- Carefully avoid hitting the supply line.
- Try to keep the sod in one piece; set it aside.
- Remove the broken head:
- Grip firmly and turn counterclockwise to unscrew.
- If it pulls out without unscrewing, you’ll need to replace the riser.
- Install the new head:
- Wrap Teflon tape clockwise around the threads 2-3 times.
- Screw it clockwise onto the stem.
- Hand-tighten only — using tools will crack the plastic threads.
- Test for leaks:
- Turn the water back on.
- Check around the base for seeping water.
- If leaking, turn off the water and tighten slightly more.
- Backfill:
- Replace dirt and sod around the head.
- Ensure the head sits flush with the soil surface.
- Adjust spray pattern using the adjustment methods in the “How to Adjust Sprinkler Head Direction and Coverage” section above.
Watch: How to replace a sprinkler head (3-minute tutorial)
| Alternatively, you can save time by hiring an irrigation expert to repair or replace a broken sprinkler head. On average, sprinkler head repair costs are typically between $60 and $110. The advantage of hiring a pro is that you don’t have to mess with it yourself, and as Watson says, “We have the different types of sprinkler heads and the proper tools to do the job right the first time.” |
Best Practices and Pro Tips
Check your manual: Most brands adjust similarly, but Rain Bird, Hunter, Toro, and Orbit each have their own quirks. Download PDFs from the manufacturer’s website if you’ve lost your manual.
Invest in adjustment tools: Brand-specific rotor keys ($5 to $10) make arc adjustments much easier. They’re available at home improvement stores or online.
Be gentle with tools: It’s easy to crack plastic sprinkler bodies. Use vice grips sparingly and never clamp down hard.
Seasonal adjustments: You may need to tweak spray patterns after:
- New landscaping or plant growth
- Aeration or dethatching
- Heavy rain that shifts heads
- Winter freeze/thaw cycles
Prevent overspray: Keep water off sidewalks, driveways, and foundations. This prevents water waste, slip hazards, and potential water damage to your home.
Annual spring inspection: When turning on your system each spring, check for:
- Cracked or broken heads
- Heads that won’t pop up
- Leaking valves or connections
- Zones that won’t activate
- Clogged filters
Regularly inspecting your system catches minor problems before they become expensive repairs.
See Related:
– How to Aerate Your Lawn: A Complete Guide
– How to Dethatch Your Lawn (Plus When to Hire a Pro)
FAQ About Sprinkler Heads
Supply lines are buried 8-12 inches deep (12-18 inches in cold climates), depending on frost depth and local building codes. The sprinkler heads themselves sit at ground level when retracted.
Low pressure usually indicates a leak in a pipe, sprinkler head, or valve. Start by checking visible heads for cracks or pooling water. Clean clogged filters before assuming there’s a leak, as underground leaks require professional detection.
Quality sprinkler heads last 10-20 years. Replace heads when you notice cracks, broken nozzles, consistent clogging despite cleaning, or if they won’t retract properly. Replace all heads in a zone at once if the system is over 15 years old.
Let the Pros Handle It
Most sprinkler adjustments take just 10-15 minutes per head, but if you’re dealing with multiple broken heads, stubborn rotation issues, or zone problems, professional service saves time and frustration.
Connect with LawnStarter’s local irrigation experts for:
- Complete system diagnostics and adjustments
- Broken head, valve, and pipe repairs
- Seasonal maintenance and winterization
- Zone reprogramming and water efficiency audits
- New sprinkler system installation
Get a free irrigation quote today and enjoy a perfectly watered lawn without the DIY hassle.
Related Resources:
- How to Install a Sprinkler System
- How to Winterize Your Sprinkler System
- How Much Does a Sprinkler System Cost?
Sources:
- “Your Sprinklers’ Biggest Water Wasters!” By Resource Central.
- Jeff Watson, Brightwater Irrigation & Lighting, Winter Garden, Florida. Personal interview.
- Boden Huffaker, True Flow Sprinklers, Rexburg, Idaho. Personal interview.
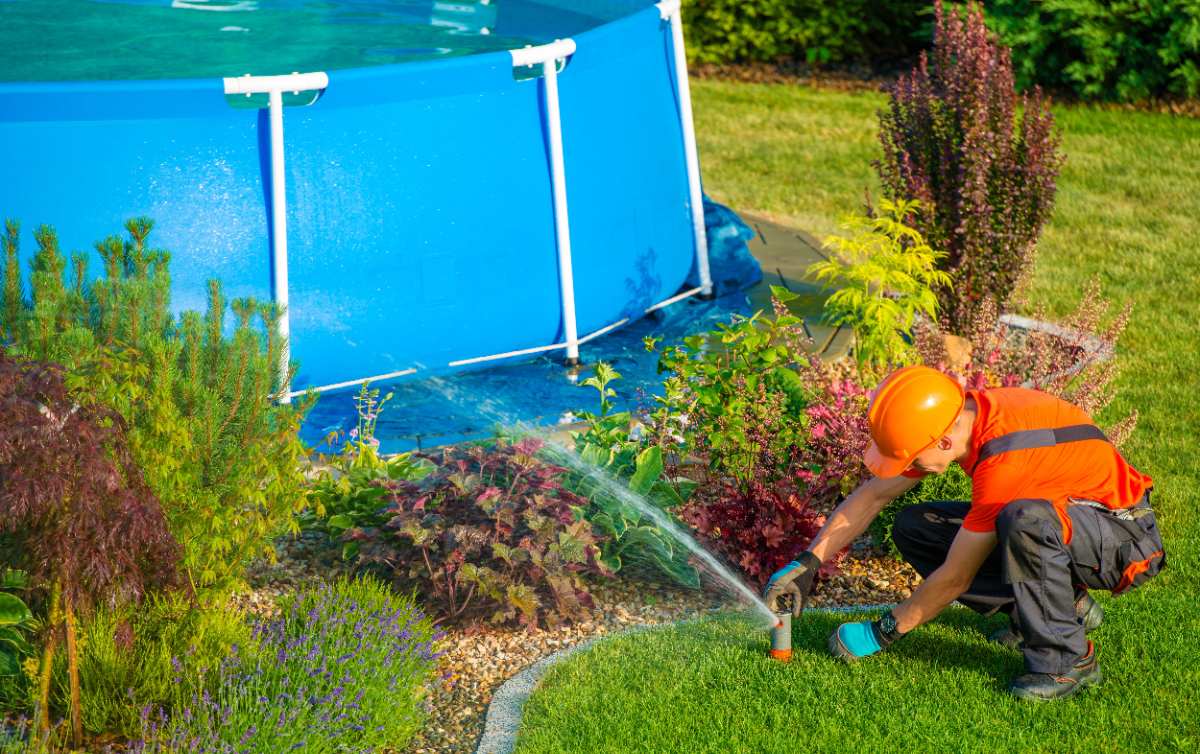
Main Image: Technician adjusting sprinkler head in a lawn. Image Credit: Tomasz Zajda / Adobe Stock