The most important part of a weed eater is its string; without it, you can’t cut down grass and weeds or even edge your lawn. So, what do you do when your trimmer runs out of string midway through a project? We’ll teach you how to string a weed eater (aka string trimmer, weed whacker, weed trimmer, lawn trimmer, or grass trimmer) quickly and easily.
Tools and Materials Needed
Luckily, you need only three things to change the string of a weed wacker:
- String (also called trimmer line or wire)
- A cutting tool, like garden shears, heavy-duty scissors, or a multi-tool
- Measuring tape or another measuring tool
The type of string, its thickness, and its length depend on the string trimmer model you own. Use the old wire to determine what wire you’ll need to buy at your local home improvement store. When in doubt, always consult your weed eater’s manual.
Usually, you’ll need 20 to 25 feet of trimmer line.
How to String an Auto-Feed Weed Eater
Automatic-feed weed eaters dispense more string automatically once they detect that the current line is too short. To restrung auto-feed weed eaters, you wind a new wire around the spool or replace the spool altogether. Here are the steps to follow for both cases:
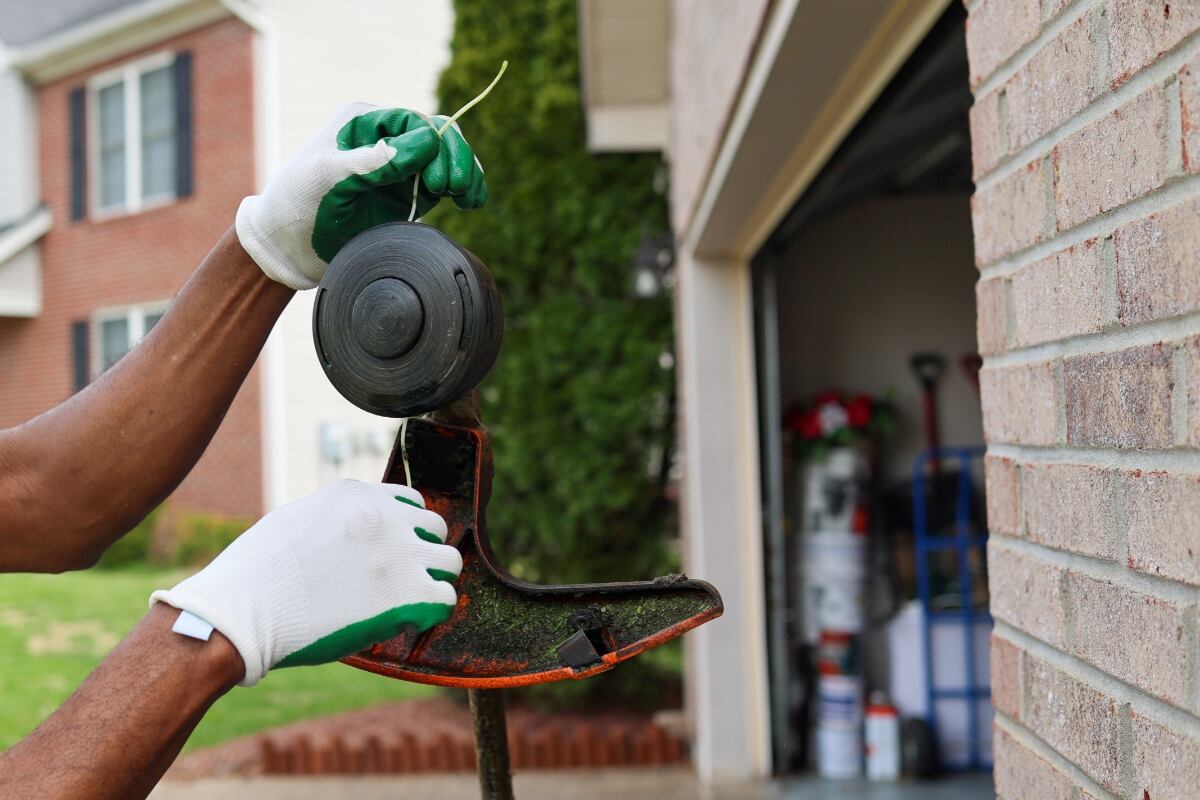
Step 1: Remove the Cap
The first step is removing the cap from your trimmer, as it keeps the wire spool in place. Power down your weed eater and disconnect it from its power source, whether a socket or a battery. If the weed eater is hot to the touch, wait for it to cool down before working with it.
Flip the trimmer head around and remove the spool cap. Try unscrewing it, prying it off, or popping tabs that keep it in place; the method to remove your cap varies with your weed eater model.
Don’t have a removable cap? You might have a bump-feed weed eater. The section further down is a tutorial on how to put string in a bump-feed weed eater.
Step 2: Remove the Spool
Next, gently pull out the spool from the weed eater, cutting away any wire if it’s stuck. This plastic cylinder is usually the only thing in the weed whacker’s cap. Keep a mental note of how the spool is facing before you take it out (or take a picture with your phone).
If your weed eater model accepts a pre-wound spool and you want to use a new spool, then you may skip to Step 6. However, this is more expensive than simply winding your spool with a new line of string.
If your weed eater doesn’t have a removable spool, you might have a bump-feed weed eater. You can skip to the section about restringing a bump-feed weed eater for instructions.
Step 3: Discard Old String
Remove the old string from the spool. If there’s still a sizable chunk of string, you probably only need to rewind it, but most of the time it’s better to just use new wire. The trimmer line is rather inexpensive.
You can keep the old line of string as a reference for what gauge of weed eater string you’ll need if you haven’t already bought replacement wire.
When undoing the old wire, take note of how it was attached to the spool and what direction it was wound in. The wire could be attached to the spool through an opening or a clip.
Step 4: Insert String Into Spool
Now, take your new trimmer line and attach it to the spool. Usually, you’ll need to feed only about ½-inch or so of the new wire. Lock it into place.
Do you have a two-string lawn trimmer? If you do, check how many eyelets (openings) your spool has:
- One opening? Thread your string through the opening and pull until you have two halves of wire hanging from your spool.
- Two openings? You’ll need to cut the string in equal halves and attach both halves to the spool openings.
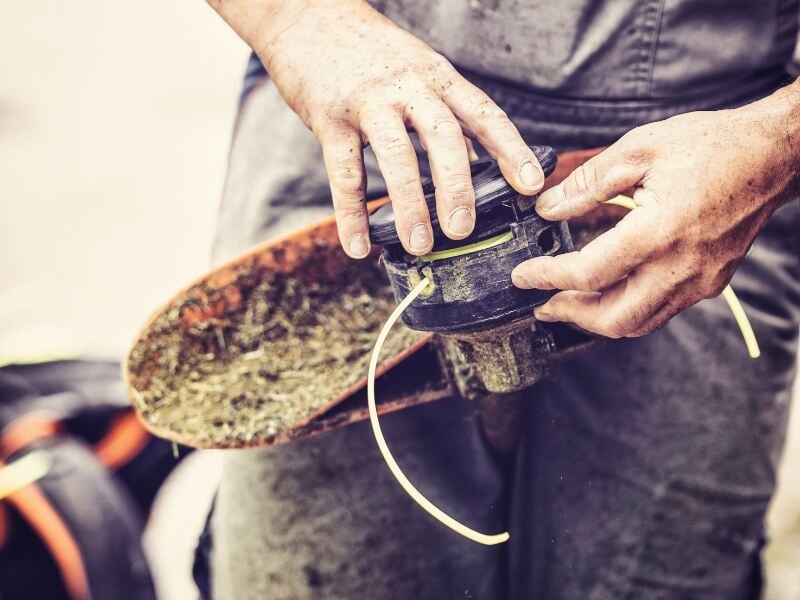
Step 5: Wind New String

Now, it’s time to wind the new string around the spool. Check your spool for any arrows and wind the string in the direction of the arrows. Consult the user manual if you can’t find any. When in doubt, roll clockwise.
Wrap your wire around the spool firmly, but not too tightly, in even rows. Start from top to bottom — overlapping only once you’ve reached one end — to prevent tangling and crossed wires. Keep wrapping until you’ve almost reached the rim of your spool; never go beyond the rim. You should have a fair bit of string hanging off.
If you have a two-string trimmer, the process is quite similar. You’ll just need to make sure the two strands of wire are wound evenly in their individual sections or slots. Never cross a wire into the other section. You can wind both strings at the same time or separately.
Step 6: Reinsert the Spool
Your spool is now ready to be placed back into your weed eater. Feed the excess string through the opening in your string trimmer.
Then, attach the spool the same way it was attached before you took it out. Hold onto the spool tightly to prevent the wire from unwinding. If you don’t remember which side it’s supposed to be placed on, look for a logo or something similar that could give you a hint as to where. Or check the user manual for instructions.
You may need to press on tabs or squeeze the spool together to lock it into place.
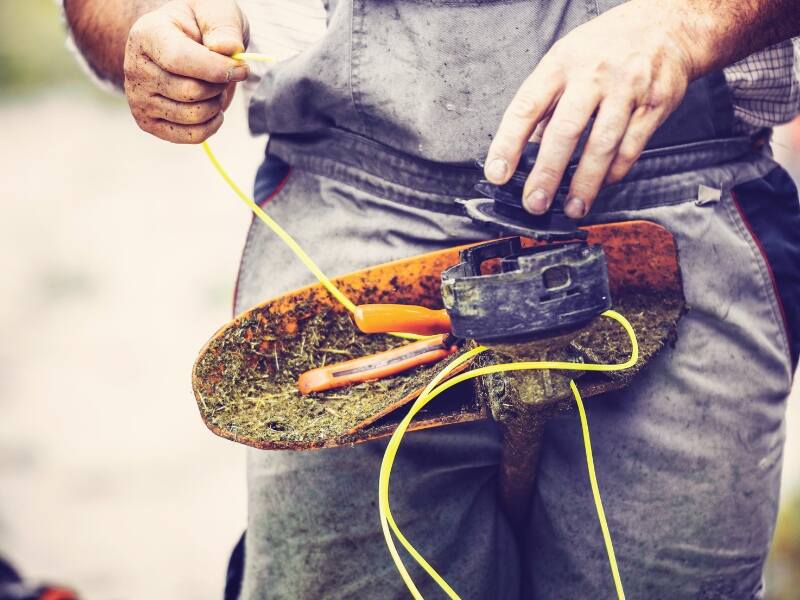
Step 7: Cut Excess Wire

Cut off the excess wire, leaving about 4 to 6 inches of string hanging out of the trimmer. Your weed eater may not work without this excess string. It’s OK if you can’t get it exactly right, as the weed eater will cut off any additional excess when you start it.
Step 8: Put the Cap Back On

All that’s left is to put the spool cap back on. Make sure it’s locked into place before starting the weed eater. Then, you can check if everything has turned out right.
If your string trimmer works, pat yourself on the back; you’ve successfully restrung an auto-feed weed eater! Now you’re ready to weed whack like a pro.
How to String a Bump-Feed Weed Eater
Unlike auto-feed string weed eaters, bump-feed weed eaters release string manually when you bump their heads against the ground or any hard surface. Usually, these string trimmers don’t have removable spools. Here’s a step-by-step guide on how to restring one of these weed eaters.
Step 1: Power Down the Weed Eater
Turn off your weed eater, then unplug or remove its battery. If your weed whacker is hot to the touch, let it cool down before working with it to avoid burns.
Step 2: Remove Old String
Remove old string peeking out from the string trimmer head. You can simply pull it out, but some models have removable caps.
If your string trimmer model has a removable cap, detach the cap, take out the bump head, and pull out the string. Then, put everything back in place.
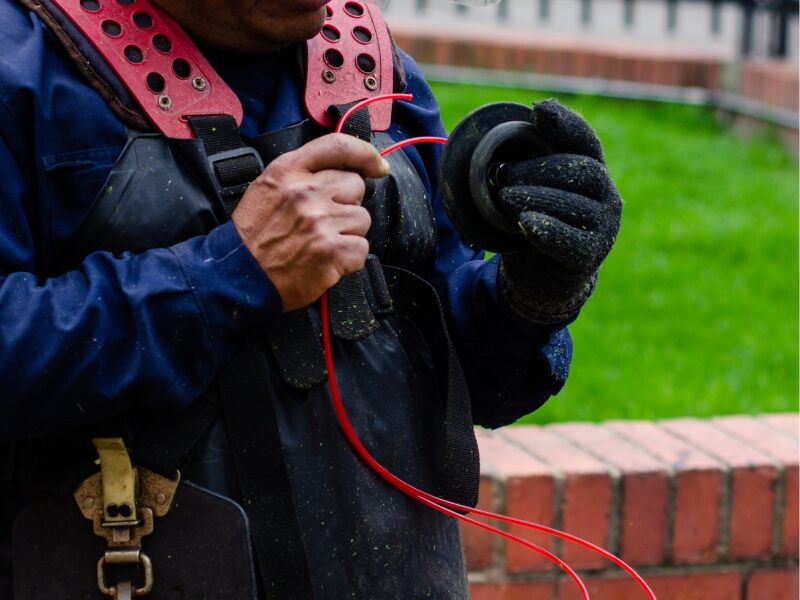
Step 3: Feed New String
Orient the bump head of your weed eater so that any arrows are lined up properly. Then, feed the new string through the opening on the bump head. There might be some resistance, but keep pushing until the string emerges from the opening on the opposite side.
Once the other end of the string is out, pull until your wire is split into even halves. You can pull the wire together to check if the halves are equal.
Step 4: Wind the Wire
Push down on the bump head and wind it up. There should be arrows telling you which direction to turn the weed eater’s head. Keep turning until you have about 4 to 6 inches of wire hanging out.
Test your weed eater. If everything is in working order, then congrats! You’ve learned how to wind a bump-feed weed eater.
FAQ About Stringing a Weed Eater
Can Weed Eaters Use Any String?
Yes, weed eaters can use any string (with a few caveats). You don’t have to use your model’s manufacturer’s trimmer line. Some weed eaters can even take larger or heavier wires for more heavy-duty projects.
The shape of the string trimmer line typically doesn’t matter when restringing your weed eater, but some models take only specific wires.
Should You Soak Your Trimmer Line in Water?
Yes, you can soak your trimmer line in water, but don’t expect it to get stronger than it originally was. Over time, the trimmer line becomes more brittle due to excess heat or cold. Soaking your brittle trimmer line in water seems to strengthen it because it’s returning moisture that your string lost.
Is a Bump-Feed Weed Eater Better Than an Auto-Feed Weed Eater?
It depends on your needs. Bump-feed weed eaters give you more control over when your line is dispensed, need less maintenance, and are easier to restring, but the repeated bumping can break it after a while.
Auto-feed weed eaters are easier to find and easier to use, but they require more maintenance and may go through your wire supply much faster.
However, that doesn’t necessarily mean one is better than the other. Some of the best weed eaters are automatic-feed models, while others are bump-feed models. Need more weed eater model suggestions? We’ve reviewed many weed eaters, including:
Keep Your Lawn Beautiful With Professional Help
Lawn care can be difficult to keep up with if you’re juggling work, family, and precious me-time — especially if you’re dealing with a sickly or weedy lawn. Why not get a professional to handle all of your lawn care needs instead? LawnStarter’s local lawn care pros can mow, weed, fertilize, overseed, aerate, and more. Get a free instant quote from LawnStarter today. Take lawn care off your to-do list.
Main Photo Credit: Robin Gentry / Canva Pro / License