| Key Takeaways |
|---|
| • Core aerators work best, pulling 2-3 inch soil plugs that relieve compaction. • Aerate in late spring for warm-season grass or early fall for cool-season grass. • Keep soil moist but not muddy, leave the plugs to break down, then fertilize and overseed. |
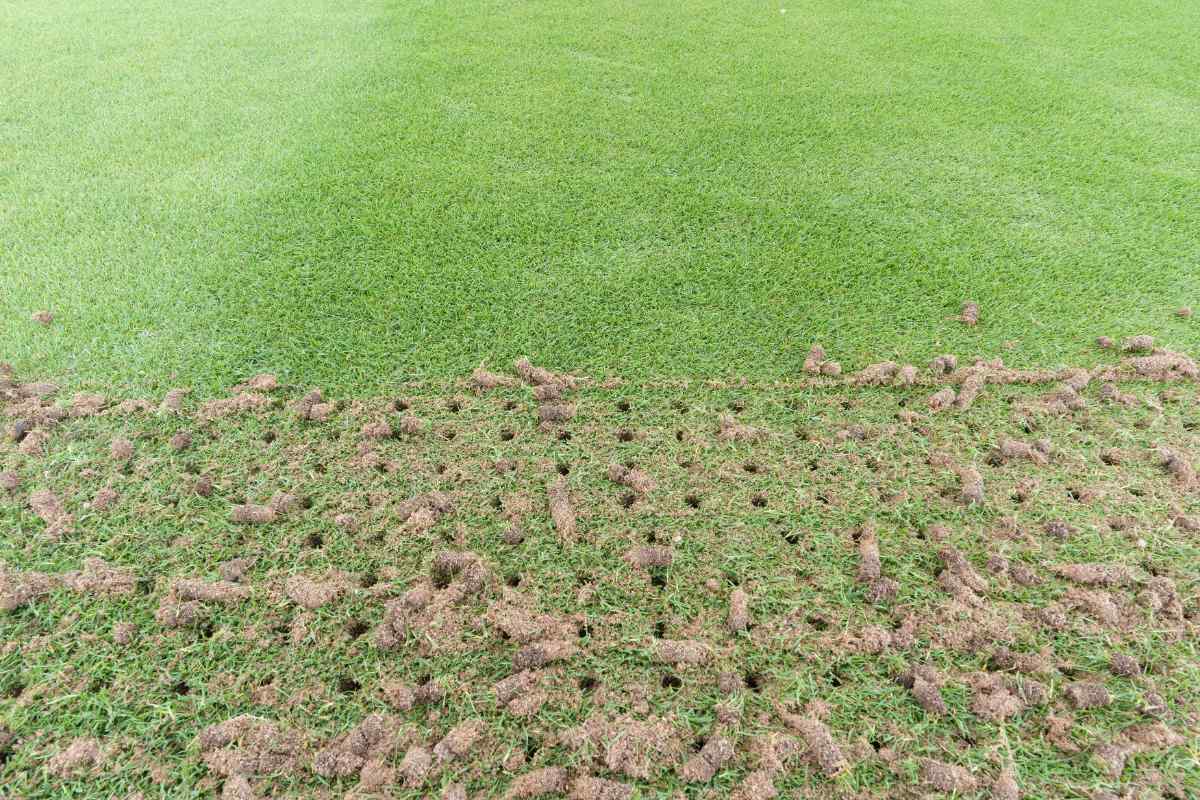
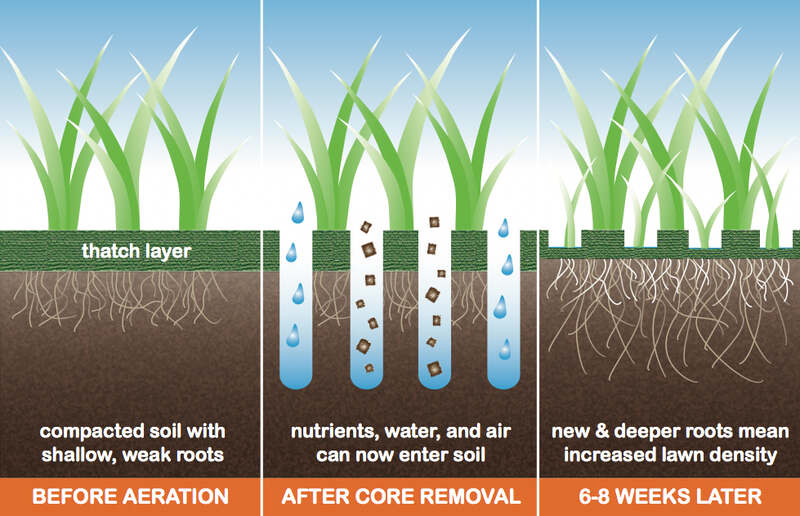
Aerating your lawn creates small holes in the soil to break up compaction and let air, water, and nutrients reach the grass roots. You can use a core aerator that removes soil plugs, a manual aerator for small yards, or hire a professional service.
The process takes 1 to 3 hours, depending on lawn size and method, and works best when your grass is actively growing. That means late spring or early summer for warm-season grasses and late summer to early fall for cool-season grasses.
This guide walks you through the whole aeration process, from choosing the right equipment to the post-aeration care that makes your effort pay off.
| Need professional help? LawnStarter’s experts handle aeration, or you can bundle aeration with overseeding services. |
| Project Difficulty: Easy to intermediate Estimated Time to Complete: Manual aeration can take up to 60 minutes per 1,000 sq. ft., while core aeration can take 30 minutes to 1.5 hours for lawns up to 1/4 acre. Project Cost: Renting aeration equipment costs around $100 per day. If you’re hiring a pro, lawn aeration costs around $107 to $202. |
Choosing Your Aeration Method
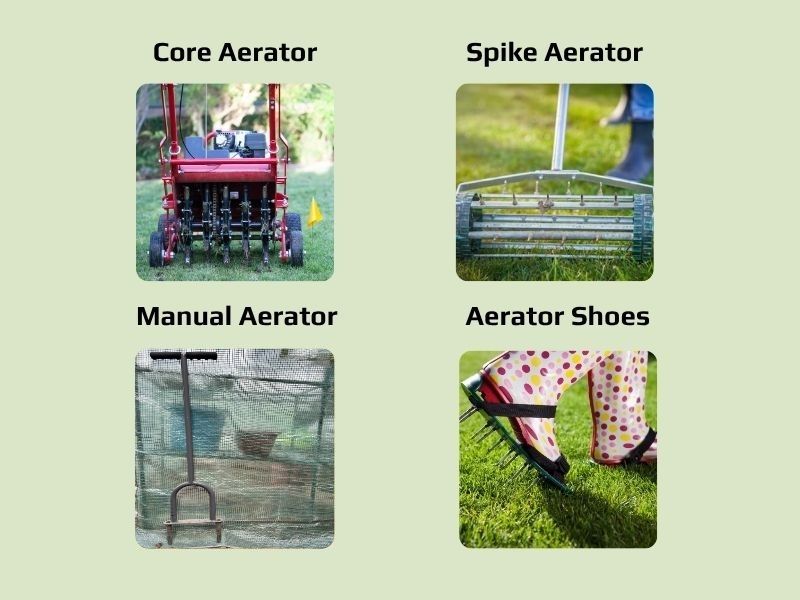
Core Aerator: Surfin_Rox / Adobe Stock
Spike Aerator: Kamil Macniak / Shutterstock
Manual Aerator: Photo by Sarah Bahr
Aerator Shoes: NinaMalyna / Adobe Stock
According to John Orick, Master Gardener state coordinator at Purdue University Extension, core aeration is the most effective option for fixing soil compaction.
“The hollow tines on the machine actually remove soil cores from the lawn, opening up the soil for air, water, and nutrient movement to the root system.”
See Related: What is Core Aeration?
Aeration Methods Compared
| Method | Best For | Cost |
| Core Aerator | Heavy compaction, clay soil, large lawns | $100 per day rental |
| Manual Aerator | Small lawns (under 1,000 sq. ft.), spot treatment | $30-$60 to buy |
| Spike Aerator | Mild compaction, sandy soil only | $50-$80 to buy |
| Liquid Aerator | Light maintenance, supplement to mechanical aeration | $20-$40 per bottle |
For most homeowners: Core aeration delivers the best results because it physically removes plugs of compacted soil, roughly 2-3 inches deep, rather than just poking holes.
For small yards (under 1,000 square feet): Manual aerators work well and save you the rental cost.
Avoid spike aerators on clay soil: They don’t remove cores and can worsen compaction by pressing soil particles closer together.
Learn more about choosing the right method:
Preparing Your Lawn for Aeration
To prevent equipment damage and improve results:
1. Mow shorter than normal. Cut the grass about 1/2 inch shorter than the recommended mowing height so aerator tines can penetrate easily.
2. Mark underground hazards. Use flags or spray paint to identify sprinkler heads, irrigation lines, and invisible fences.
3. Call 811 at least 2-3 days before. This free service marks underground utilities so you don’t hit a buried line.
4. Clear the lawn. Remove toys, tools, furniture, sticks, rocks, and debris that could jam equipment.
5. Water if dry. If it hasn’t rained recently, run sprinklers for 10-20 minutes 1-2 days before aeration. Soil should be moist enough to push a screwdriver in with moderate effort, but not muddy.
How to Aerate Your Lawn: Step-by-Step
The core routine is the same for every method: cover the whole lawn evenly in overlapping rows or a tight grid, then make a second pass over the most compacted spots. Below are the exact steps for each type of aerator.
Core Aeration
Equipment needed: Core aerator
Time required:
Under 1/4 acre: 30 minutes to 1.5 hours
1/4 to 1/2 acre: 1 to 2 hours
1 acre or larger: 1 to 3+ hours
Process:
Begin at one edge of your lawn, near a corner or obstacle.
Move forward slowly (similar to mowing speed), allowing the hollow tines to fully penetrate and extract soil plugs.
Cover your entire yard in straight rows, overlapping each pass by 2-3 inches.
Go over the lawn again, perpendicular to your first pass, to ensure optimal coverage.
Make extra passes over heavily compacted areas, such as walkways, play areas, or where vehicles have driven.
Manual Aeration
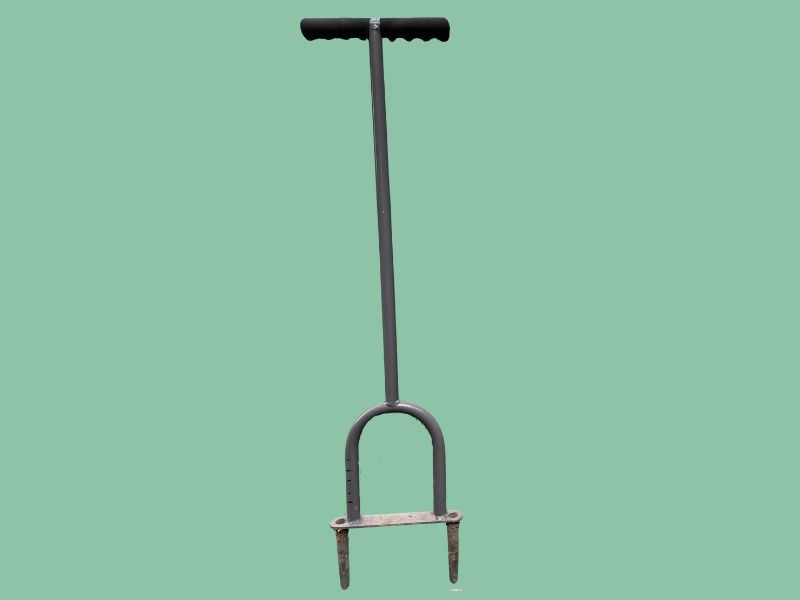
Equipment needed: Manual core aerator or hollow tine aerator
Time required: 30 minutes to an hour per 1,000 square feet
Process:
Place the aerator perpendicular to the ground.
Step on or press down until the tines penetrate 2-3 inches.
Pull back on the handle to remove the soil plug.
Work in a grid pattern, aerating every 4-6 inches across your lawn.
Focus your efforts on high-traffic zones that need it most.
Spike Aeration
Equipment needed: Rolling spike aerator or spike aerator shoes
Time required: 30 minutes to an hour for 1,000 square feet
Process:
Roll or press the spike aerator across your lawn.
Work in straight, parallel lines to ensure even coverage.
(Optional) Go over the lawn at a 45-degree angle for better coverage.
Liquid Aeration
Equipment needed: Liquid aerator solution with hose-end sprayer
Time required: 15 to 60 minutes (for the application)
Process:
Connect the bottle to your garden hose using the included sprayer attachment.
Work in consistent, sweeping motions to cover the entire lawn.
Lightly water the lawn to move the solution into the soil.
Wait at least 24 hours before heavy lawn use.
Note: Avoid application when temperatures exceed 85 degrees, during peak afternoon sun, or if you’re expecting heavy rain within 24 hours.
See Related: Does Liquid Lawn Aeration Work?
After Aeration: Next Steps
Leave the Soil Plugs on Your Lawn
Those dirt cylinders scattered across your lawn serve an important purpose. According to Orick, “Soil cores left on top of the lawn contain soil organisms that help break down the thatch layer.”
Let plugs break down naturally over 1-2 weeks. Rain, mowing, and foot traffic will help them disintegrate. Clearing that buildup matters, since a thick layer can harbor disease and pests.
If plugs clump in specific areas and interfere with mowing, gently rake to spread them evenly.
Optimal Post-Aeration Care
Immediate (Day 1-3):
Pause watering for 1-2 days to let the soil breathe and settle.
Apply fertilizer right away, since nutrients reach roots more effectively through the fresh holes.
Keep foot traffic to a minimum.
Week 1-2:
Apply topdressing if desired to improve overall soil quality.
Overseed bare or thin patches.
Begin light, frequent watering if you’ve overseeded.
Week 2-4:
Resume your regular lawn care routine.
Monitor grass recovery and new growth in previously thin areas.
Continue avoiding heavy foot traffic in overseeded areas until the grass reaches 3 inches tall.
For more detailed information, see What to Do After Aerating Your Lawn.
Troubleshooting Common Problems
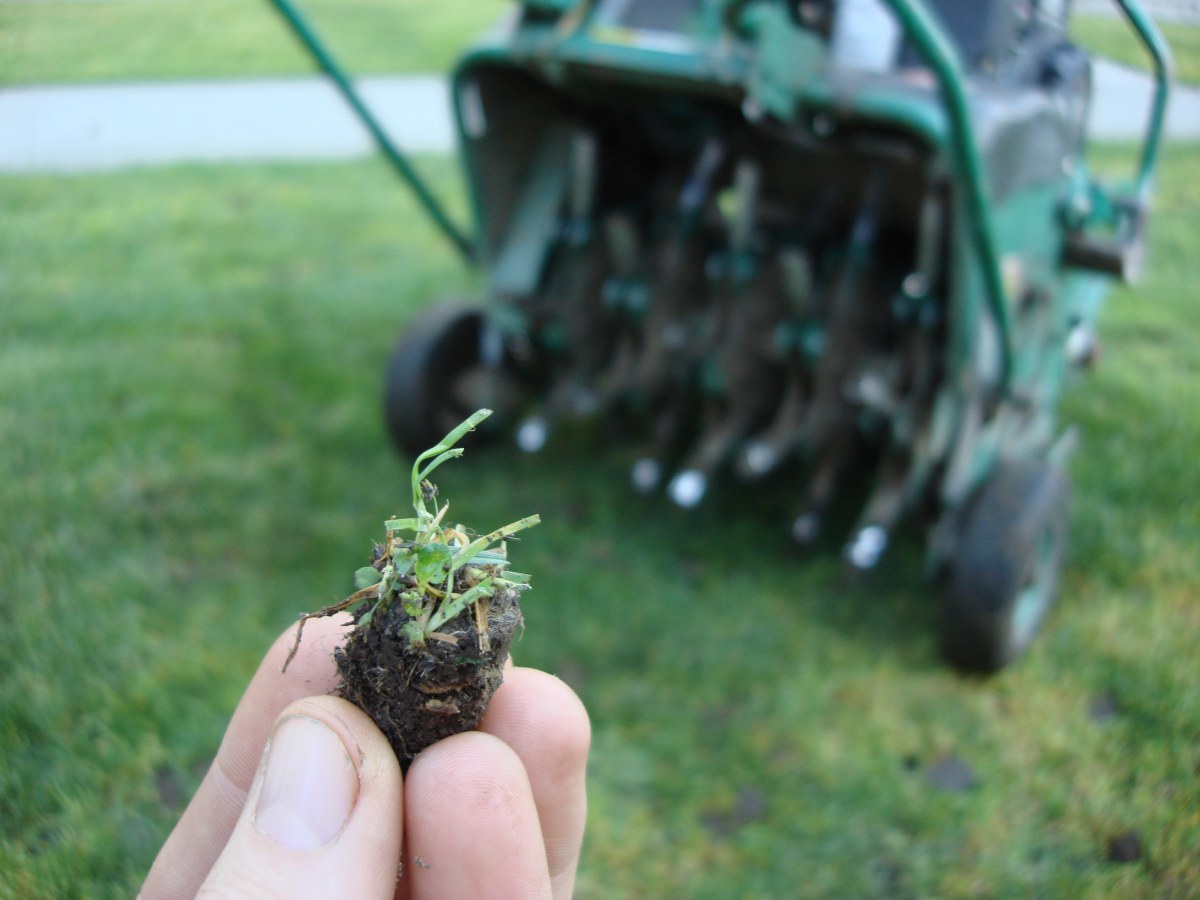
Aerator Won’t Pull Plugs
Problem: Tines can’t penetrate or extract soil cores.
Solution: Water your lawn and try again in 24 hours. Clean tines thoroughly and check for damage. If needed, add weight to the aerator (some models have trays for sandbags).
Uneven Coverage
Problem: Some areas have many holes, while others have few.
Solution: Make a second pass perpendicular to the first. Mark any missed spots with flags and re-aerate those areas.
Lawn Looks Worse After Aeration
Problem: Your lawn looks rough for 1-2 weeks, with soil plugs scattered around and visible holes.
Solution: Trust the process. Improvement takes 2-4 weeks to become visible. Call a professional if:
Brown grass patches expand after 2 weeks
Grass dies specifically in aerated areas
Severe rutting or soil displacement occurs
Signs Your Lawn Needs Aeration
Not every lawn needs aeration every year. Look for these signs of soil compaction holding your grass back:
Water pools or runs off: Rain and irrigation sit on the surface or run downhill instead of soaking in.
The soil feels hard: A screwdriver is tough to push into the ground, even a day after watering.
Thin or patchy grass: Growth is weak in high-traffic areas like paths, play spots, and where cars park.
Spongy, thatchy feel: The lawn feels bouncy underfoot, a sign thatch has built up past the healthy half-inch mark.
Newer or sodded lawn: Construction traffic and layered soil from fresh sod both compact easily.
If two or more of these sound familiar, your lawn is a good candidate for aeration this season.
When Should You Aerate Your Lawn?
The best time to aerate depends on your grass type:
Warm-season grasses (Bermudagrass, Zoysiagrass, St. Augustinegrass): Late spring to early summer
Cool-season grasses (fescue, Kentucky bluegrass, ryegrass): Late summer to early fall
Aerating during active growth allows grass to recover quickly and fill in the holes.
To learn more about the benefits of aeration and signs your lawn needs it, see our guide on why you should aerate your lawn.
When to Hire a Professional
Consider professional help if your lawn exceeds 5,000 square feet, you’re dealing with heavily compacted clay soil, or you want to bundle aeration with overseeding and fertilization.
FAQs
Most lawns need annual aeration. Heavily compacted lawns, clay soils, or high-traffic areas may need it twice yearly (spring and fall). Sandy soils can go 2-3 years between aerations.
Spacing depends on your soil condition:
• Heavy compaction: 2-3 inches apart (requires a double pass in a crisscross pattern)
• Moderate compaction: 4-6 inches apart (standard for annual maintenance)
• Light maintenance: 6 inches apart (sandy soils or regular upkeep)
For depth, aerate 2-3 inches deep to reach the root zone. Going deeper than 3 inches doesn’t provide additional benefit and may damage roots. Shallow aeration under 2 inches won’t reach the active root zone where grass needs air, water, and nutrients.
Aeration leaves soil plugs and visible holes for 1-2 weeks and can stress grass if done outside the active growing season. On weedy lawns, the open holes can give weed seeds room to sprout, so pair aeration with overseeding to crowd them out.
Aerating Your Lawn Doesn’t Have to Be Tedious: Hire a Pro
Aerating your lawn successfully comes down to 3 things: using the right method for your yard size, aerating during your grass’s active growing season, and following up with fertilization or overseeding. The 2-3 inch depth and 2-6 inch spacing guidelines work for nearly all residential lawns.
If DIY feels overwhelming, LawnStarter pros handle aeration plus fertilization, mowing, and leaf removal. Your grass will reward proper aeration with deeper roots, better nutrient absorption, and healthier overall growth.
Main Image: Core aeration plugs scattered on freshly aerated lawn. Image Credit: Shutterstock
Related Posts: