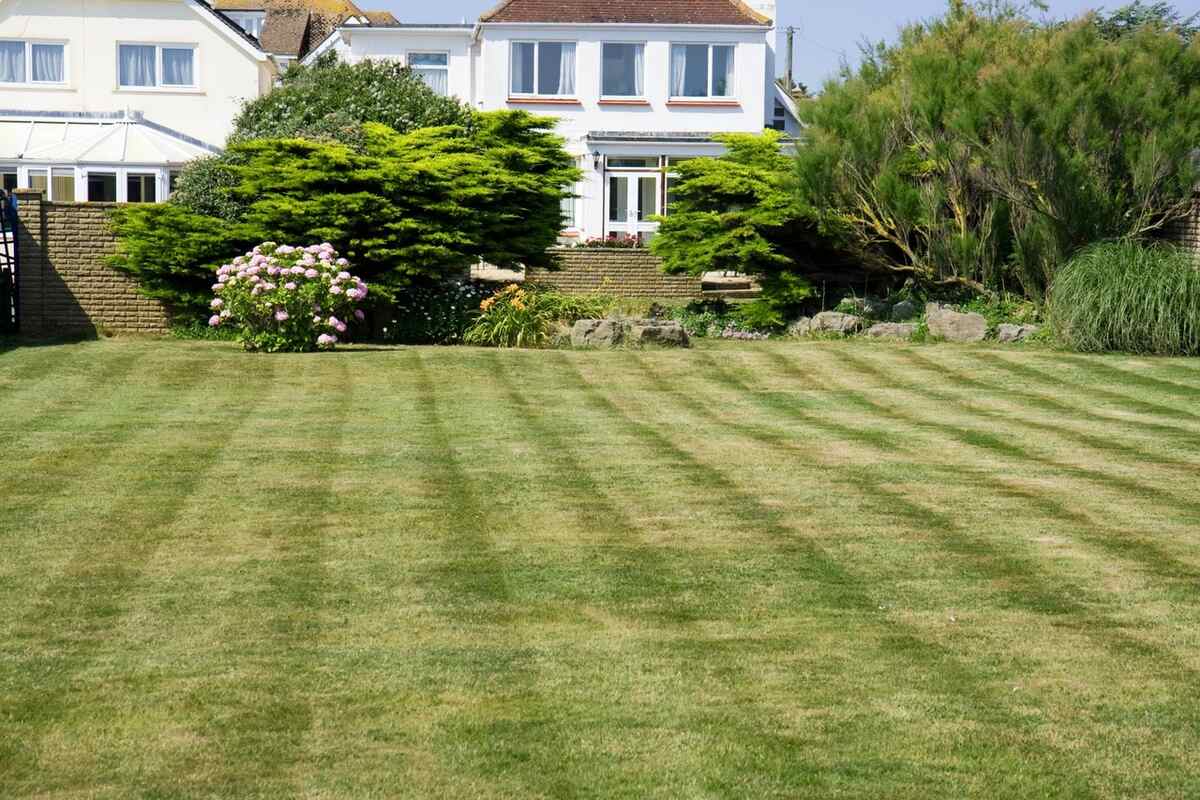
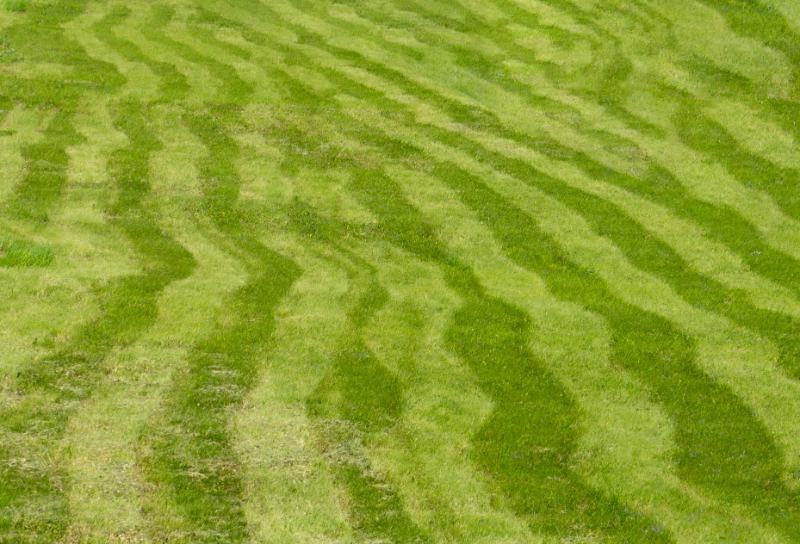
Adding stripes to your lawn is a straightforward process that takes your grass to the next level. It’s accomplished by using a lawn roller to bend the grass, creating a straight line, diagonal, circular, or zigzag pattern.
I take great pride in keeping my yard looking nice. With well over 3 decades of experience mowing lawns, I’m well-versed in creating beautiful lawn stripes.
What Causes Lawn Stripes?
The magic behind lawn striping is a clever optical illusion created by bending grass blades in opposite directions.
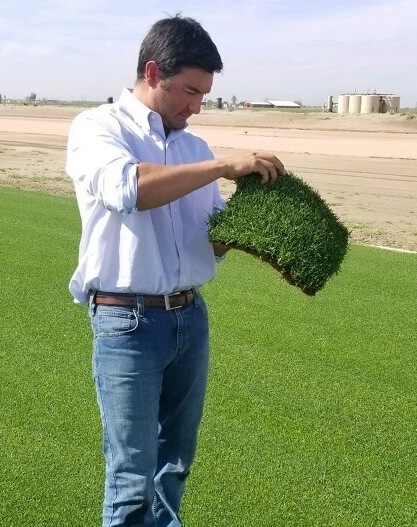
Ryan Moy, head groundskeeper at Minnesota United Football Club’s $250 million stadium in St. Paul, explains: “In general, turfgrass species have a darker and lighter shade to their leaf surface. The top of the leaf surface, known as the adaxial side of the leaf, is darker than the abaxial [the underside of the leaf surface].”
When grass is bent toward you, it appears darker because you’re seeing more of the blade surface and the shadows created. The grass blades bent away from you appear lighter because you mostly see the light reflected from the sun. This contrast creates the distinct alternating pattern that makes the stripes visually striking.
Equipment You’ll Need
Learn how to choose a mower and roller or striping kit:
Mower
Reel mowers create the best stripes, but they require more manual labor and aren’t efficient on large lawns. Don’t worry, though, your rotary mower can produce excellent results as long as you have a good roller attachment.
Rear Roller
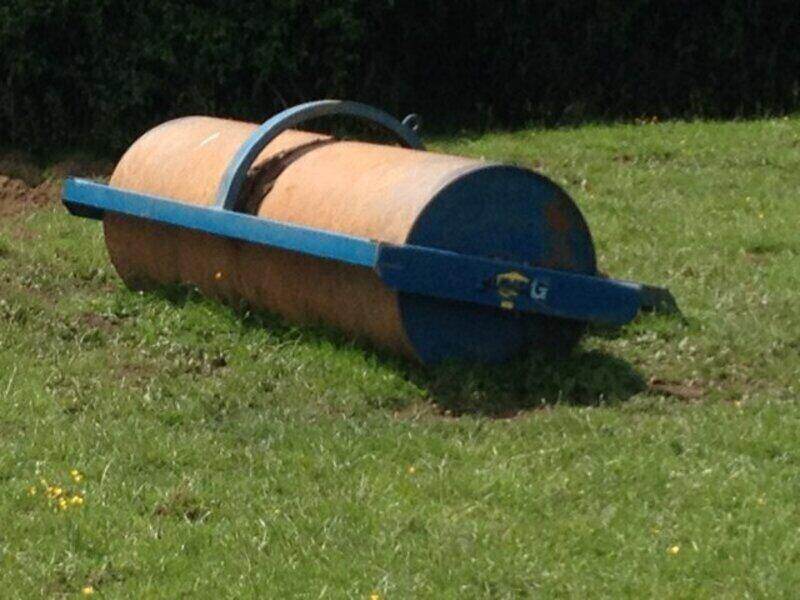
A rear roller consists of a weighted plastic or metal cylinder that attaches to the back of your mower. As you mow, the roller bends the grass in the direction you’re traveling.
The weight of the roller is crucial: too light and it won’t bend the grass enough; too heavy and it could damage the blades or compact your soil. Most rollers can be filled with water or sand to adjust the weight as needed. You’ll want between 50 and 150 pounds of weight, depending on your grass type.
To create your own lawn roller, use a section of 12-inch PVC pipe or an old barrel or drum. Fill with sand.
My Tip: You don’t need to use a roller to create stripes in your lawn, but it will make them significantly more prominent. I get decent stripes in my cool-season grass with just the rear skirt on my push mower.
Striping Kit
Depending on your mower’s manufacturer and model, you may be able to purchase a professional striping kit. These kits feature roller or brush systems specifically designed for certain models, providing professional results.
They typically have adjustable weight systems and are constructed with durable materials for consistent, long-lasting stripes. While more expensive, they’re worth the investment for serious striping.
Pro Tip: Moy suggests buying a 30-inch Lawn Striping System/Lawn Mower Striping Kit from Toro.
| If you’d like to see how well your lawn stripes before investing in a roller or striping kit, hire a LawnStarter lawn care pro to create basic straight lines in your lawn. Our pros charge an average of $48 to mow standard-sized lawns and earn a 4.5 rating from our customers. |
How to Stripe Your Lawn: Step-by-Step Guide
Make a Plan
Before firing up your mower, take a minute and think through the pattern you want to achieve. The first time or two, it might be helpful to sketch out what you want to do, including obstacles to work around.
Start with a simple straight line or diagonal pattern until you’re comfortable with the process. Then, you can tackle other designs.
Open Up the Perimeter
The first step is to mow around the outside edge.
My Tip: Most recommendations suggest mowing once around the edge. I recommend 2 passes. This comes from years of mowing and working fields on the family farm — opening headlands or “turn rows” at the ends of the fields — and gives you more room to turn around.
Start by going one direction (say, clockwise) and then do a second pass in the opposite direction (counterclockwise).
If you own a zero-turn mower, you might be able to make tight turns within a single pass around the outside.
Create Your First Line
Now it’s time to make the most important cut: the first line across the lawn. It’s critical that this line is perfectly straight. If you’re mowing next to a driveway or sidewalk, you can use that as a guideline and mow your first line parallel to it.
My Tip: Before heading across the lawn, pick a focal point at the opposite end (I choose a plant in my flowerbeds or a fence board) and mow toward it. This was how I learned to make straight lines in the field. If you’re focusing on 10 feet in front of you, and then another 10 feet in front of that, you’ll end up with wavy lines.
Start Mowing Stripes
When you finish that first row, you’ll mow in the opposite direction back across the lawn. I lift the front wheels of my push mower and turn 180 degrees so I’m standing next to where I mowed.
Overlap the first pass by 2 or 3 inches and mow back across. Repeat this process until you have mowed the entire lawn.
Creating Different Stripe Patterns
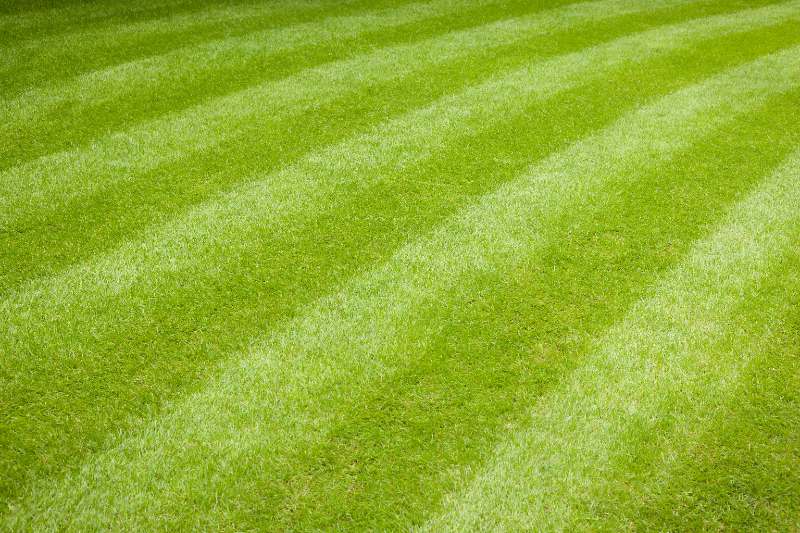
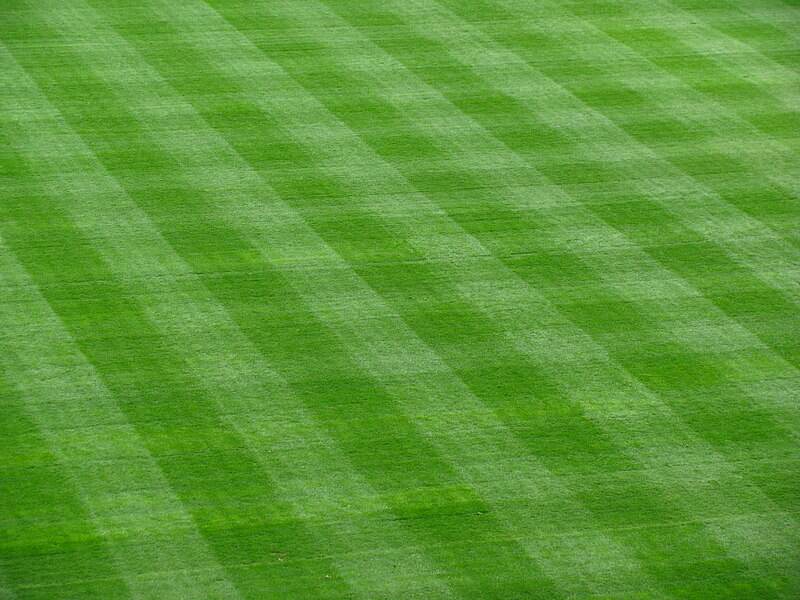
Basic Straight Lines

Straight lines are great for beginners and the foundation of many other patterns. All you have to do is follow the directions above, alternating directions with each pass.
Stripes running toward your house or the street will create the most dramatic visual impact.
Checkerboard
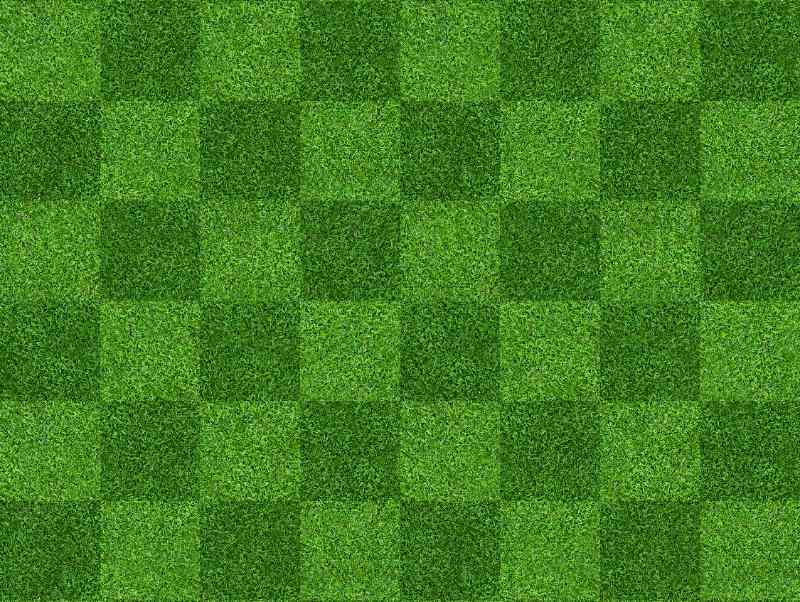
Mow straight stripes in one direction, then turn 90 degrees and stripe perpendicular to create intersecting lines. Best for square or rectangular lawns.
Diagonal
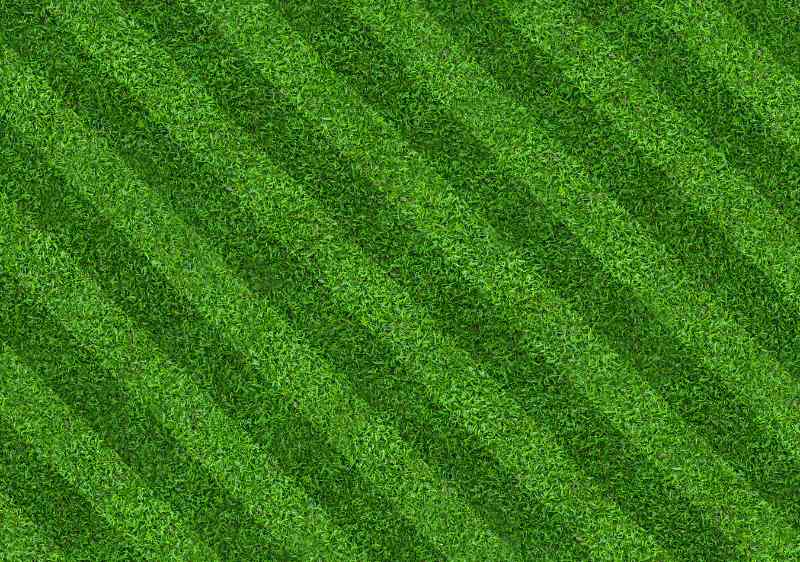
To create diagonal lines, follow the same directions as basic straight lines, but mow on an angle across your lawn.
Diamond

Create diagonal stripes in one direction, then repeat them perpendicular to the first direction. The intersections form diamond shapes.
Circles
Start in the center of your yard and work outward in concentric circles, or begin from an outside edge (with a half circle) and spiral inward.
Wavy
You can start mowing, curving your way across the grass, and then create parallel waves, or you can use a garden hose or rope as a guide.
Zigzag

The best way to do zigzag stripes involves a 3-part process. First, mow basic straight lines in your lawn, and then a diagonal pattern at a 45-degree angle to the straight lines.
Pick a light colored diagonal line a few lines in from the edge and start mowing over it. When you reach the intersection with a light straight line, make a 45-degree turn and follow the straight line until it intersects the next light colored diagonal line. Make another 45-degree turn, repeating the pattern until you reach the other side of the lawn.
Lawn Striping Basics
Cool-Season vs. Warm-Season Grasses
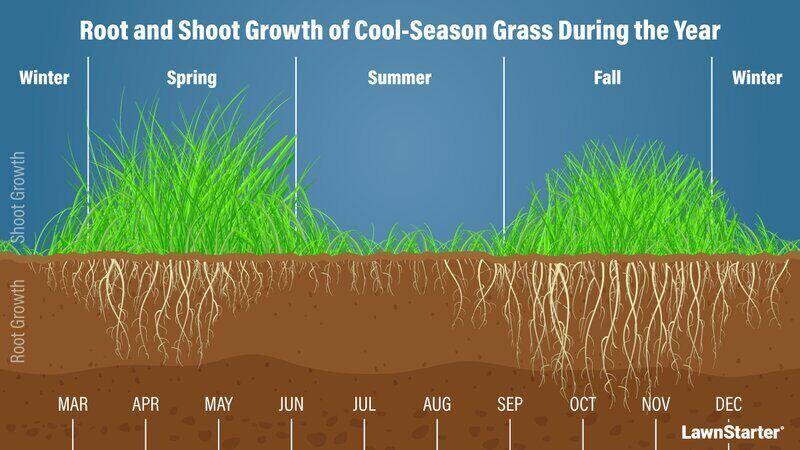
“Not all turfgrass species are created equal with respect to their ability to show [stripes],” says Moy. Cool-season grasses (Kentucky bluegrass, perennial ryegrass, and tall and fine fescues) are typically more flexible and bend more easily, so they’ll stripe better and last longer.
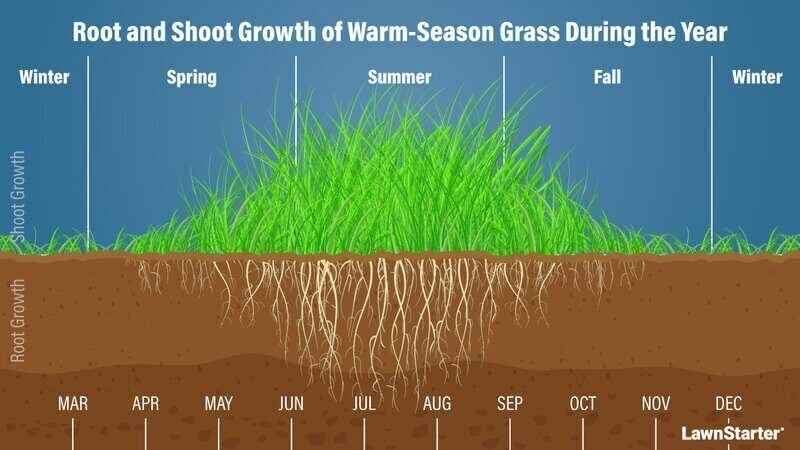
Warm-season lawns (St. Augustine, Zoysia, Bermudagrass), have shorter, stiffer blades that are more resistant to bending. You may need to add more weight to your roller to get a good, visible stripe on warm-season grasses.
Keep Your Mower Blades Sharp
Sharp blades are critical for successful lawn striping. Dull blades tear grass rather than cutting it cleanly, causing an uneven appearance that disrupts the pattern. Check your blades regularly and sharpen them at least twice each growing season.
Prepare Your Lawn
Before striping, make sure your lawn is healthy and in good condition. Remove debris and fill low spots that can cause uneven cutting heights. You might want to cut it once without striping to establish a baseline height and remove any existing patterns.
See Related:
- When and How Often Should You Fertilize Your Lawn?
- How Long Should I Water My Lawn?
- How to Get Rid of Weeds in Grass
- How to Aerate a Lawn
Grass Needs to Be Dry
Moisture makes grass blades heavy and prone to clumping, which prevents proper bending and results in uneven cutting. Wait until the morning dew has evaporated and your grass is completely dry before striping.
See Related:
Working Around Obstacles
When striping around obstacles, the key is to make clean transitions around them. Mow in concentric circles around trees (I mow 2 circles), then transition back to your main pattern. For rectangular obstacles like garden beds, mow parallel to the edges, then resume your main pattern.
Troubleshooting Common Striping Problems
Stripes Aren’t Visible Enough
If your stripes are hard to see, look at the 3 main causes:
- Check to see if your striping roller has enough weight to bend the grass blades effectively.
- Raise the height of your mower deck. Longer grass creates more dramatic stripes in the alternating rows. You want to cut at the recommended mowing height for your grass type, or slightly longer.
- Make sure the grass is completely dry when you’re mowing.
Stripes Look Uneven
When mowing, maintain a steady, moderate speed. Rushing or varying the mower speed creates irregular patterns. Also, check that your mower deck is level from side to side and front to back, and your blades are sharp.
Bumps or rough areas in your lawn can also cause uneven stripes. Level problem spots, so you’re working with flat ground.
Stripes Disappear Quickly
Lawn stripes typically last 5 to 7 days under ideal conditions. (e.g., calm weather.) Wind, rain, and foot traffic will cause faster fading.
If your stripes are disappearing quicker, make sure your striping roller has enough weight to create good bending. Avoid mowing during windy conditions, and limit foot traffic across freshly striped lawns.
FAQ About Adding Stripes to Your Lawn
Yes, seasonal conditions will impact striping success.
Spring grass is softer and more responsive to striping.
Summer heat is stressful for your grass; avoid striping when it’s hot.
Fall provides great conditions.
Warm-season grasses grow slower in the winter, making stripes last longer but appear less dramatic.
When done correctly, striping your lawn won’t cause damage. The rolling can help to smooth soil irregularities. However, you want to vary your striping direction to prevent permanent bending and avoid striping when the ground is really wet.
For newly seeded lawns, wait until the grass is well-established and mowed 3 or 4 times, which is typically 8 to 12 weeks. For new sod, wait 4 to 6 weeks for roots to establish.
See Related:
Leave Striping to the Pros
If you’re inspired to achieve a professional stadium look but need expert help, contact LawnStarter’s lawn care pros. Our local pros can handle the fertilizing, mowing, and striping techniques needed to create championship-quality results, giving you more time to relax and admire your outdoor space.
Sources:
- “Achieve a Beautifully Striped Lawn With An Allett Cylinder Mower.” Allett Mowers.
- “How to Mow Stripes in the Lawn.” By Allyn Hane, “The Lawn Care Nut” on YouTube. Milorganite.
- Ryan Moy, head groundskeeper at Minnesota United Football Club, St. Paul, MN. Personal interview.
Main Image Credit: Pxhere