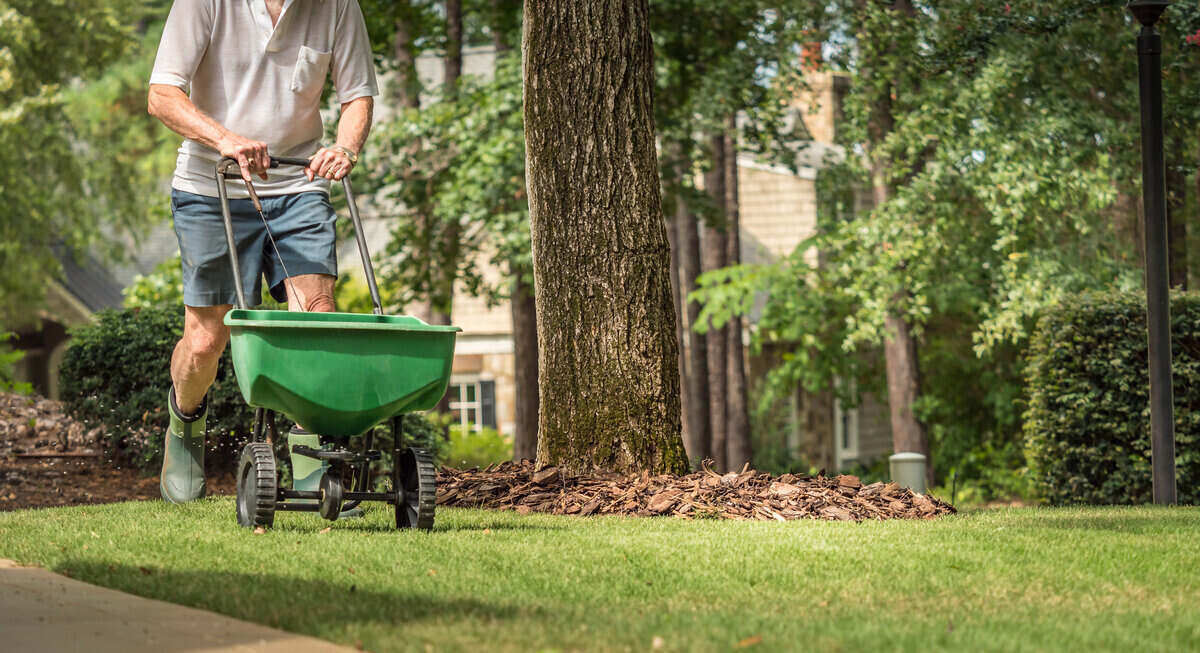
Fertilizing your lawn properly will boost your lawn’s looks and long-term health. If you want the kind of thick, dark green lawn that makes your neighbors green with envy, then follow LawnStarter’s step-by-step advice on how to fertilize your lawn.
How to Fertilize Your Lawn
Fertilizing your lawn isn’t rocket science. However, you can’t just throw around the fertilizer and expect a healthy lawn to spring forth. You should prepare your lawn before fertilizing it.
Feeding your lawn also will be a little different depending on whether you’re using a granular fertilizer or a liquid one.
How to Prepare Your Lawn for Fertilization
Your soil actually plays a huge role in how you fertilize your lawn. Dry soil that’s too acidic or too alkaline will have some difficulty absorbing nutrients and keeping them in forms your grass can use. So before fertilizing your lawn, you’ll need to prepare your soil so your turf can properly absorb the nutrients in the fertilizer. Preparing your lawn will also tell you what nutrients you need and what fertilizer to use to solve deficiencies.
- Step 1: Test Your Soil
- Step 2: Adjust Your Soil pH
- Step 3: Eliminate Weeds
- Step 4: Mow Your Lawn
- Step 5: Water Your Lawn
Step 1: Test Your Soil
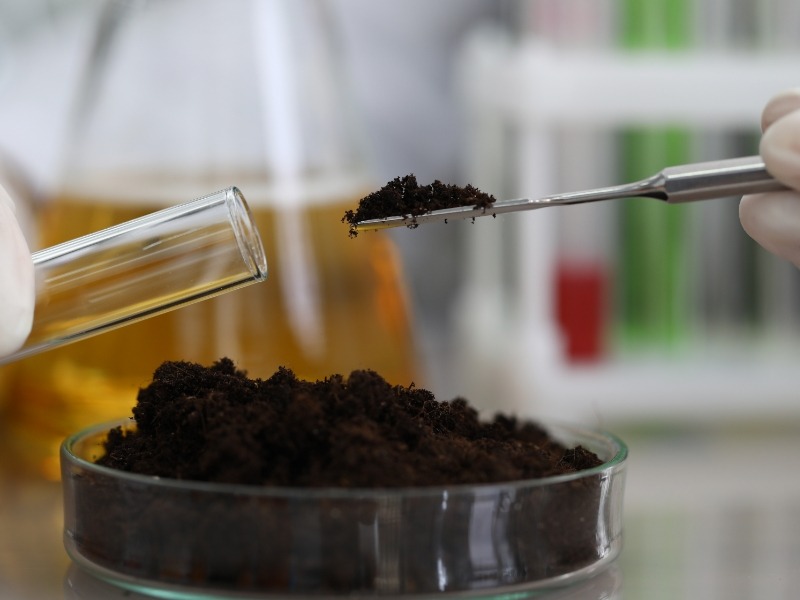
It all starts with a soil test. Testing your soil lets you know your soil pH and what nutrients your soil is lacking. A soil test will help you choose the right fertilizer for your grass. Some tests will even make it tell you what type of fertilizer you should use on your lawn.
Testing your soil with store-bought pH strips will only tell you your soil’s pH level. Soil pH is still important to fertilization as it influences what nutrients your plants can absorb, but you’ll want to know what nutrients are in your soil already. Your soil contains macronutrients and micronutrients, the latter of which are less important but still nice to know.
The three macronutrients you need to keep an eye on are nitrogen, phosphorus, and potassium. They are important to healthy plant growth, such as strong root development. The three numbers on every bag and bottle of fertilizer tells you what N-P-K ratio the product has. Sometimes, your soil test results will tell you the ideal fertilizer ratio your lawn needs to address nutrient deficiencies.
Some at-home soil testing kits will be able to tell you an estimation of your soil’s nutrient levels in addition to its pH value. However, it won’t tell you the exact percentages.
You can get a more in-depth test by sending a soil sample to a laboratory. You should be able to get a soil test from your state university’s local county extension office, which you can find on the National Institute of Food and Agriculture’s university directory.
Step 2: Adjust Your Soil pH
Your soil test might reveal that your soil pH is too acidic (meaning too low) or too alkaline (meaning too high). With acidic or alkaline soil, your grass will have a hard time absorbing the nutrients from the fertilizer, no matter how much of it you apply.
The ideal pH range for most grasses is 6.5 – 7. If your soil pH is lower than that range, add agricultural lime to raise it before fertilizing. If your soil pH is higher than that range, add elemental sulfur to lower it before fertilizing. Your soil test results should include advice on how much lime or sulfur to apply for your specific needs.
Step 3: Eliminate Weeds
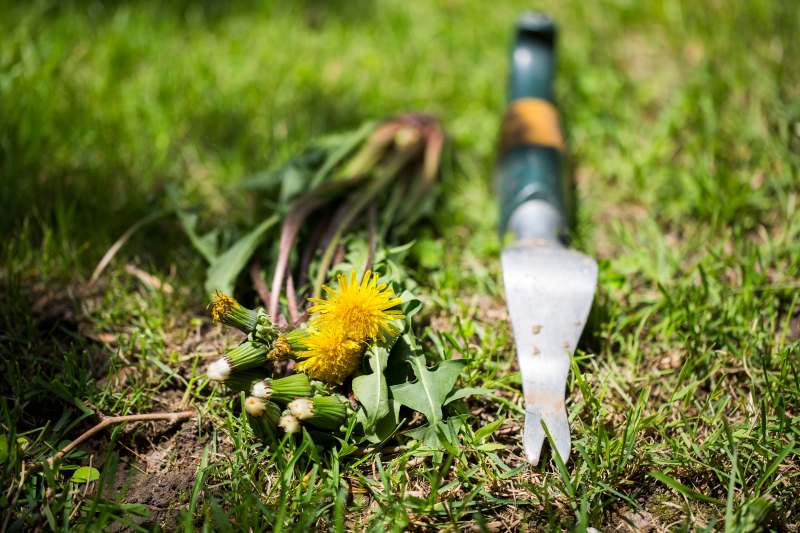
If your lawn is weedy, you’ll need to get rid of the weeds before fertilizing your grass. After all, you want to feed your lawn and not the weeds. Use a post-emergent herbicide to deal with the weeds efficiently. If you want to prevent weeds, use a pre-emergent herbicide.
Typically, you’ll need to wait around a week after using weed killers before you can fertilize your lawn.
Some fertilizers have herbicides mixed in with them. They can even get specific: Some fertilizers specifically prevent crabgrass from popping up in spring. These products — called weed-and-feeds — may seem tempting to use, but they’re less effective than if you used herbicide separately.
Step 4: Mow Your Lawn
Mow your lawn a few days before fertilization if it’s looking a little tall. It’s easier to evenly spread fertilizer on a lawn that’s been mowed. Mowing also can help remove debris that can block fertilizer from reaching the soil.
You also can mow your lawn on the same day you fertilize it, but you’ll need to wait a few hours to avoid injuring your turfgrass.
Step 5: Water Your Lawn
About three to four days before fertilizing, water your lawn as you normally would. That way, by the time you add your chosen fertilizer, the soil will be moist – but not too wet – and ready to absorb nutrients.

How to Feed with Granular Lawn Fertilizer
Granular fertilizers come in the form of granules, which are tiny, dry particles that usually come in a bag. These fertilizers need to be used with a fertilizer spreader for even application.
- Step 1: Pick a Fertilizer Spreader
- Step 2: Wear Protective Gear
- Step 3: Add the Fertilizer to the Spreader
- Step 4: Apply Fertilizer
- Step 5: Water Your Lawn (if Needed)
- Step 6: Clean Up
Step 1: Pick a Fertilizer Spreader
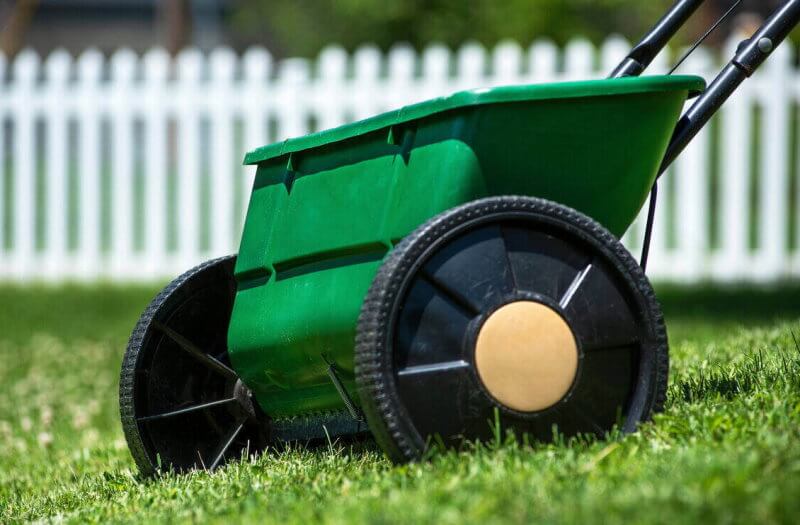
There are three types of fertilizer spreaders for homeowners to choose from. Choose the one that best fits your lawn’s needs:
- Handheld spreaders hold a small amount of fertilizer and are best for smaller yards and tight spaces.
- Broadcast spreaders, aka rotary spreaders, throw the fertilizer in a wide radius for faster application. They look like small wheelbarrows and need to be pushed. They’re best for medium to large yards
- Drop spreaders fertilize one small spot at a time, so they’re good for accuracy. This type of spreader drops fertilizer straight onto the ground. This is also a push-powered tool, but it works better for smaller yards.
Step 2: Wear Protective Gear
We recommend wearing protective gear when fertilizing your lawn. Lawn fertilizer can cause burns when it comes into contact with your skin and eyes. For maximum protection, wear gloves, close-toed shoes, a long-sleeved shirt, long pants, a dust mask, and safety goggles.
Step 3: Add the Fertilizer to the Spreader
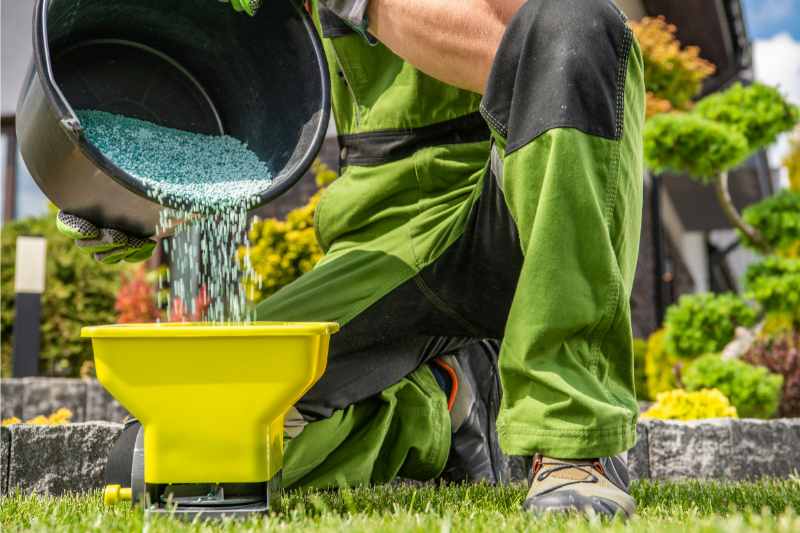
Next, you’ll need to set your chosen spreader to the right application rate setting. The label on your fertilizer bag will tell you which setting to use for that specific product. If you’ll be doing two passes over your lawn, calibrate your spreader to deliver half the desired rate.
Put the spreader on the driveway or another hard surface – not your grass – to fill it with fertilizer. Put a tarp where you plan to fill your spreader. This will ensure that fertilizer won’t get on your grass (which can get burned) or on your driveway or walkway (which can get stained). Put any spilled fertilizer back into the bag.
Before you put fertilizer in the spreader, make sure that the hopper is closed. Then, put as much fertilizer as you need in the spreader.
Step 4: Apply Fertilizer
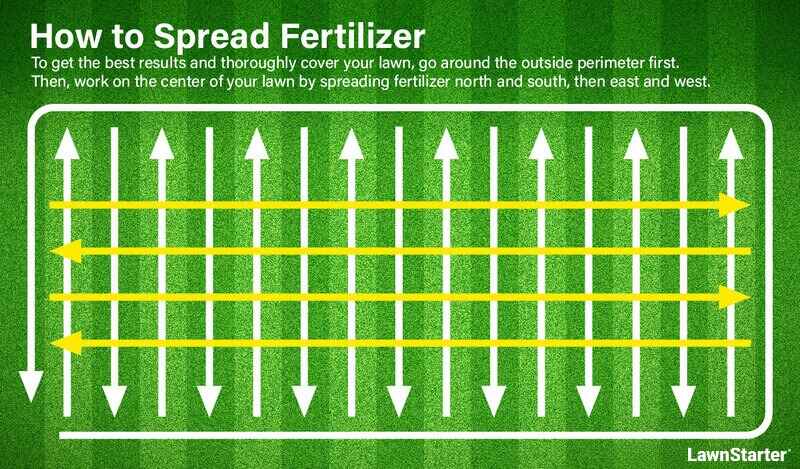
Now it’s time to fertilize your lawn. First, walk the spreader around the outside edge (perimeter) of your lawn. Walk at a slow, steady pace to ensure even coverage.
When you’re done with the perimeter, you’ll need to fertilize the middle of your lawn. Walk the spreader back and forth across the lawn in straight lines, similar to the pattern you follow when you mow. Overlap a few inches on each pass so you don’t miss any spots. Continue until you’ve covered the whole lawn.
You can also go north to south from one end of your lawn to the other, and then turn 90 degrees to move east to west. You’ll go through your lawn in a crisscross pattern. This will also fertilize your lawn evenly.
Pro Tip: Close the hopper hole whenever you need to turn or stop. This will prevent overfertilizing one spot, which can cause fertilizer burn and waste fertilizer.
Step 5: Water Your Lawn (If Needed)
Most granular fertilizers will need to be watered right after you spread them on your lawn. This will push the granules down into the soil and help the soil absorb them. However, it’s best to consult the instructions on the bag before watering your lawn.
If you do need to water your lawn afterward, then thoroughly water by hand or with sprinklers.
Step 6: Clean Up
After fertilizing the lawn, sweep up any excess granules on the driveway and other hard surfaces and throw them in the trash. If you leave excess fertilizer out, rainwater will eventually carry it into natural bodies of water, polluting them with chemicals. Fertilizers can also stain your driveway.
Remove the leftover fertilizer from the spreader and put it back in the bag, then store it in a cool, dry place far from the curious reach of pets and children.
Once the fertilizer spreader is empty, open the hopper and spray down the whole machine with a hose. Store your fertilizer spreader inside so it doesn’t rust.
How to Feed with Liquid Lawn Fertilizer
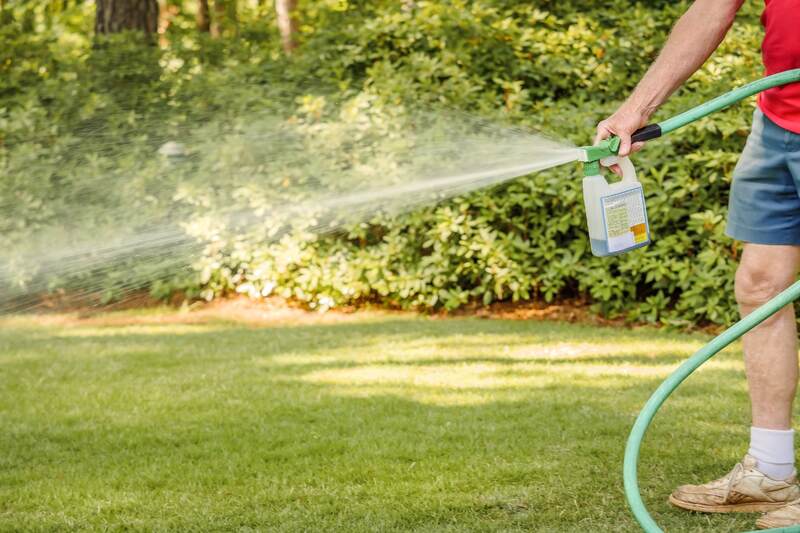
Instead of granules, some lawn fertilizers come as a liquid in a bottle or as a water-soluble material that you mix with water. You spray these fertilizers across your lawn.
- Step 1: Wear Protective Gear
- Step 2: Attach or Fill Your Sprayer
- Step 3: Spray Fertilizer Evenly
- Step 4: Water After a Few Hours
- Step 5: Clean Up
Step 1: Wear Protective Gear
Like its granular counterpart, liquid fertilizer also can burn your skin and eyes. Wear gloves, close-toed shoes, long sleeves, long pants, safety goggles, and a dust mask before handling liquid lawn fertilizer.
Step 2: Attach or Fill Your Sprayer
Many liquid lawn fertilizers come in a “ready-to-spray” hose-end sprayer that attaches to your garden hose. The hose dilutes the fertilizer with water so it won’t harm your turf. You just need to screw the bottle securely onto the hose and spray.
If your fertilizer doesn’t come in a “ready-to-spray” bottle, it’s probably a concentrated product. You’ll have to mix it with water before using it. The product label will tell you the proper ratio of fertilizer to water. Once you’ve diluted the fertilizer, pour it into a handheld or backpack sprayer.
Step 3: Spray Fertilizer Evenly
Start by picking one side of your lawn, step a little ways away, and face the edge. Then, spray your fertilizer from side to side across your body as you go. Pay attention to where you’ve been spraying so you can pick up on the next pass where it leaves off. Walk backward as you go and avoid stepping on grass you’ve already fertilized.
Make sure not to miss any spots, especially irregularly shaped areas of your lawn. However, you must also try not to overspray any spots as this will result in uneven growth. Applying liquid fertilizer evenly can be tricky if you don’t know what you’re doing. Many homeowners have found that liquid fertilizer results in a patchy lawn.
Step 4: Water After a Few Hours
It’s not recommended to water your lawn immediately after applying most liquid fertilizers. The water will wash the fertilizer off your grass before it has a chance to soak into the soil. However, it’s better to check the instructions on the bottle to know for sure.
Give the fertilizer time to dry, which should take about two to four hours. Once the lawn seems mostly dry, water thoroughly to help your grass absorb the nutrients in the fertilizer.
Step 5: Clean Up
If you used a handheld or backpack sprayer, empty any leftover fertilizer back into the original container and rinse out the sprayer with a hose. Store the container of fertilizer in a climate-controlled place indoors, outside the reach of pets or small children.
When to Fertilize Your Lawn
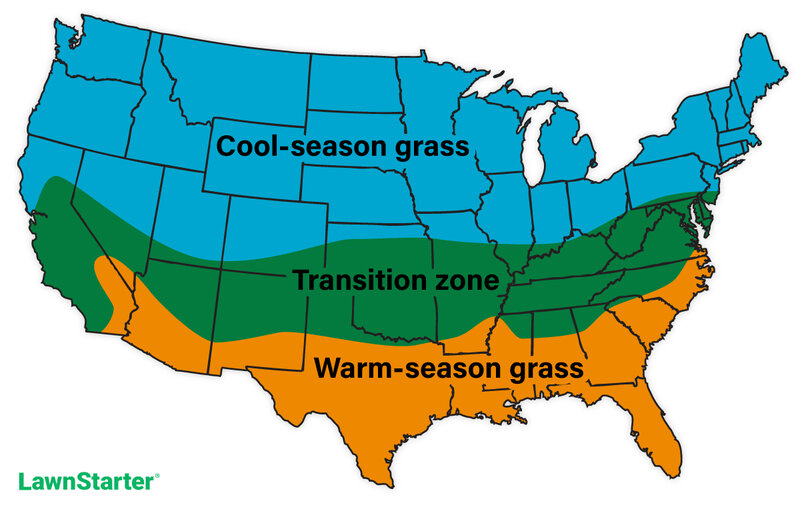
The best time to fertilize your lawn is during its active growing season so it can make the most out of the essential nutrients in the fertilizer. This golden time will be different depending on the type of grass you have.
- Warm-season grasses: Fertilize Zoysia, St. Augustine, centipede, bahia, and Bermudagrass during late spring or early summer when daytime air temperatures start hovering around 80F.
- Cool-season grasses: Kentucky bluegrass, tall fescue, fine fescues, and perennial ryegrass should be fertilized during the cooler periods of fall. Both early fall and late fall are both fine. Late spring is an alternative time that also will benefit your turf. Daytime air temperatures should hover around 60F to 70F before fertilizing.
You can learn more in our article about When to Fertilize Your Lawn.
Make sure your grass is green when you fertilize. Fertilize after your grass greens up in the spring, and never fertilize if it has gone dormant because of drought. Your grass won’t be able to make use of the nutrients because it’s stressed.
What Fertilizer Should You Use?
There are many types of lawn fertilizers. You’ve already seen granular and liquid fertilizers, which have different application methods. Here are the different types of fertilizers to consider:
- Slow-release fertilizers release nutrients into the soil over a longer period of time, which is better for the long-term health of your grass. It also keeps your turfgrass fed for longer, so you won’t have to fertilize as often.
- Quick-release fertilizers are better for struggling lawns that need a boost of nutrients to recover. You’ll need to apply this type of fertilizer more often as it doesn’t stay in the ground as long. They’re generally not recommended for healthy, established lawns.
- Synthetic fertilizers are manufactured using man-made chemicals. They’re typically cheaper than organic fertilizers but are more harmful to the environment.
- Organic fertilizers use natural materials. These include compost, manure, cottonseed meal, bone meal, or seaweed. They are generally better for your lawn and the environment, but they’re more expensive and take longer to work their magic.
- Starter fertilizers are formulated specifically for newly planted grass seed or new sod. Their mix of nutrients promotes healthy root growth.
- Weed-and-feed fertilizers combine fertilizer and herbicide to kill weeds or prevent them entirely. They’re useful if you want to combine weed control and fertilization into one process.
- Seasonal fertilizers are tailored for a specific growing season. You shouldn’t use seasonal fertilizers outside of their intended season; for example, you shouldn’t use a summer fertilizer in the fall.
You can learn more about types of fertilizer in our article about How to Choose the Right Lawn Fertilizer. Pick the fertilizer that best fits what your lawn needs.
Lawn Fertilization DOs and DON’Ts
There are some things homeowners should and should not do when they’re fertilizing their lawns. Let’s take a look at them:
- DO check the weather before fertilizing. It’s best to fertilize your lawn on a calm day without much wind so that the fertilizer won’t be carried off. Try to fertilize when it isn’t predicted to rain heavily in the next few days, too; you don’t want your fertilizer to be washed away.
- DO wait for your grass to dry before fertilizing. While it’s good to fertilize moist soil, it’s not recommended to apply fertilizer when the grass itself is soaking wet. The fertilizer might stick to the grass instead of going down to the soil. The fertilizer will also be less effective if your grass is too wet.
- DO apply fertilizer when the temperatures aren’t hot. This means you should fertilize in the morning or early evening. The harsh midday sun can intensify the burning effect of fertilizer on your grass.
- DO mulch your grass clippings. Also known as grasscycling, mulching your grass clippings won’t help with the actual process of spreading fertilizer on your lawn. However, the grass clippings will return nutrients to the soil as they break down. This can allow you to use less fertilizer throughout the year.
- DO keep pets and children off the lawn while fertilizing. Fertilizer can harm your pets and kids, so it’s best to bar them from entering your lawn while you fertilize. We also recommend keeping them out of the lawn for at least a day, until the fertilizer gets absorbed into the soil.
- DON’T fertilize during a drought. As mentioned earlier, grass that has gone dormant during an extended drought is stressed out. It won’t be able to use the nutrients effectively and may be harmed by fertilizer.
- DON’T apply fertilizer if the ground is still frozen. The fertilizer won’t be able to penetrate the soil, so the soil can’t receive the nutrients. Once the ground thaws, the fertilizer also may be carried away by the water.
- DON’T apply fertilizer near water. The fertilizer may run off into the water, releasing a burst of nutrients that can cause algal blooms. These blooms are unwelcome and are bad for the environment. Many fertilizers are toxic to animals, especially fish. Stay at least 6 to 8 feet away from bodies of water whenever you fertilize.
FAQ on Fertilizing Your Lawn
How Much Does It Cost to Fertilize a Lawn?
If you choose to buy fertilizer to fertilize your own lawn, you’ll spend about $10 to $30 per bag of fertilizer. How much fertilizer you need depends on the size of your lawn.
If you hire a professional lawn care company to fertilize your lawn instead (LawnStarter network of pros offers fertilization services), you should expect to pay between $103 and $343 per service, depending on labor rates where you live, the size of your lawn, and the type of fertilizer you want the pros to use.
How Much Lawn Fertilizer Do I Need?
How much fertilizer you need will vary based on the product and your soil test results (if you conducted one). Fertilizer labels will tell you how much ground you can cover with one package. In most cases, about 14 to 20 pounds of granular fertilizer will cover 5,000 square feet.
However, you may need more or less fertilizer depending on the nutrient levels of your lawn. You can check your soil test results for how much fertilizer you need to apply to your lawn.
You may also need to use more fertilizer depending on the type of grass you have. Some grasses, like Kentucky bluegrass and St. Augustinegrass, need more fertilizer (or need to be fertilized more often) than other species.
If you don’t know what your lawn’s square footage is, here are two ways to figure it out:
- If you know the square footage of your overall property and the square footage of your home, subtract the size of your home from the size of your property. What’s left is approximately the size of your lawn.
- Measure around the perimeter of your lawn with a measuring tape or measuring wheel. Multiply the length times the width to get your lawn area.
How Do You Reverse Fertilizer Burn?
To reverse fertilizer burn, flush your soil with a lot of water. Watering in excess is normally bad after fertilization because it will cause the nutrients to leach out of the soil, but that’s what we want here. Fertilizer burn is caused by too much nitrogen.
How can you tell if your grass is suffering from nitrogen burn? If it turns yellow, tan, or brown after fertilizer application, then it might be. If you act quickly, you can flush out enough nitrogen and your grass can recover. However, if it turns brown and completely dies, then you’ll need to replace it with new, healthy grass.
Let Your Lawn Flourish With Fertilizer
Fertilizing your grass on a regular schedule will let it flourish and grow faster than ever. While it will look pretty, you will end up needing to mow your lawn more, which may not be how you want to spend your free time.
If you want a beautiful green lawn but don’t want to take care of it yourself, then why not hire a pro? LawnStarter can connect you with local lawn care pros who offer weekly mowing services and routine fertilization, all from the comfort of your home.
Main Photo Credit: The Toidi / Shutterstock / License