To apply pre-emergent herbicides, you’ll need 3 things: your lawn’s square footage, the right applicator (spreader or sprayer), and proper timing. The key is getting the herbicide down before weed seeds germinate — typically when soil temperatures hit 50-55 degrees in spring.
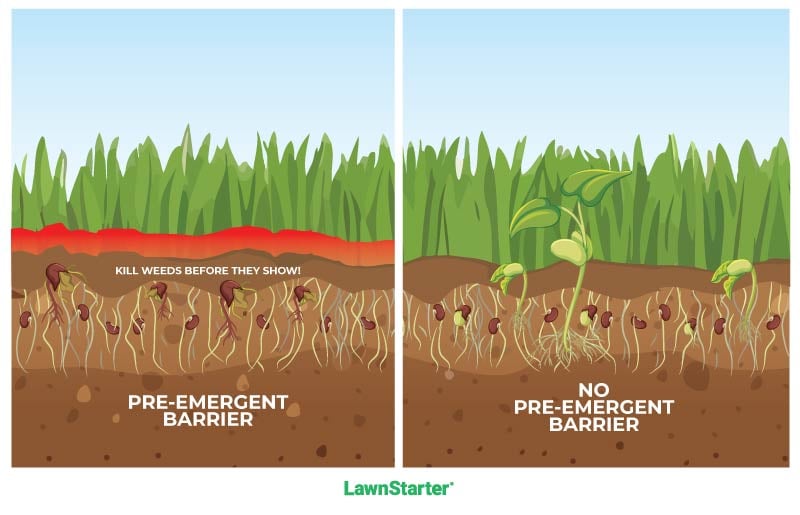
Pre-emergent herbicides create a chemical barrier in the soil that stops weed seeds from sprouting. They come in granular or liquid form. Both types require about 1 inch of water to activate and move into the soil where weed seeds germinate.
Don’t want to handle the timing and application yourself? LawnStarter’s weed control service takes care of pre-emergent applications at the right time, so you never have to worry about missing the window. Get a free quote in under 2 minutes and let the pros handle your weed prevention.
| Key Takeaways: |
|---|
| • Apply pre-emergent when the soil reaches 50-55 degrees in spring or falls to 70 degrees in fall. • Two applications per year, once in spring and once in fall, is recommended for most lawns. • Always water in the herbicide with about 1 inch of water to activate. • Wait at least 1 year before using pre-emergent on newly seeded lawns. |
Preparing to Apply Pre-Emergent
Before you start, gather information and your supplies.
1. Measure Your Lawn
Calculate your lawn’s square footage by multiplying length times width:
Length (in feet) × Width (in feet) = Square footage
For irregular shapes, break your lawn into rectangles, calculate each section, then add them together. Knowing your exact square footage prevents overapplication and wasted product.
2. Choose Your Pre-Emergent Type
Choose between granular and liquid based on your equipment and preferences:
Granular herbicides:
- Need a spreader for even distribution
- Release slowly into soil
- Less precise coverage
- No mixing required
Liquid herbicides:
- Need a sprayer
- Activate faster
- More even coverage
- Require mixing with water
Most lawn pre-emergents are selective, meaning they target specific weeds without harming your grass. Products containing prodiamine or dithiopyr work well for preventing crabgrass and other grassy weeds. Non-selective pre-emergents prevent all plant growth and should never be used on lawns — save those for driveways and walkways where you want zero vegetation.
Pro Tip: “First, consider your need for a preemergence herbicide application,” says John Fech, Extension educator at the University of Nebraska. “Lawns that are thin or haven’t been cared for in a few years are much more likely to need one. Well-maintained, thick turf may not need an application every year.”
See Related:
3. Gather Your Tools
You need the right tools and protective gear to apply pre-emergents:
- Measuring tape
- Garden hose with sprinkler
- Broadcast spreader (granular pre-emergent)
- Pump sprayer or hose-end sprayer (liquid pre-emergent)
- Measuring cup (liquid pre-emergent)
- Work gloves
- Long sleeves and long pants
- Dust mask
- Eye protection
Pro Tip: Use a measuring cup dedicated to chemical herbicide use ONLY.
See Related: How to Choose The Right Lawn Spreader
How to Apply Granular Pre-Emergent Herbicide

Granular pre-emergents look like fertilizer and are applied similarly. A spreader distributes the granules evenly across your lawn. Choose a dry, calm day with no rain in the forecast.
Application Steps
Step 1: Fill your spreader. Pour the granular pre-emergent into your spreader hopper. Check the product label for the recommended application rate based on your lawn’s square footage.
Step 2: Set the spreader. Calibrate your spreader to half the product’s recommended setting (if applying two passes) or match the recommended setting if you’re doing only one pass. Most labels list spreader settings for common brands. Start with the lowest recommended setting.
Step 3: Apply the pre-emergent. Walk at a steady, normal pace across your lawn. For push spreaders, squeeze the handle to release granules as you walk. Release the handle when you stop or turn to avoid double-application in those spots.
“For drop spreaders, it’s best to follow the wheel tracks pretty closely, and for rotary spreaders, a slight 10%-20% overlap between passes works well,” says Fech.
Pro Tip: Split your application in half, and apply in a crosshatch pattern: Make one pass walking lengthwise across your yard, then make a second pass walking perpendicular to your first pass. This ensures complete coverage with no gaps.
Step 4: Clean your spreader. Rinse the spreader thoroughly with water to remove all herbicide residue. This prevents chemical buildup and damage to the spreader.
Step 5: Water your lawn. Apply about 1 inch of water within 24 hours to activate the herbicide. Most pre-emergents need water to move into the soil where weed seeds germinate. Set out an empty tuna can to measure — when it fills up, you’ve applied 1 inch.
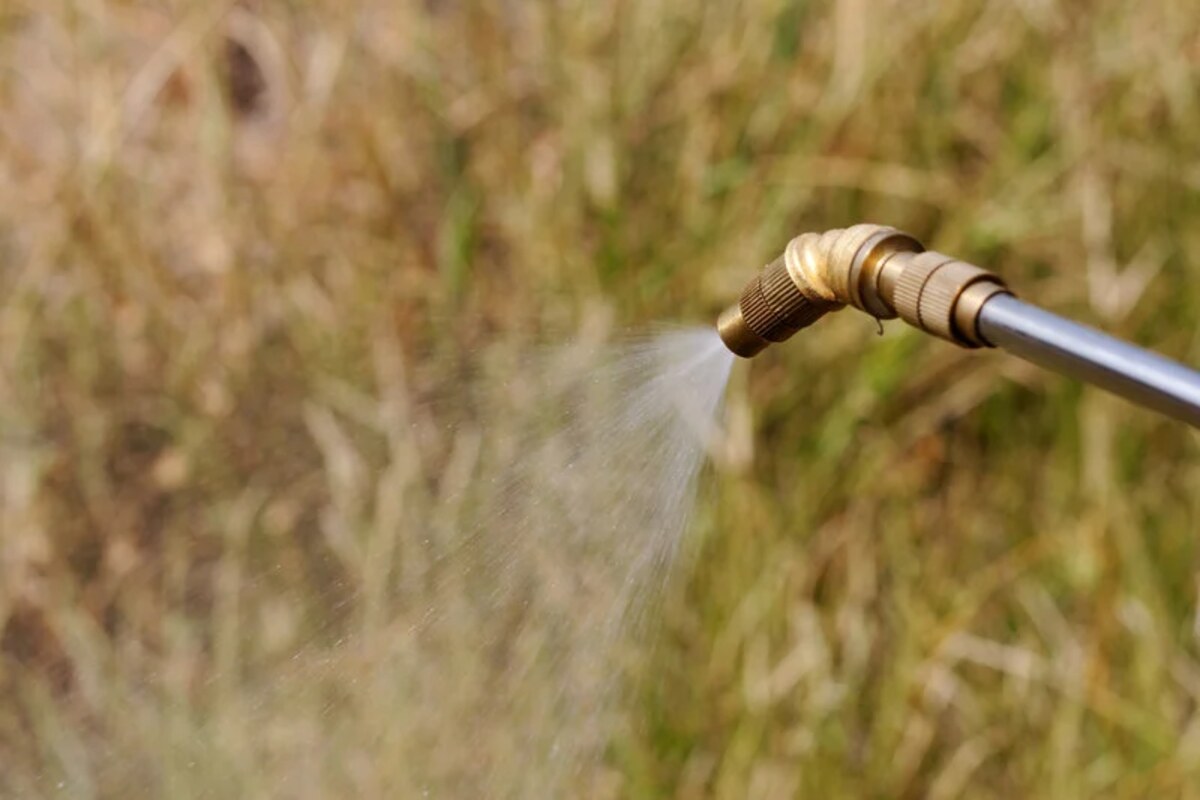
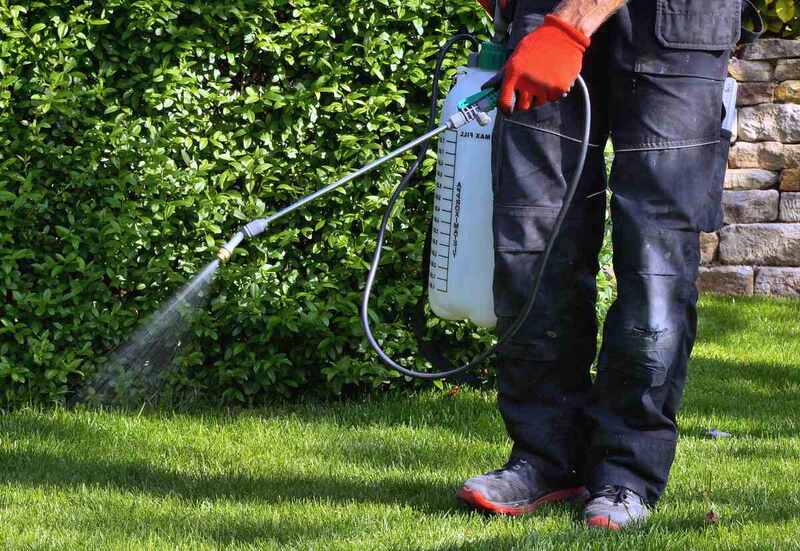
How to Apply Liquid Pre-Emergent Herbicide
Liquid pre-emergents offer more precise coverage but require mixing and careful application. They work faster than granular products because they soak directly into the soil. Apply on a dry, calm day with winds under 10 mph so the spray doesn’t drift.
Application Steps
Step 1: Mix the herbicide. If you’re doing a single pass, measure the herbicide concentrate according to label directions. If you’re doing 2 passes (in a crosshatch pattern), measure at half the recommended rate.
For pump sprayers, fill the tank halfway with water first, add the herbicide concentrate, then top off the rest of the way with water. This ensures better mixing.
Some products come with hose-end sprayers that automatically dilute the concentrate as you spray. These save mixing time but offer less control over application rate.
Step 2: Apply the herbicide. Walk at a steady pace while spraying, keeping the nozzle 6-12 inches above the grass. Hold the sprayer close to the ground to minimize wind drift. Move in slightly overlapping passes to avoid gaps.
It’s recommended to use the same crosshatch pattern as with granular: Spray lengthwise across your yard, then make a second pass perpendicular to the first. This double coverage ensures you don’t miss any spots.
“An even, consistent coverage with a slow, steady pace is best for the overall health of the turf,” says Samantha Brown, horticulture agent with Clemson University.
For large lawns, use marker flags to track which sections you’ve completed.
Step 3: Clean the sprayer. Rinse the sprayer tank, hose, and nozzle thoroughly with clean water. Run clean water through the system to flush out any remaining herbicide; use mild detergent or soap if necessary. This prevents clogs and extends your sprayer’s life.
Step 4: Water your lawn. Apply about 1 inch of water within a few hours (check your product label for exact timing). This activates the herbicide and moves it into the soil.
When to Apply Pre-Emergent
Timing is critical for pre-emergent success. “Keep an eye on the soil temperature rather than the air temperature,” Brown says.
- Spring application: Apply when soil temperature reaches 50-55 degrees. “Crabgrass can germinate at 4 consecutive days of 55-degree soil temperature,” she says.
- Fall application: Apply when soil temperature drops to 70 degrees. “Most winter weeds (like annual bluegrass and chickweed) start to germinate when the soil temperature reaches below 70 degrees,” Brown says.
Check your local soil temperature using a soil thermometer or online resource. Most areas need 2 applications per year — spring and fall — for complete weed control.
Applying pre-emergent herbicides too early or too late will be ineffective. A premature application will break down or wash away before it has a chance to disturb the weed’s growth. But if you apply too late and weeds have already sprouted, you’ll need a post-emergent herbicide instead.
See Related: When to Apply Pre-Emergent Herbicide (Spring & Fall Guide)
FAQs About Applying Pre-Emergent Herbicides
No, apply pre-emergent to dry grass. Wet grass blades prevent granules from falling to the soil and cause liquid sprays to run off instead of sticking to the lawn. Wait until morning dew dries before applying.
Wait 24-48 hours before mowing after a pre-emergent application. This gives the herbicide time to settle into the soil. Mowing too soon, especially bagging the clippings, can remove some of the product before it activates.
Stay off the lawn for at least 24 hours after application. Keep pets and children away for 24-48 hours, or until after the first watering. Check your specific product label for exact re-entry times, as they vary by formulation.
Most lawns need 2 pre-emergent applications per year — 1 in early spring and 1 in early fall, but this can differ depending on your location and the product you’re using.
In areas with a longer growing season, split applications (applying half the rate twice, about 6 weeks apart) can be used for prolonged weed control.
“Most granular products last between 6-12 weeks, and some liquid applications can last up to 6 months,” Brown says.
Let the Pros Handle Your Weed Prevention
Pre-emergent timing is everything. Apply too early or too late, and you’ve wasted time and money. LawnStarter’s local lawn treatment professionals know exactly when soil temperatures are within range in your area. They’ll handle the measuring, mixing, applying, and watering — all at the right time.
Free quotes in under 2 minutes. No contracts. Easy online booking.
Get matched with top-rated lawn pros in your area who’ll keep your lawn weed-free all season. Focus on enjoying your yard instead of fighting weeds.
Read More:
- Reasons Why Weeds Grow in Your Lawn
- How to Prevent Weeds From Growing in Your Lawn
- Applying Post-Emergent Herbicides to Your Lawn
Sources:
- John Fech, Extension educator at the University of Nebraska, Omaha, NE. Personal interview.
- Samantha Brown, horticulture agent with Clemson University, Anderson County Cooperative Extension Office. Personal interview.
Main Image Credit: Krtichai / Adobe Stock Free / License