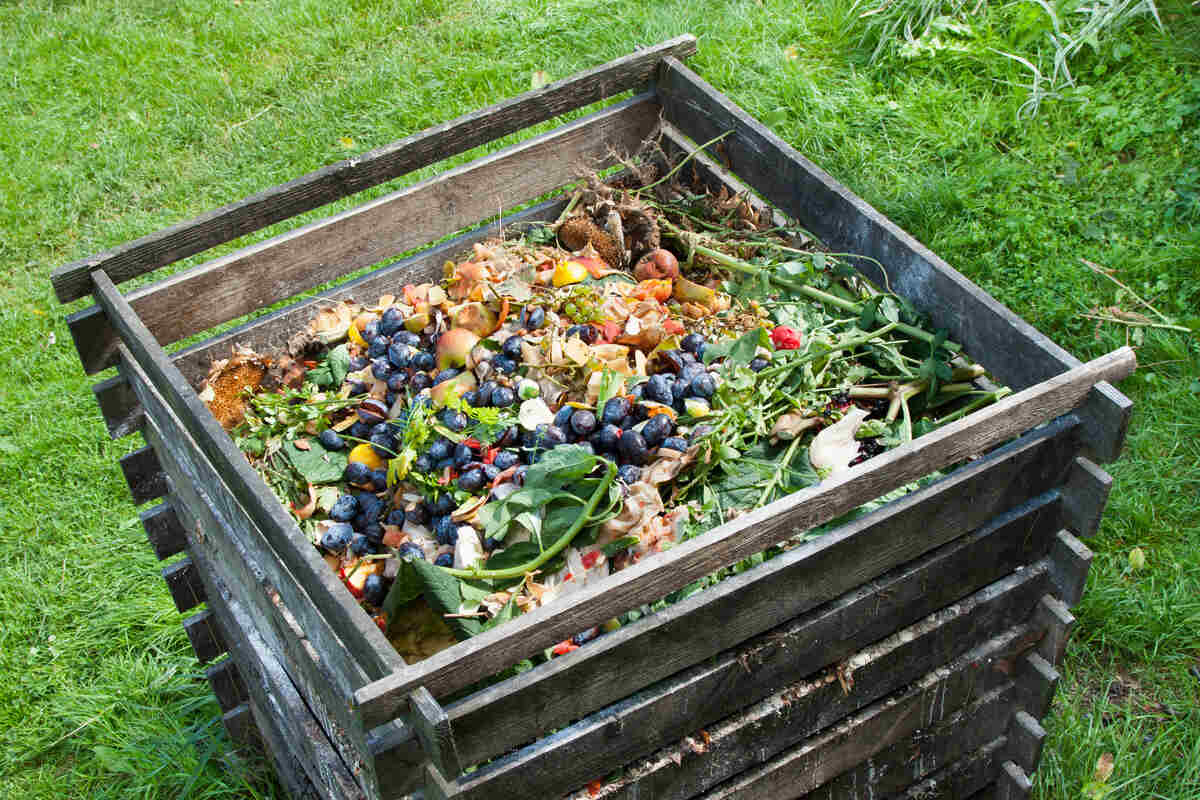
If you are new to gardening or lawn care, you’ve likely encountered the word composting. Experienced gardeners know how beneficial compost is for lawns and gardens. But if you’re a beginner, you may wonder how this works. This article will show you how to start composting with a few simple steps and see the benefits for yourself.
Why You Should Try Composting
Composting is good for lawns (as well as for gardens): While compost has been a mainstay for enriching garden soil, homeowners are learning that compost can be incredibly useful for their lawns when applied in a special process called topdressing.
Composting is good for the environment (and your wallet): The U.S. Department of Agriculture estimates that 30-40% of the food supply is lost due to waste. And that waste adds up to 22% of the rubbish that ends up in municipal landfills. If you’re looking for a more sustainable lifestyle, learning how to compost at home is a good step in that direction.
What Is Composting?
Basically, organic composting is a natural process in which a pile of yard waste and kitchen scraps decomposes into organic matter. Mix the right ingredients in the right proportions, and bacteria, fungi, and earthworms will produce a material praised as “black gold.” This is added to soil to improve its structure, fertility, and water-holding capacity.
How Does Composting Happen?
The composting process requires five components:
- Carbon (C)
- Nitrogen (N)
- Moisture
- Oxygen (O2)
- Microorganisms
In the presence of moisture and oxygen, microorganisms such as bacteria, fungi, bugs, and worms work in three stages to break down the biodegradable materials into humus.
Experts say the composting process can take anywhere from a few months to three years, though a well-managed compost pile could be ready in two to four months. You can take many steps to move things along and get your lawn and garden in shape more quickly.
The 3 Stages of Composting
Stage 1: Initial Organic Decomposition
In the first stage, mesophilic organisms (which live in moderate temperatures from 68 degrees to 113 degrees Fahrenheit) begin to break materials into smaller pieces. This stage takes a couple of days and begins to increase the pile’s internal temperature.
Stage 2: Complex Organics Break Down
When the temperature becomes too warm for mesophiles, the second stage starts, and thermophilic microorganisms (which thrive from 113 degrees to 252 degrees Fahrenheit) take over.
These higher temperatures let thermophiles efficiently break down proteins, fats, and complex carbohydrates into finer particles. Stage two can span days or months, depending on the conditions within the compost pile.
Stage 3: Breakdown
As thermophilic microorganisms use up the materials, the pile’s temperature starts to drop, allowing the mesophiles to retake control of the process. During this final step, mesophiles finish breaking down the organic materials into usable compost.
| 3 Stages of Composting | |||
| Stage 1 | Stage 2 | Stage 3 | |
| Temperature | 68 – 113°F | 113 – 252°F | 68 – 113°F |
| Microorganisms | Mesophilic | Thermophilic | Mesophilic |
| Length of Time | 5-10 days | Days to Several Months | Several Months |
| Processes Occurring | Breakdown of materials into smaller pieces | Breakdown of proteins, fats, and complex carbohydrates | Cooling and maturation |
What to Compost
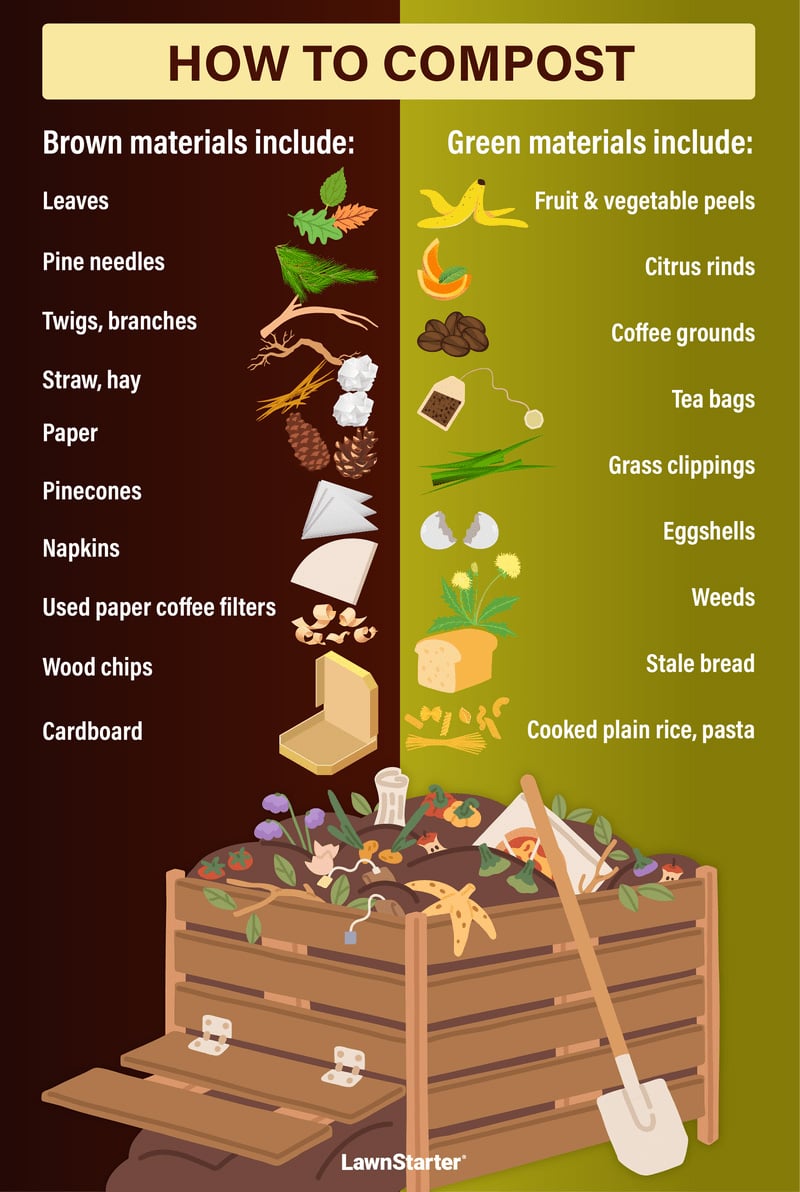
Most materials in compost piles can be classified as brown or green materials.
- Brown materials are carbon-rich items that provide energy to the microorganisms in the pile and give compost its light, fluffy body. Typical brown items are wood-based or fibrous: dry leaves, branches, stems, sawdust, tree bark, shredded newspaper, corn stalks, wood ash, and pine needles.
- Green materials are nitrogen-based waste materials. They provide amino acids and proteins needed for the bacteria and fungi to do their job. Food scraps, coffee grounds, green leaves, and grass clippings are excellent nitrogen-rich green materials.
Pro Tip: A simple rule of thumb is to make sure the compost pile is approximately 2/3 “brown” materials and 1/3 “green” materials.
Note: Manure is not recommended for home composting piles.
Different Ways to Compost
There are many ways to set up a composting spot in your backyard (or kitchen). The main difference is where and how you pile the materials. Home composting methods offer flexibility and vary in cost and difficulty.
Here are five composting systems to consider:
Outdoor Composting Methods
- Piling: You literally heap the materials into a pile and turn them periodically to aerate. You can put it in the sun or shade, but sunshine will quicken the process.
- Composting bins: Composting bins can be open or enclosed. This can be a DIY building project or can be purchased.
- Open bins are partial structures that allow ventilation and aeration. One side is easily accessible so you can add materials and turn the pile.
- Enclosed bins use a lid to enclose the material completely, eliminating both the sight and smell of a compost pile.
- Tumblers: If making a batch of backyard compost is your dream, this is the easiest way to get started. Compost tumblers are a unique, efficient type of enclosed compost bin. Cylindrical in nature, a tumbler has hand-held insets or a handle that allows it to be “turned” or tumbled easily.
- Bokashi composting: Bokashi composting starts indoors but ends up outside in the soil for the last phase of decomposition, so we’ll consider it an outdoor method. Bokashi is more a method of fermentation than composting.
Here’s how Bokashi works: Kitchen scraps are mixed with an inoculated bran in a bucket to start the fermentation. Then, the fermented mixture is placed in the ground for a few weeks to finish the process.
Note: Bokashi differs from other composting methods because you can compost things like meat scraps and dairy products. Environmentalists love that it’s easy to reduce food waste and repurpose it in their gardens.
Indoor Composting Methods
Vermicomposting, or worm composting, is a method of composting that relies heavily on a type of worm known as a red wiggler to break down the materials. It is often done in a specialized worm bin and focuses mainly on compostable kitchen waste.
If you live in an apartment, backyard composting isn’t an option, but that’s where worm composting comes in. Vermicomposting is a popular method of indoor composting, and the finished product can be used to give a boost of nutrients to your houseplants or outdoor potted plants.
How to Start a Compost Pile
The simplest way to compost is to create a pile or heap in an outdoor space, tending to it as necessary. If possible, situate it in a dry spot fairly close to a water source.
Check out the process:
- Clear a space in your yard or garden, exposing bare soil.
- Build a base layer of straw or twigs. A few inches will help provide good drainage.
- Add layers of materials to be composted one at a time, alternating between brown and green materials.
- Incorporate a nitrogen source to start decomposition. Some gardeners add a handful of nitrogen fertilizer to jump-start the process.
- Keep the pile moist. It’s recommended that the materials should feel like a damp sponge — wet enough that you can feel the water, but not so wet that you can squeeze water out.
- Turn the compost pile every couple of weeks to allow the center of the pile to “heat up.” A pitchfork works well for this. Aeration provides oxygen to the microbes involved in the composting process and mixes the pile.
What to Put in a Compost Bin?
- Fruit and vegetable peels
- Coffee grounds
- Eggshells
- Tea bags
- Leaves
- Wood chips
- Shredded paper
- Cardboard
- Houseplants
What Not to Compost
- Animal byproducts — dairy products, bones, and meat
- Foods rich in fat and oil (i.e. mayonnaise, peanut butter, salad dressing, or vegetable oils)
- Human or pet waste
- Garden waste treated with pesticides
- Garden waste from sick plants
- Weeds
- Plastics (even biodegradable ones)
- Raspberry brambles
- Large sticks or branches
- Pressure-treated wood
- Leaves or twigs from black walnut trees
Note: To kill most weed seeds, the compostable materials in the pile must reach 140 degrees Fahrenheit for 1 to 3 hours. If your pile won’t get this hot, keeping weeds out of your compost pile is best.
The Do’s and Don’ts of Composting
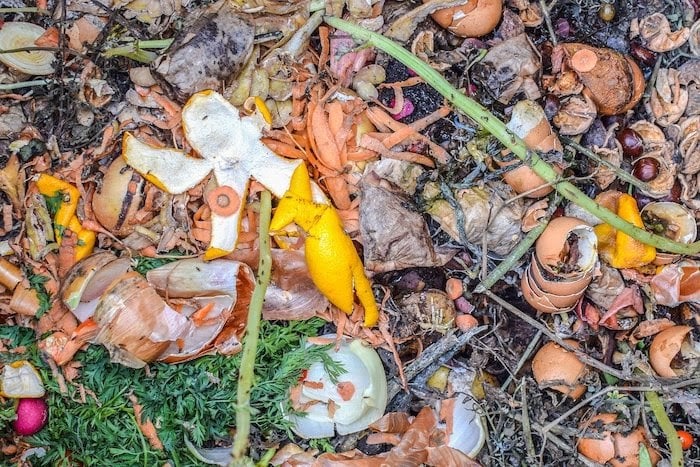
Maintaining the right balance of brown and green materials and the proper amount of water in your compost pile will influence how quickly the process occurs. To speed up decomposition in your compost pile, keep in mind the following “do’s” and “don’ts.”
DO
- Chop all materials into smaller pieces.
- Cover the top of the pile if your area gets a lot of rain.
- Add nitrogen fertilizer if the ratio of brown materials is too high.
- Add pulverized eggshells to increase calcium in your finished compost.
DON’T
- Don’t leave food waste at the top of the pile. It can attract rodents and other critters.
- Don’t put plant roots, diseased plant tissue, or pesticide-infected plant matter in the pile.
How to Tell When Your Compost is Ready
When all of the waste has been broken down and the compost is ready to use, the temperature of the pile will drop dramatically. The finished product will look and feel like dark, rich soil with a deep, earthy smell. At that point, you’ll be ready to apply this fresh soil amendment to your yard or garden.
FAQ
Why Does My Compost Pile Smell Bad?
A well-maintained pile should have an earthy smell. Bad smells may mean the pile is too tight or too wet. Turn the pile to get more air circulation. If it’s too wet, add new dry material.
What Can I Do With Vegetable Scraps if I Don’t Have a Compost Bin?
Try in-place composting. Simply dig a 12-inch-deep hole in your garden, dump in the organic waste, and cover with dirt. Make sure there’s at least 8 inches of cover to discourage animals from digging.
If you’ve been processing veggies for canning or freezing and have a lot of trimmings, dig several holes so that you don’t concentrate all the material in one spot.
How Do I Store Compost?
If you’re going to use the compost in a week or two, the pile will be fine if left uncovered. For longer storage, place the compost in bags or an empty garbage can and move it to a dry place. A plastic bin with a loose-fitting lid will work, too.
When is The Best Time To Start a Compost Pile?
Autumn is the best time to collect dead leaves, garden debris, and organic kitchen food waste to make a compost pile. When these materials are combined to create an open air compost pile, they’ll start the decomposition process over the winter and eventually turn into carbon-rich material.
Organisms in compost piles can thrive even in winter, as the bacterial colonies in the compost change with temperature. The bacteria that are active in cold weather usually work a bit more slowly, but it is possible to have a very active, steaming pile even in the winter. So rake those leaves and start composting at home this fall!
When to Call in a Professional
Learning how to compost is an excellent starting point to boost your lawn’s health. Having said that, lawns also need proper maintenance. If you need some help with that, consider calling a lawn care professional. A local pro can take care of the maintenance needed to keep your lawn looking its best.
Main Image Credit: Shutterstock
Additional source: Live Science
