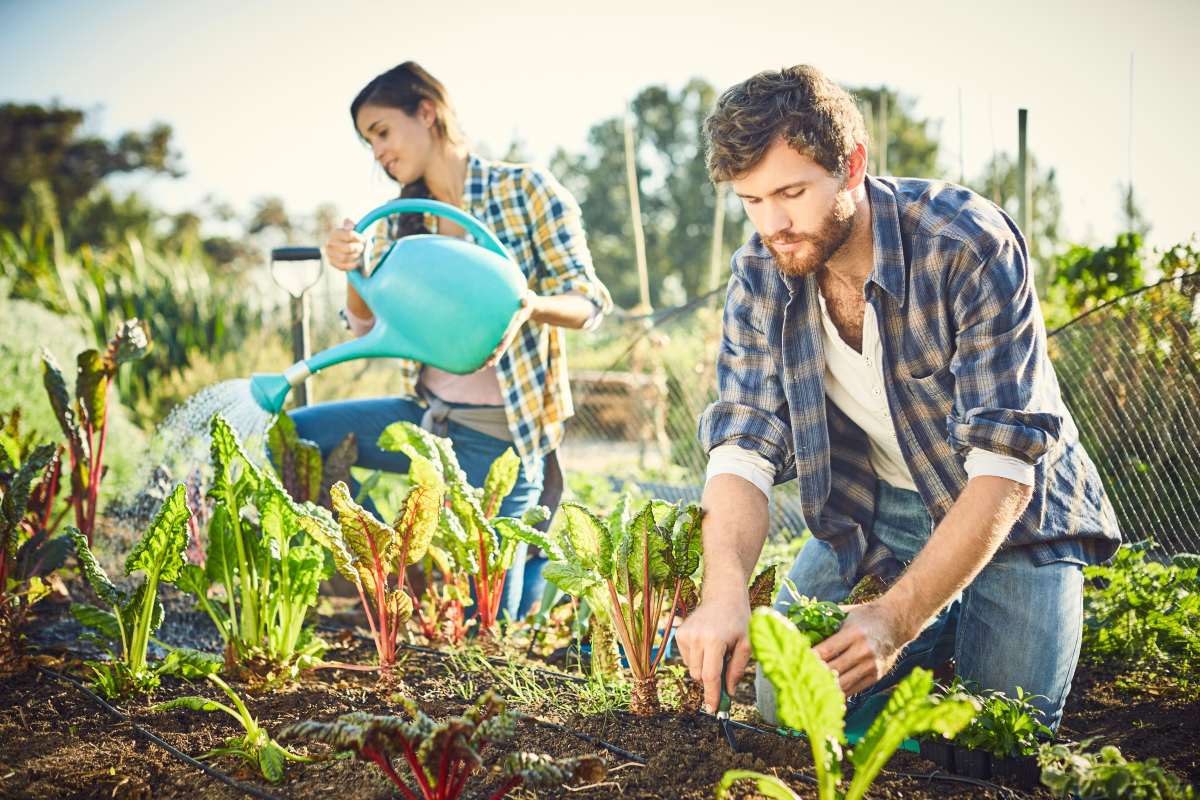
Start by watering seeds daily to support germination. After they germinate, water new seedlings every other day to help them settle into their new home, and irrigate established vegetables 1 to 3 times per week to promote deep roots. Ensure 1 to 2 inches of water weekly. Those are the basics of how much and how often to water your vegetable garden from planting to harvest.
To go beyond these basics, upgrade your gardening skills. Learn how to water your vegetable garden in particular, adapting the rules for your soil type, plants, climate, and gardening techniques.
Read our guide to understand your garden’s water needs better and learn the best irrigation practices for homegrown vegetables.
Understand Your Garden’s Water Needs
Most veggies and herbs need 1 to 2 inches of water per week spread across 1 to 3 applications. Adjusting these amounts and frequencies to fit your garden’s soil, location, and types of crops can lead to healthier plants, better drought resistance, and richer yields.
How to Water by Soil Type
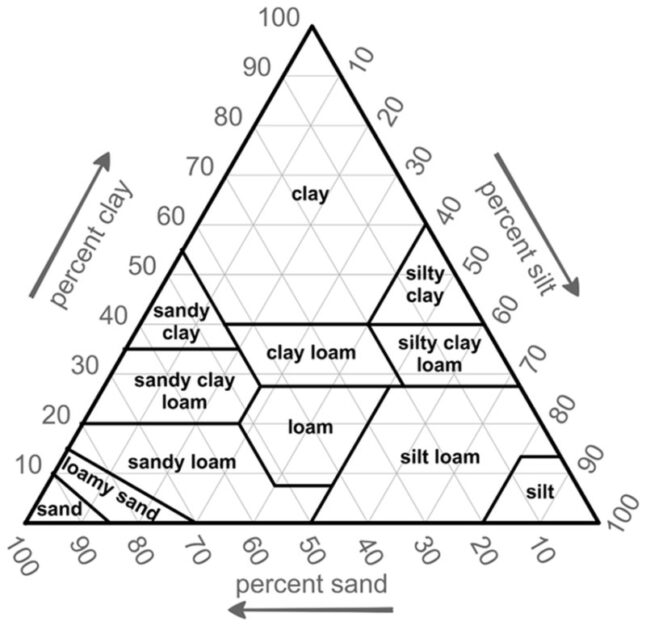
Garden soil combines sand, silt, and clay. How much of each material is present decides the soil type, how it absorbs, holds, and drains water, and the best irrigation method.
Sandy soil has a loose texture with more sand particles (large and coarse) than silt and clay. When it rains or you irrigate, sandy soil accepts water fast and won’t form puddles or runoff. On the other hand, because the water travels easily through its layers, it keeps little moisture available for roots, and plants are often exposed to dry soil.
Because of its poor water-holding capacity, irrigating sandy soil more often and with a lower amount is better. For example, you’ll get better results by watering your garden beds twice weekly with 0.5 inches each session rather than applying 1 inch in a single round.
Clay soil is rich in clay particles (soft and tiny) and has a heavy, dense structure. It’s slow to absorb water, so adding a large volume quickly only leads to puddling, runoff, and evaporation.
The best way to water clay soil is gradually by using drip irrigation systems or soaker hoses. When irrigating with a garden hose and a wand, apply water to a plant until it starts to puddle, then move to another plant and return later to add more. This way, you give the clay soil time to absorb the moisture.
On the other hand, clay soil has excellent water-holding capacity. This means that while an irrigation session takes longer, moisture sets in deep into the soil and stays there for a long time. Watering once a week is usually enough.
Silty soil is common near bodies of water. It has mainly silt particles (larger than clay, smaller than sand) and a soft, soapy texture. It holds water well but has a fragile, unstable structure that erodes quickly under heavy rain or watering. Water silty soil more lightly and frequently than other soil types.
Loamy soil is a balanced mixture of sand, clay, and silt particles with good drainage capacity. It doesn’t pose special problems when it comes to irrigation. Friable loam soil absorbs and keeps the water well, so rainfall should always be measured and considered when deciding how much to irrigate after precipitation.
Three Ways to Check Your Garden Soil
If you’re the scientific type and want precise results, take some soil samples and send them to the local Cooperative Extension Office. If you’re more of a hands-on gardener who likes DIY approaches, try one of the following tests to approximate your soil type.
The Jar Test
Collect a few soil samples across the garden and sift them through a mesh sieve to remove large debris. Put the remaining soil into a clean, dry jar to fill ⅓ of its volume. Add about ⅔ water, leaving some space at the top.
Cap the jar and shake it until you get a uniform mass. Set the jar on a leveled surface, wait, and observe the forming layers:
- The sand content is the compact layer of large particles settling down after 1 minute.
- The second layer, requiring about 2 hours to set on top of the sand, is the silt layer.
- The top one, taking about 48 hours to settle down, is the clay.
Mark each level with a line and observe what type of soil particles are predominant. Use the USDA soil texture triangle to read your jar test for a more precise interpretation.
The Ribbon Test
Take a bit of soil in your palm and add water until it’s moist enough to form a mud ball. Knead it in your hand to mix all the particles well. Then start squeezing it from the top between your thumb and forefinger, pushing it into a ribbon.
When the ribbon breaks, start another and continue until the mud ball ends. Measure the ribbons. The longer the ribbons, the more clay in your soil:
- Short ribbons, under 1 inch, show sandy soil.
- Long ribbons, over 2 inches, indicate clay soil.
- Ribbons about 1 to 2 inches long signify loamy soil.
The Feel Test
Take some soil in your palm. Add water until the soil becomes a thin layer of mud. Use the fingers from the other hand to feel the particles. If smooth, like flour or talc, it’s mostly clay. If you feel gritty particles, the soil has more sand.
Adjust Watering to Climate and Weather Conditions
Temperature, rainfall, and air humidity can drastically change how soil manages water.
Temperature
Water evaporates faster from the soil surface when temperatures are high. During hot summer weeks, when even morning temperatures are up, apply more water to ensure enough soaks a few inches deep into the soil.
Take special care during unexpected hot spells in spring and fall when cool-season veggies are still young and frail. Ensure enough moisture to protect them from the unusual heat.
Also, pay attention to cool spells during summer and adjust your irrigation schedule to prevent too much moisture from building up.
Air Humidity
If you live in a place with humid summers, like Florida, you’ll water less often than gardeners in California or Nevada, where summers are dry.
When air is already humid, it can’t absorb much extra water, so evaporation is low, and moisture stays longer in the soil after irrigation. On the other hand, dry hot air works like a sponge, sucking up soil moisture fast and mercilessly.
Wind
Air currents increase evaporation, so the ground and plants dry faster in windy areas. If your garden is exposed to frequent winds, you might need to irrigate more often.
How Much to Water Different Types of Vegetables
Vegetables require different amounts of water and nutrients depending on their type. Here are a few examples of common vegetables grown by home gardeners and their water needs:
| Vegetable | Water Requirement (per square foot per week) |
| Peas | 1 inch |
| Beans | 1 to 2 inches |
| Arugula | 1 to 1.5 inches |
| Radishes | 1 inch |
| Spinach | 1 to 1.5 inches |
| Lettuce | 1 inch |
| Kale | 1 to 1.5 inches |
| Carrots | 1 inch |
| Tomatoes | 1 to 2 inches |
| Cucumbers | 1 to 2 inches |
| Bell peppers | 1 to 2 inches |
| Eggplants | 1 to 2 inches |
| Cabbage | 1 to 1.5 inches |
| Broccoli | 1 to 2 inches |
Irrigating Your Vegetables by Root Depth
Vegetables behave differently towards water depending on how deep their root system is.
Plants with shallow roots are more sensitive to changes in soil moisture and air temperature. They are less resilient to drought and must be watered more often, especially if grown in sandy soil with a low organic matter content.
Some common examples are cucumbers, spinach, onions, leeks, carrots, radishes, broccoli, celery, cabbage, and Brussels sprouts. Irrigate these as often as every day, if necessary, during summer droughts and periods of high heat.
Vegetables with deep roots have access to water deposits protected from evaporation in the lower layers of the soil. They are less vulnerable to drought and more resilient to heat. If grown well, with deep and infrequent irrigation, to develop deep and robust roots, they rarely need more water than usual during droughts.
The most popular deep-rooted vegetables are tomatoes, asparagus, parsnips, rhubarb, sweet potatoes, okra, pumpkins, and watermelons.
Veggies with medium root depth are somewhere in between. You’ll need to water them during drought and high heat, but not as much as the shallow-rooted species. This category includes eggplants, turnips, beans, kale, peas, peppers, rutabaga, and potatoes.
Water Needs Vary by Plant Growth Stage
Vegetables need different amounts of water depending on the stage in their life cycle.
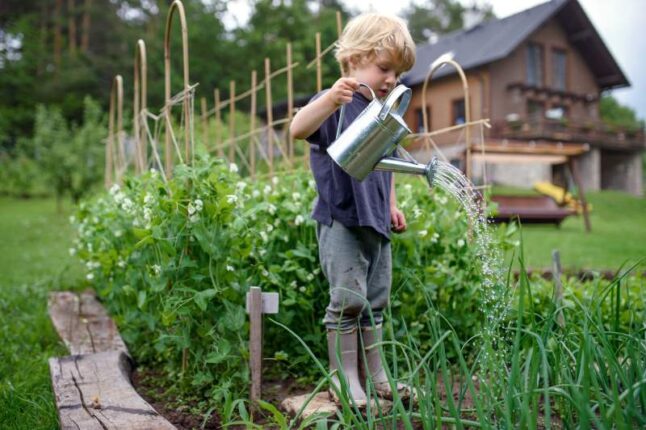
During seed germination, you must keep the soil permanently moist (not wet) with frequent watering to keep the process going. Depending on the weather, this might mean watering once a day or more often during a dry, hot spell. Use a sprinkler system with the mist setting or a garden hose with a soft nozzle to avoid displacing the seeds. Water often and in small amounts.
Fragile, new seedlings with barely developed roots also need more attention but in a different way. Water less often, unless very hot, about once every 2 or 3 days, and deeper to promote robust root systems. Keep the flow soft and slow to avoid damaging the plants, and water the soil, not the plant leaves. Drip irrigation and soaker hoses are especially effective at this stage.
Established plants are prepared for regular watering. Their roots are strong and deep enough to face moderate drought conditions and thrive with one watering per week.
Mature vegetable plants flowering and fruiting need more water. If you think about how juicy cucumbers, zucchini, and tomatoes are, you’ll understand that you must apply extra water when your plants are producing fruit. Watch the plants and check the soil to determine the amount and frequency of irrigation required.
Signs of Underwatering and Overwatering
Recognizing the signs of overwatering and underwatering is essential for correctly watering your kitchen garden. Here’s what to look for:
| Underwatering Signs | Overwatering Signs |
| • Dry leaves, crispy to the touch, with brown spots • Plant leaves curl upward to reduce evaporation • Lightweight, dry soil • Wilting plants • Leaves low on the plant turn yellow • Small, dry fruits | • Soft, limp leaves with brown spots • Plant leaves curl downward to increase evaporation surface • Plants slow their growth, and leaves begin to yellow (old and new leaves) • Blisters or water-soaked spots present on leaves and stems • Plant crown begins to rot • Cracked fruits • Mushy stems and leaves • Wet soil |
Not all wilting plants need extra watering. Mid-day slump is a normal adaptive response to high heat. Wait until evening to see if plants recover their sturdy look.
How to Water In-ground Beds, Raised Beds, and Container Gardens
Vegetables planted in in-ground beds need 1 to 2 inches of water per week. The soil around them works as an insulator, reducing evaporation compared to raised beds and containers.
The soil inside raised beds dries up faster, requiring more frequent watering and higher amounts during hot periods. Check moisture levels daily when exposed to drought and heat.
Since containers are smaller than raised beds, they’ll dry up sooner, especially if exposed to direct sunlight during mid-day and afternoon. During hot spells, your container plants might need watering every day. Keep an eye on the plants and soil.
When to Water Vegetables
Theoretically, you can turn your irrigation system on at any time. However, there’s a best, a second best, and the worst time of day to water your vegetable garden. Let’s see when pro gardeners do it.
The Early Morning Advantage
The best time of day for watering vegetables is early morning – at least before 10 a.m., but the earlier, the better. This leaves enough time for water to soak deep into the soil before the sun evaporates any moisture in sight. At the same time, the morning sun dries any drops of water on the leaves relatively quickly, reducing the risk of fungal diseases.
Evening Watering is Second-Best
Some of us don’t have the luxury of the perfect early morning irrigation routine. When that’s the case, a late afternoon to early evening irrigation is the second best option – around 4 to 6 p.m. You just need to take extra precautions:
- Try to water your home garden when the heat of the day has subsided, but the sun still has an hour or two in the sky to dry out any wet leaves.
- Don’t use overhead irrigation in the evening to keep the leaves from getting wet.
- Do your best to avoid sprinkling water on leaves directly or splashing it from the soil.
The biggest risk with evening watering is that your plants’ leaves will stay wet overnight, which could cause fungal diseases to grow. That’s why getting as little water on the leaves as possible when you irrigate in the evening is so important.
Worst Time to Water: Mid-day
The worst time to water your vegetable garden is midday, from 10 a.m. to 4 p.m. Most of the water evaporates because of the sun, failing to feed the plant roots. You risk wasting water, money, and time and exposing your plants to underwatering.
The Best Way to Water Kitchen Gardens for Rich Yields

To conserve water and protect plants from fungal diseases, always water the soil at the base of the plant, avoiding the leaves. The best watering techniques you can use to achieve that are drip irrigation, soaker hoses, or manually watering vegetables with a garden hose or watering can. Traditional sprinklers are not a good option for vegetable gardens.
Drip Irrigation Kits
Also known as trickle irrigation, drip irrigation uses a network of plastic tubes with holes to deliver water to each plant directly on the soil, towards the root zone. It can save up to 50% water compared to overhead sprinkler irrigation systems.
Dripping ensures better water absorption, prevents runoff and erosion, and can keep watering your garden when you’re away. Drip irrigation works best for plants like tomatoes, peppers, cucumbers, head lettuce, veggies, and herbs grown in bunches like basil or thyme.
Here are some examples of drip irrigation kits available online for home gardens:
- Rain Bird Drip Irrigation Garden Watering Kit (Amazon)
- DIG Raised Bed Garden Drip Irrigation Kit (Home Depot)
- Raindrip Vegetable Garden Kit (Walmart)
Soaker Hose Systems
Made from permeable materials that let the water slowly transpire, soaker hoses are a good alternative to drip irrigation for row crops like radishes, carrots, onions, spinach, and leaf lettuce. You lay them down on the soil along planted rows, and water slowly slips out of the hose and absorbs into the soil.
Manual Watering With a Garden Hose and a Wand
A more traditional method is to water the vegetables using a garden hose with a watering wand. The wand allows you to reach into planting beds without stepping on the soil and water each vegetable individually at the base of the plant.
It’s more time-consuming, but it is still a good solution if soaker hoses and drip irrigation are unavailable. Ensure a slow water flow to avoid washing off the soil and exposing the plant roots.
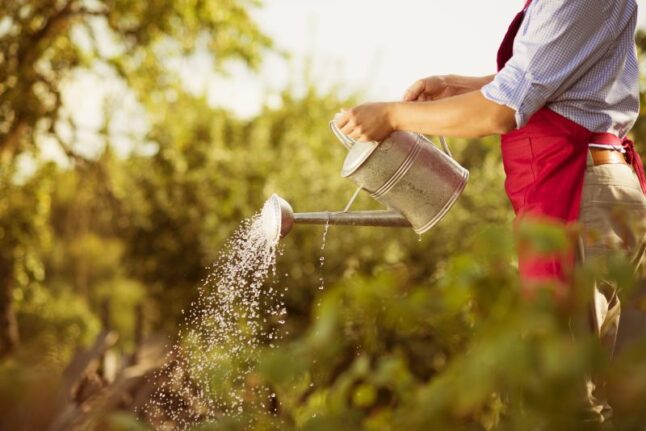
Manual Watering with a Watering Can
Using an old-fashioned watering can with a nozzle is also an option. Since you must go back and forth from the hose to fill it up as you water, this method is the most time-consuming. Consider it for small cultivated areas like a 4×4 garden bed or container gardening.
Sprinklers As a Last Resort
Consider overhead sprinklers as a last resort. Use them if your plants suffer after a dry and hot day and you must spread some water fast. Make it a morning intervention to minimize leaf wetness after the sun goes down.
Don’t make it a habit. Overhead watering exposes the plants to fungal diseases; some nasty ones can kill your veggies quickly and compromise your crops.
DIY Watering Devices
For a small vegetable garden, you can also use DIY devices for watering. One method is burying a plastic bottle with a perforated bottom halfway into the soil near each plant. You fill the bottle, and water slips gradually into the soil, irrigating the roots.
Another method is building a drip irrigation system using gravity. It’s quite easy. You connect drip hoses to a rain barrel placed at least 5 feet higher than the garden to ensure a water flow rate of 2 psi (pounds per square inch) in the hose.
How to Measure Rainwater, Soil Moisture, and Irrigation Flow

The surest way to keep track of how much and when to water your vegetable garden is to check and measure moisture periodically. Here’s how and what to use.
Use a Rain Gauge
It’s important to know if the last rain has brought down 2 inches of water per square foot or barely ⅜ of an inch. What you estimate from watching and hearing the rain can be misleading. It’s safer to install a rain gauge in one of your garden beds to see exactly the rainwater amount your soil receives.
Rain gauges are open, transparent plastic or glass containers you stick into the ground or mount on a stake or a fence. They collect water during rain and have a scale showing precipitation amount per unit area (usually per square foot). Rain gauges are affordable, practical, and easy to use.
Here are a few models suitable for kitchen gardens:
- AcuRite 5″ Capacity Easy-to-Read Magnifying Acrylic Rain Gauge (Amazon)
- AcuRite 5 in. Glass Rain Gauge (Home Depot)
- La Crosse 705-109 Waterfall Rain Gauge (Walmart)
Rely on Soil Moisture Meters
A fast and easy way of measuring the moisture content in your garden beds is by using a soil moisture meter. Soil moisture meters are small handheld devices with probes you put into the soil where you want to test the water content. They are affordable, easy to use, and help you measure moisture at different depths in the soil.
Try the Trowel Test
A more traditional method of testing moisture is the trowel test. You dig a small hole a few inches deep, check the soil color and texture, take some dirt in your hand, and squeeze it. If it breaks down, it’s too dry. If it stays clumped, it’s moist enough.
This test is a bit more complicated when mulching since you need to remove the mulch layer and put it back on after testing. With a mulched garden, it’s easier to use a moisture meter.
Or the Finger Test
This test is easier to use on sandy and loamy soil. Stick a finger into the soil a few inches deep. If you feel moisture, you don’t need to water. If you feel dry soil, you should irrigate.
Clay soil compacts easily and becomes rock hard when dry. This makes it harder to test using your hand. With clay soil, it’s often better to use the trowel test.
Put a Water Meter On Your Hose
You also need a method to measure how much water you put into the ground when irrigating. One way to do it is with a hose-end water flow meter. Installed on the outdoor hose faucet, this device measures the water passing through your hose. It’s perfect for drip irrigation, soaker hoses, and water with a garden hose and a watering wand.
Here are a few popular hose meters you can buy online for pretty cheap:
- P3 P0550 Water Meter (Amazon)
- Worth Garden Adjustable Garden Watering Flow Meter (Home Depot)
- Orbit 3/4 In. Plastic Water Flow Meter 56854N (Walmart)
Install a Hose Timer
You won’t need a hose timer if you’re watering manually using a garden hose and a wand. But it’s very helpful for drip irrigation systems or soaker hose systems. Such a device helps you automate the watering process, saving time and allowing you to go on vacation without neglecting your vegetable garden. You can use a mechanical timer or a digital one.
Water-Saving Strategies
You can grow delicious crops and enough food for your family with lower water bills and less work using smart garden tips that save water.
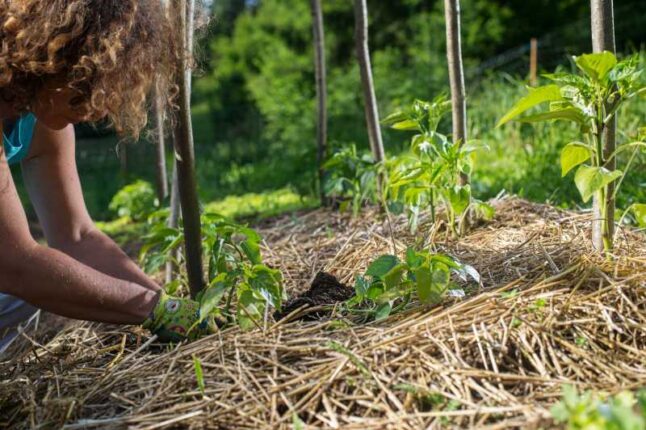
Mulching
Covering the soil with a layer of mulch 2 to 3 inches thick reduces evaporation by up to 50%. You can use grass clippings, dry leaves, wood chips, hay, or straw. Remember that mulch decomposes in time, acting as a slow-release fertilizer, and you’ll need to reapply it a couple of times during the growing season to keep the layer effective.
Grouping Plants With Similar Water Needs
If the size of your vegetable garden allows it, create a garden layout that groups plants with similar water needs together. For example, put thirsty veggies like tomatoes, cucumbers, and zucchini in one area and less thirsty veggies and herbs (sage, thyme, Swiss chard, chili peppers, pole beans, etc) in another.
This way, you can offer each category the proper water amount, saving water and preventing plant damage.
Collecting and Reusing Water
Rainwater is a valuable resource for vegetable garden irrigation. Healthier for plant roots than tap water, it is easy to collect and can help you save money on your water bill.
Place rain barrels to catch water pouring from your downspouts. Use a spigot to fill your watering can, or connect a hose and a pump to spread the collected water more easily across the garden.
Some states, like Nevada and Colorado, restrict collecting rainwater, while others, like Kentucky and Tennessee, offer incentives for this practice. Check the policies regarding rainwater collection in your state before buying and installing rain barrels.
Where you can buy rain barrels online:
- Amazon: FCMP Outdoor RC4000 50-Gallon Heavy-Duty Outdoor Home Rain Catcher Barrel
- Lowe’s: RTS Home Accents 50-Gallons Black Plastic Rain Barrel
- Walmart: Zimtown 50 Gallon Collapsible Rain Barrel
Dealing with Waterlogged Soil
Compacted and poorly drained soils, like those with mainly clay particles, are prone to waterlogging. Waterlogged soil is soaked with water, and roots don’t have access to air for breathing. Plants begin to yellow, and roots rot and die. Depending on what’s causing the waterlogging, you have several solutions to solve this problem and save your garden.
- Improve soil structure and drainage by amending with organic matter to loosen a heavy clay texture and aerating the soil a few times a year.
- Dig a small trench around soil-level garden beds to promote drainage from the plant area.
- Build raised garden beds, which promote better drainage than planting directly in the ground.
- Use live mulch (ground cover plants) instead of dead mulch if the garden is prone to flooding.
- Go with no-till gardening to improve the natural soil drainage system.
- Install a French drain to direct excess water out of the garden.
- Collect rainwater from gutters and downspouts to prevent it from getting into the garden.
Combating Drought Stress
Summer drought makes growing veggies harder and can bring water bills discouragingly high. Suppose you’re a beginner gardener in Arizona, Idaho, California, or Utah. In that case, you might wonder if there is a point in growing vegetables and how to manage the garden during high heat and drought. The answer is yes; you can grow vegetables even in drought-prone states because drought, too, can be fought off with good gardening practices.
Here are a few watering tips to keep your vegetable garden thriving during drought:
- Water deeply. Moisture that reaches deeper into the soil is safer from evaporation.
- Irrigate from 9 p.m. to 6 a.m. to give water time to soak deep into the ground before the sun starts drying the soil surface.
- Focus on peak watering times. Veggies don’t require the same amount of water across their growing process. Seedlings need constant moisture to develop roots, established plants need less water since they can tap into deeper soil, and flowering and fruiting plants require more water. However, you can lower the amount again during ripening to intensify flavor.
- Cover the soil with a thick mulch layer to slow evaporation. Also, consider installing a shade cloth to filter sunlight.
- Use drip or soaker hose irrigation, and avoid overhead watering since it wastes a lot of water.
You can also use these gardening tips to plan your vegetable garden for better chances of success with minimal rain:
- Plant drought-resistant crops and varieties. Some examples of drought-resistant vegetables include Swiss chard, certain varieties of corn (i.e. ‘Hopi Pink’ and ‘Black Aztec’), pole beans, hot peppers, arugula, and okra.
- Grow a smaller vegetable garden that properly handles watering during summer drought.
- Plant earlier in the spring and later in the fall so your young plants aren’t exposed to the hottest, driest part of the year.
- Group plants closer together to shade the soil. Try to put plants with similar water needs in the same area.
- Use the companion planting trick to keep moisture in the soil. Vine veggies like zucchini, squash, and cucumbers work great as living ground covers on garden beds with tomatoes. Three Sisters Gardening – which groups squash, corn, and pole beans – is one of the most successful companion planting methods.
FAQ About How Often and How Much to Water a Vegetable Garden
To make watering your vegetable garden easier and more effective, use these gardening tricks:
• Amend the soil with organic matter like compost or manure to improve water retention and drainage.
• Cover the soil with a layer of mulch to reduce evaporation.
• Group plants with similar water needs together.
• Irrigate in the morning to maximize absorption.
• Ensure good drainage across the yard to prevent flooding and waterlogging in your garden area.
• Grow plants in raised beds if the yard is prone to waterlogging.
• Choose vegetable plants suitable for your location, climate, and soil.
To start a vegetable garden, follow these steps:
• Choose a suitable location with plenty of sunlight and a water source nearby.
• Decide on a proper garden size for your family.
• Pick up the vegetables and herbs you want to grow.
• Draw a layout for your garden beds, setting the place for each plant.
• Prepare the garden beds.
• Seed and install transplants.
• Water the soil to ensure germination and robust root development.
Drip irrigation or a soaker hose are the best ways to water a vegetable garden. Both methods apply water at the base of the plant, protecting leaves from getting wet.
Not necessarily. Healthy vegetable plants with deep roots are resilient to heat and drought, and water evaporates slower if the air humidity is high. You don’t want to add too much moisture and stress the roots. Test the soil moisture level, observe the plants in the early morning and evening for signs of stress, and only water as needed.
When to Call the Professionals
There’s always a good time to bounce ideas off a gardening professional, but some moments are essential. Contact a local landscaping expert through LawnStarter when you plan the irrigation system, level the yard to solve drainage problems, or decide on the garden layout in a difficult spot. With professional help during setup, you can give your garden the best outfit for effective irrigation and enjoy rich, tasty crops all year!
Main Photo Credit: Neustockimages / Canva Pro / License