Your backyard is supposed to be a relaxing, peaceful spot to sit and unwind, not a small pond after heavy rains. How to get rid of all that standing water? We’ll show you how to install a French drain system in your yard in six steps.
Note: We don’t recommend you tackle this project yourself, as installing a French drain is a job best left to a professional. But if you’re an experienced DIY-er, we’ll list the tools you’ll need and show you how to get the job done right.
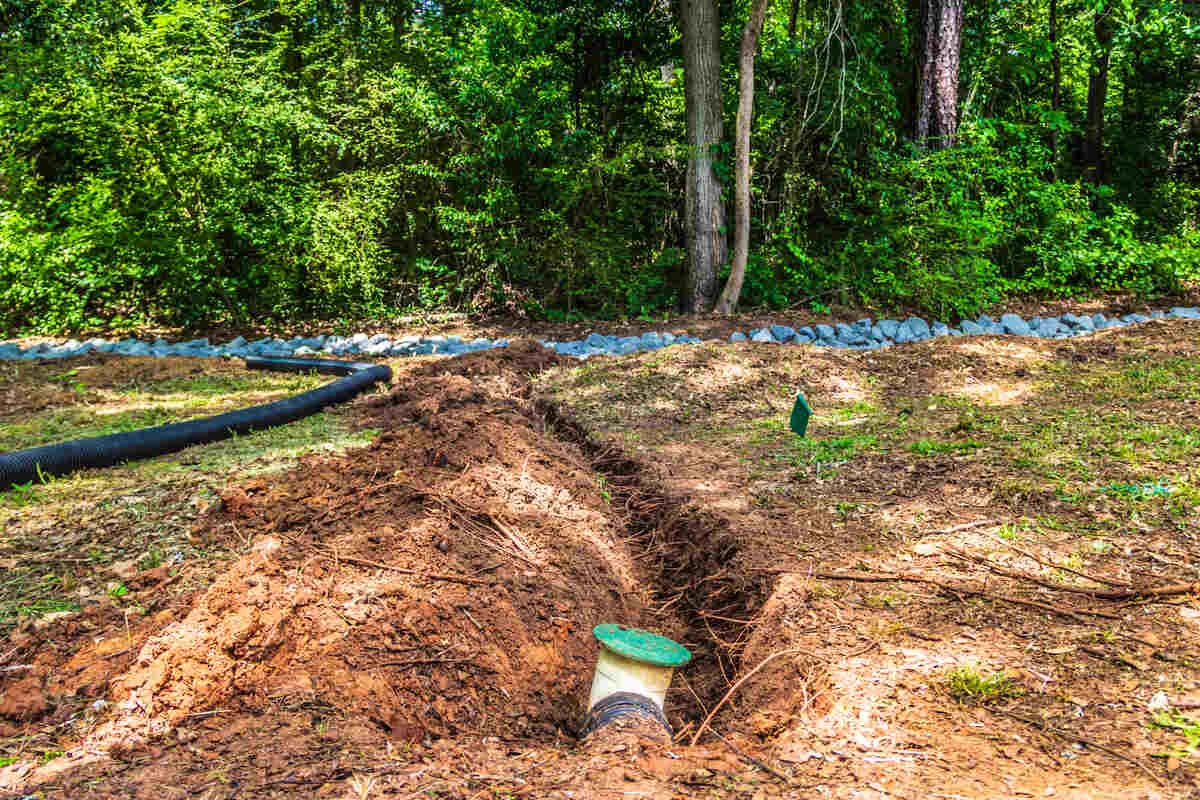
The end result (however you install your French drain): Once this system is in place, your grass will be protected from standing water, the mosquitoes will hang out someplace else, and your backyard will once again be your tranquil oasis.
What is a French Drain?
So, what is a French drain system? It’s a solution for directing surface water or groundwater away from a specific area. It consists of a trench that is filled with gravel and includes a perforated or slotted pipe.
Sometimes referred to as a curtain drain, weeping tile, perimeter drain, or agricultural drain, French drains are commonly used to help protect foundations from water damage.
How Does a French Drain System Work?
Water loves the path of least resistance, and a French drain system is partly designed with that theory in mind. A French drain uses subsurface gravity to redirect “runoff” (excess surface water) and groundwater accumulation away from a home’s foundation, landscaping, or any low-lying area.
Components of a French Drain System:
- A drain box is the entry point for runoff water on ground level.
- The drain box is connected to a perforated pipe.
- That perforated pipe has been laid in a 4-inch deep trench (depth according to the frost line in your area), with perforations facing downward.
- A couple of inches of gravel should surround the perforated pipe and line the trench floor.
- Landscape fabric, also called filter fabric, is wrapped around the perforated pipe and acts as a filter, allowing water to pass but prohibiting weeds, dirt, and other debris from blocking the holes.
- A trench digger, also called a trencher, is needed. This machine produces a clean trench with a flat bottom and smooth walls) to house the pipe, gravel, and landscape fabric.
- The bottom of the trench is dug to have a “pitch to it” (industry slang for slope) that allows gravity to assist excess water in traveling downhill.
- The trench is then filled in with topsoil and “tamped down” on ground level. A tamping machine, also called a plate machine, compacts the soil above the trench to avoid sinkholes in the future).
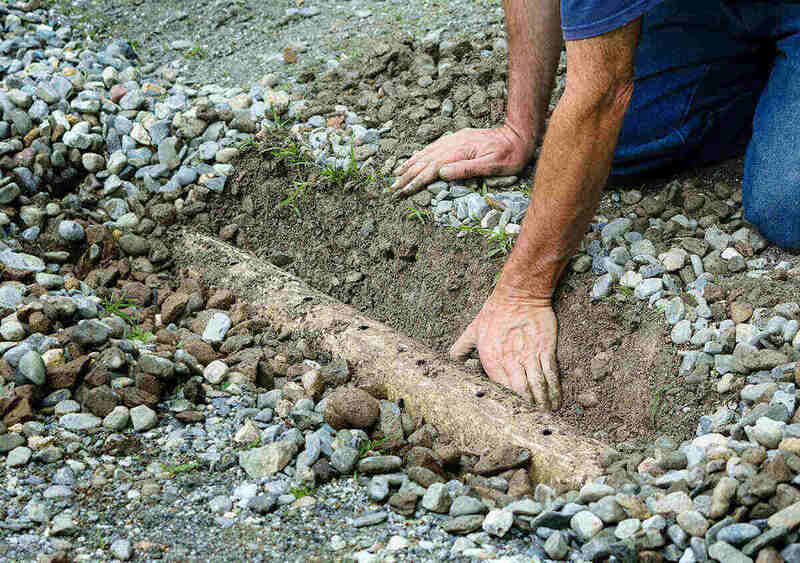
- Gravel or river rocks are added along ground level above the trench and also on top of the drain box to protect it from falling debris like leaves, pine needles, and icing from snow.
- A daylighted pipe can be seen at the exit point. The exit point must be lower than the entry point.
Things To Do (and Check) Before Installing a French Drain
- Permits – Get permission and obtain the necessary documents before starting your French drain installation. Some municipalities and HOAs have strict guidelines regarding certain types of projects.
Also, you don’t want your runoff to head into neighboring properties. You’ll create a nightmare for yourself in legal issues.
- Know Where Utility Lines are Buried – You or your landscaping pro should call your local “Know Before You Dig” line so the local utility companies can come out and “mark” (spray-paint) the location of your gas line, electric, cable, water, etc.
Knowing where these lines are can make the difference between life and death. If a trench digger or backhoe hits a gas line by accident during your French drain installation, the machine operator could be severely wounded or killed.
- Make Sure Your Contractor is Insured and Bonded – You want to make sure the pro installing your French drain (or any other major home or outdoor project) has good insurance and is bonded. This protects him and you.
- Check Your Homeowner’s Insurance – Make sure that you are covered for your own protection, if installing the system yourself. If hiring a pro to install your drain, you’ll also be covered in case of an accident with any of the crew members while on your property.
Tools Needed To Install a French Drain System
- Trench digger
- Shovels
- Pickaxe
- Topsoil and sand
- 4-inch PVC perforated drain pipe
- Drain box
- PVC 45-degree angle joint (clean out point)
- Spray paint for marking the ground
- 4-inch level
- Gravel and river rocks (landscape stones)
- Landscape fabric
- Turf grass
- Spool of string
- Wooden stakes
- Hammer or rubber mallet for stakes
- Work gloves
- Work boots
- Safety goggles
- 4-foot level (use this to help see the pitch)
- 50-foot metal tape measure (retractable)
- Glue or fasteners for combining lengths of pipe
- Dumpster to remove and dispose of topsoil
How to Install a French Drain in 6 Steps

Time To Get Your Hands Dirty!
Now that you have a basic understanding of the components of a French drain system, how it works, and you have gathered all your tools, it’s time to get your hands dirty.
Not only are your hands getting dirty, but so is the rest of you! Wearing the proper work clothing will protect you and make moving around in the trench much easier.
Work gloves protect your hands, and work boots protect your feet. Don’t wear sneakers or Crocs — getting clods of mud off sneakers is a daunting process. Crocs have large holes — the soil will sneak through the holes and become slippery.
Safety goggles are crucial, especially if you are using machinery, as small rocks will get kicked up and can fly into your eyes.
To get the best outcome, dress appropriately and check the weather on dig day. Make sure the weather is dry, and the soil isn’t saturated from rain. Soil is hard to work with when wet.
Step 1: “Mark the Area” for Your French Drain’s Location
Look for an open area free of obstacles to lay out your drain. You don’t want any boulders, shrubs, trees, or tree roots.
The utility companies should have already come out to mark the lines, so you know to avoid those areas.
Now is a good time to determine the entry point and the exit point (the drain box location and the entire run of the trench). Use your 50-foot metal tape measure and figure out the length of the run, so you’ll know how much PVC piping you’ll need.
You’ll also be able to figure out the amount of gravel, landscape fabric, etc., needed at this point. Make sure your location isn’t near your house’s foundation.
Note: You need to determine the location of a quick, easy-cleanout point for your PVC pipe. Simply attach a 45-degree angle joint to the start of the pipeline and then connect it to another pipe that can stick out of the ground.
Begin by hammering the stakes every 2 feet into the ground in a row to mark the area of the drain box and the direction of the trench. Then, with the spool of string, tie the string to each stake, and you’ll have a physical outline/guide for knowing where to spray paint the ground.
Spray paint on the ground, following the same path as the string lines you created with the stakes. You can remove the stakes and string once the ground is marked with your spray.
Step 2: Dig the Trench
Once you’ve marked the shape of the trench with spray paint, it’s time to start digging.
Don’t forget to figure out the location and configuration of the drain box. This actually determines the entry point for the runoff on the ground’s surface.
A word of caution, when removing the turf (grass), be as gentle with it as possible. You will need to re-lay it back in place, if you are not using river rocks to extend the length of the trench above ground.
Your French drain should be 12 inches wide, with a depth between 18 and 24 inches throughout its length, and slope down slightly (at least 6 inches for every 50 feet) for efficient drainage.
If you live in a colder climate with freezing temperatures, you may need to check with your local office to make sure of the trench requirements and to determine what is deep enough to avoid any frost-line issues.
Step 3: Lay the Landscape Fabric
Once the trench for a drainage system has been dug, landscape fabric (water-permeable landscape fabric) should be unrolled and laid down. Leave at least 10 inches of excess fabric along both sides as a protective layer for your pipes.
Since it’s easy to trim off extra material if needed, err on the side of caution when fitting the fabric into the trench.
Step 4: Add Gravel to the Lining
To complete the lining of the path, spread a 3-inch thick layer of gravel over the landscape fabric and make sure it lies flat along the entire trench. The gravel helps to direct water away from the side of the path while also preventing any weeds or grass from growing through or within it.
Step 5: Place the Pipe
Once the gravel has been installed, the next step is to add the pipe. Carefully measure the pipe and ensure it goes from the entry point to the designated drainage exit spot, with holes pointed downward.
Though it might be counterintuitive, pointing the holes downward will ensure that the drainage can seep directly into the ground.
PVC perforated pipe is preferred because flexible plastic pipe might collapse on itself once the topsoil is added to the trench.
You might need an additional piece of pipe called an elbow angle. This can also be used for the clean-out point and also another one for the drain box connection.
The elbow angle is a connector that secures the horizontal pipe running along the base of the trench to the vertical pipe heading up to the drain box.
After the PVC perforated pipe is placed along the trench, additional gravel is placed on top of the pipe. You want to leave about 5 inches between the top of the gravel and the surface. At this point, any excess landscape fabric should be folded over to protect the drain pipe.
Step 6: Fill and Cover the Trench
Once you have folded the landscape fabric together as an extra layer of protection, start to fill in the trench with sand and topsoil using a shovel.
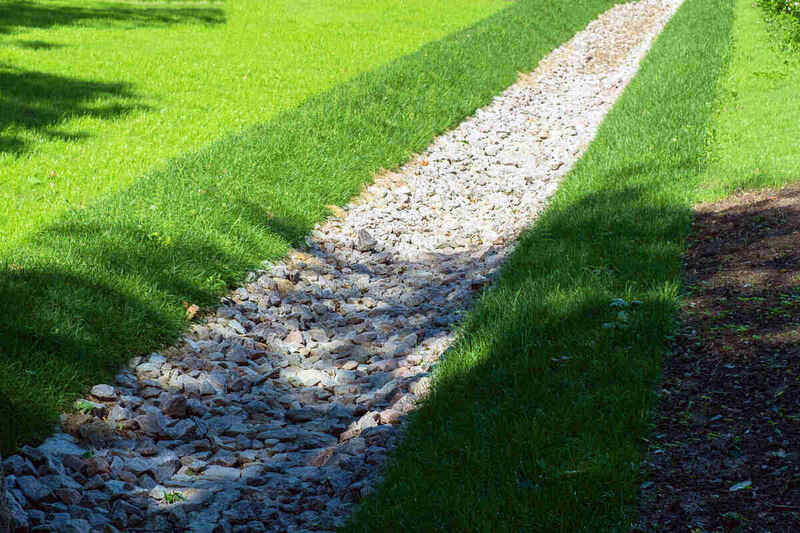
Lay turf cover on top to further secure the drainage system in place. A bed of stones is recommended to be added around the end of the drain so that it stands out visually and is separated from other parts of the landscape.
If the existing grass has been destroyed, you can purchase sod, or you can plant grass seed to repair the area from digging. The only areas that need to remain visible are the two ends of the pipe — the entry point and the exit point.
The soil that you dug out initially to create the trench should be close by so you can fill in the trench. You might want to place any excess topsoil in a dumpster.
If your trench is deeper due to the frost line in your area, consider using a plate machine (tamping machine). This machine compacts the soil on the ground level so you don’t get sinkholes in your yard.
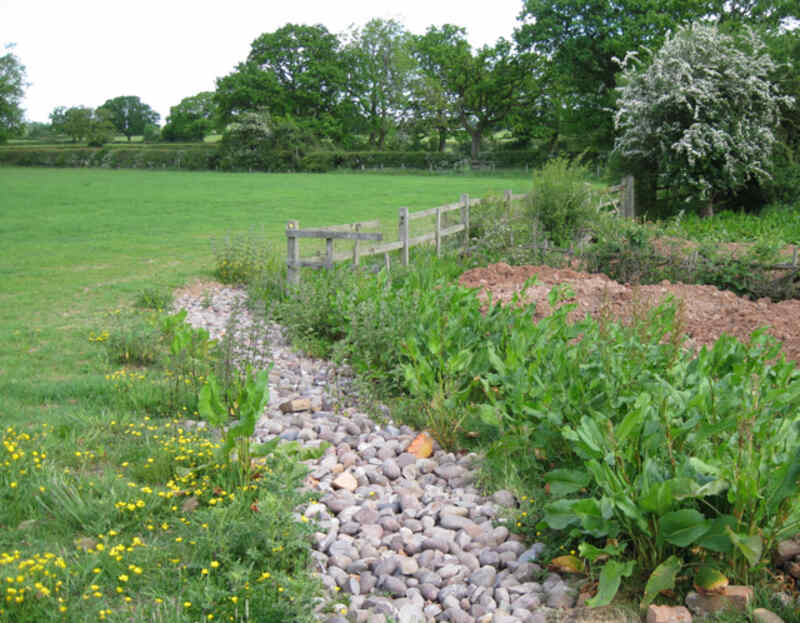
Then, you might want to add river rocks (a mix of 3-to-5-inch and slightly larger stones work well, in my experience) to the ground level to help with erosion.
Other Factors to Consider

French drain maintenance
Keeping your French drain system running properly requires some regular maintenance. Start by ensuring that both the entry point at the drain box inlet and the exit point are clear of obstructions.
If you notice that water is no longer flowing freely through the pipe, use a garden hose to send a blast of water up through the pipe to dislodge any debris or dirt that may have accumulated inside the pipe. Taking these simple steps will help keep your French drain functioning optimally.
Clogging could also be a sign that part of the pipe has collapsed. This necessitates digging up the pipe to inspect for the underlying damage. Section repairs are possible, but it’s often better to replace the drainpipe to avoid further excavations and fixes down the road.
When a pipe has become completely clogged and unable to be cleared of obstructions on its own, it might be time to bring in a professional plumbing expert. With the use of specialized tools and equipment like pipe cameras, they can find the precise location and severity of the clog and then develop an effective plan to clear it.
Subsurface surprises
If you decide to forgo hiring a professional and do the project yourself, you might find subsurfaces surprises. These are costly and unforeseen. Large tree roots, underground boulders and bedrock are some of the most common ones.
You’ll probably need additional tools like an electric saw to get through thick tree roots. You might need a backhoe to lift out hidden boulders and bedrock. Both are heavy and difficult to move without a machine. Consider these circumstances before embarking on this adventure as a DIY-er.
Pro vs. DIY to Install a French Drain? (Factors and Costs)

There are several factors that might influence your decision of whether to hire a pro or DIY when it comes to installing a French drain in your yard::
- Your region of the country: Is the climate colder requiring deeper trenches, tougher pipes and more redirected water flow needed?
- Your property’s challenges: Are you in a wooded area with boulders, trees and bedrock? How much ponding/standing water is there and where is it located?
- Unforeseen circumstances: Like subsurface surprises, are you ready to tackle those surprises under the ground?
- Project approval hurdles: Are you OK with and knowledgeable about how to cut through all the red tape and bureaucracy, for permits, possible HOA rules, etc.
- Budget: Enough said.
With all of this information, you can now make a decision. So, how much is it to use a pro vs. to install a French drain as a DIY project?
Pro Costs
Homeowners should expect to pay an average price of $5,000 to have a French drain system professionally installed with most homeowners paying between $1,650 – $12,250. A professional French drain installation costs around $10 – $75 per linear foot.
The pro’s estimate would “factor in” the permits, calling the “Call Before You Dig” line to get the lines marked, getting the crew back and forth, machines, and labor costs. That being said, even the most skilled project managers/installers cannot anticipate what is under the ground, sometimes they will “pad” the price for unseen occurrences, sometimes you will end up “eating” the additional costs.
DIY Costs
You may be surprised to know that installing a French drain yourself could cost between $700 – $3,000 depending on the size of your project. But, the average DIY cost is around $21.12 per linear foot.
Even if you tackle this project yourself, It is important to be prepared for additional costs that may arise. Since you will be the project manager, you will be responsible for expenses such as getting permits, renting and transporting heavy equipment, and paying for repairs to utility or water lines if they are damaged during excavation.
The total cost of the project will also vary depending on your location. Therefore, it is advisable to budget more than you initially anticipate to cover any unexpected costs that could occur during installation of your French drain.
FAQ About French Drains
A French drain has four main benefits:
1. Home Foundation Protection: French drain systems are a beneficial solution for protecting your home from foundation damage which can be costly to repair.
2. Insurance Discounts: Insurance companies often recognize the value of French drains and may offer discounts on homeowner’s policies, making the investment even more worthwhile.
3. Proven Water Control Method: The ability to control water buildup beyond just exterior areas is an often overlooked benefit that a French drain system provides.
4. Little Maintenance Needed: With a good maintenance plan in place, these systems can last up to 10 years and work to prevent soil erosion and other damage caused by excessive water buildup around the home.
Naturally occurring wetlands areas, natural springs and preserved areas. If your property has any of these a French drain wouldn’t work, is ill-advised and could be against the law. Check with your local authorities on the regulations for your area.
Absolutely! Struggling with a wet basement? A French drain is an effective solution for basement waterproofing in a home with a “wet” or waterlogged basement.
French drains can be installed both inside and outside the home’s foundation, where these systems will intercept water that is near your home’s foundation and redirect it to another location so it doesn’t leak into your basement.
The indoor French drain installation involves cutting a trench in the basement slab along the foundation’s perimeter, laying pipe in the trench, and putting in a sump pump to help move water from inside to outside.
Yes, there are different types of drains but the basic premise is the same. They are all trenched with a pitch to redirect water from a higher spot to a lower spot using gravity. The structure is what makes them different.
— Curtain Drain
A curtain drain is similar to a traditional French drain, except that it works at shallower depths. This type of drainage system is usually used when there is a consistent accumulation of surface runoff from locations such as at the base of a retaining wall.
— Dispersal Drain
Dispersal drains are aimed at distributing wastewater from a septic tank or dry well back into the ground. These drains can be installed in either a lateral or horizontal fashion.
— Filter Drain
A filter drain drains groundwater on the surface, such as removing a ponding condition, not underground water. It is primarily used to prevent groundwater from influencing slope stability.
— Fin Drain
Also called pavement edge drains, fin drains are used to drain areas adjacent to pavement to redirect water from the subbase and subgrade. They are placed vertically and they consist of a polymer drainage core wrapped in a geotextile filter.
For colder climates, a dry well is the preferred method of diverting excess water away from your property. It’s a place where runoff can flow without causing any damage or runoff to the surrounding area.
A dry well consists of a large reservoir filled with gravel that’s dug beneath the frost line in order for the water to be safely stored and dispersed into the ground. It’s important to ensure that the dry well is at least 20 feet away from any foundation as to not disrupt it.
The French drain in these cases will be directed to the dry well so that the water doesn’t rise above the frost line when it dissipates into the ground.
When to Hire a Landscaping Pro
A French drain system is a great way to protect and maintain the integrity of your house’s foundation. These drains can be used to restore your overly saturated backyard into a tranquil backyard oasis.
Once your French drain is installed and working properly, you can then remove your waders and put on your flip-flops.
But should you tackle this project yourself or hire a landscaping pro near you? You should definitely consult a professional before installing a French drain system yourself.
Here’s why: A pro has the working knowledge and has probably installed hundreds of these systems with varying challenges.
If you go it alone and decide to install your own French drain, you can save costs, as long as you don’t make any costly mistakes in the process.
Main Image Credit: Shutterstock