Looking to install tile for a new patio, walkway, or other outdoor feature? You should expect your outdoor tile installation cost to fall somewhere between $1,380 and $3,520, including materials and professional labor. The national average cost is around $2,450.
Many contractors will price a tiling project based on size. Typical rates range from $9 to $65 per square foot. Prices vary so much because there are many different types of tiles and other project details that can affect cost. You can use the average rate of $37 per square foot to roughly estimate your budget.
How much does outdoor tile installation cost?
- National average cost: $2,450
- Typical price range: $1,380 – $3,520
- Extreme low end: $600
- Extreme high end: $14,000
While most homeowners spend between $1,380 and $3,520 on outdoor tile installation, you could end up paying much more or much less.
Think of all the different hardscapes you can create with outdoor tile. Outdoor living spaces, garden paths, and pool decks are just some of the possibilities. With lots of possibilities come lots of possible price points.
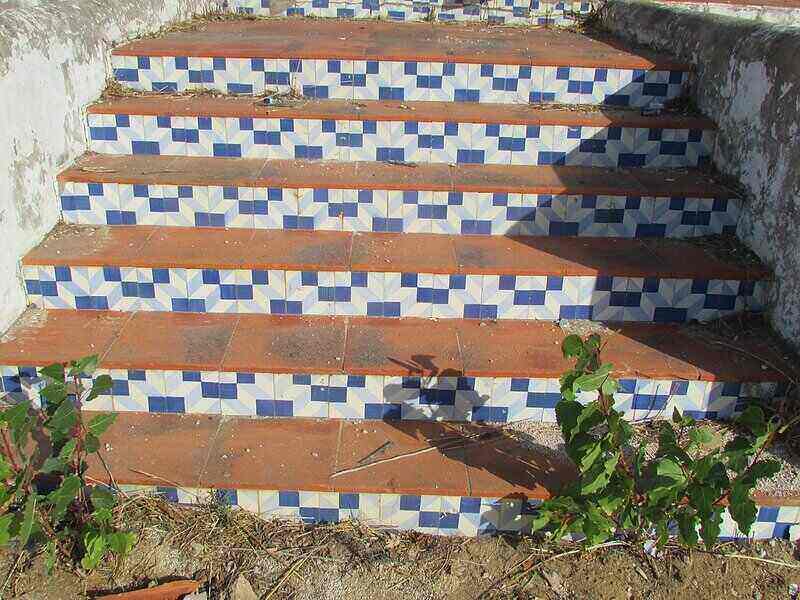
The least you can expect to pay for a professionally installed outdoor tile project is about $600. Small, simple projects such as tiling a stoop or entryway steps will fall toward this low end. Tiling large features like an outdoor living space or pool deck could cost as much as $14,000.
Cost by Type of Project
Outdoor tile installation is a broad blanket term. You can’t really get a good idea of what your budget will look like without specifying the size and layout of your tiling project.
In the table below, you’ll find the typical sizes of several common outdoor tile features, along with an estimate of the project’s total cost.
We calculated approximate costs using the national average rate of $37 per square foot, which includes installation from a contractor, the tile itself, and any other materials necessary to complete the project. If you already know the size of your specific project, you can use the same rate to estimate your budget.
If you plan to use cost-effective materials such as ceramic or concrete tiles, you’ll get a more accurate estimate using the low-end rate of $9 per square foot. But if your project is especially complicated and you want to install expensive natural stone tiles, you should use a number closer to the high-end rate of $65 per square foot.
| Project | Typical project size *square foot | Approximate total cost *includes materials and installation |
| Stoop / entryway steps | 12 sq. ft. | $446 |
| Small bistro patio | 49 sq. ft. | $1,818 |
| Walkway | 160 sq. ft. | $5,936 |
| Outdoor dining area | 168 sq. ft. | $6,233 |
| Outdoor living room | 288 sq. ft. | $10,685 |
| Pool deck | 360 sq. ft. | $13,356 |
Cost by Tile Material
Not all types of tile are suitable for outdoors, but you still have many options in style, texture, shape, and color. The best outdoor tile for you will depend on:
- Your budget
- The aesthetic you’re seeking
- How much tile maintenance you’re willing to do
- Amount of foot traffic there will be on top of the tile
- Exposure to rain or pool water
- If winters mean freezing temperatures where you live
What are your options when shopping for outdoor tile? We’ll go over some of the most popular materials to help you understand the pros and cons (if there are cons) of each one. We also cover typical costs for each material so you can compare them.
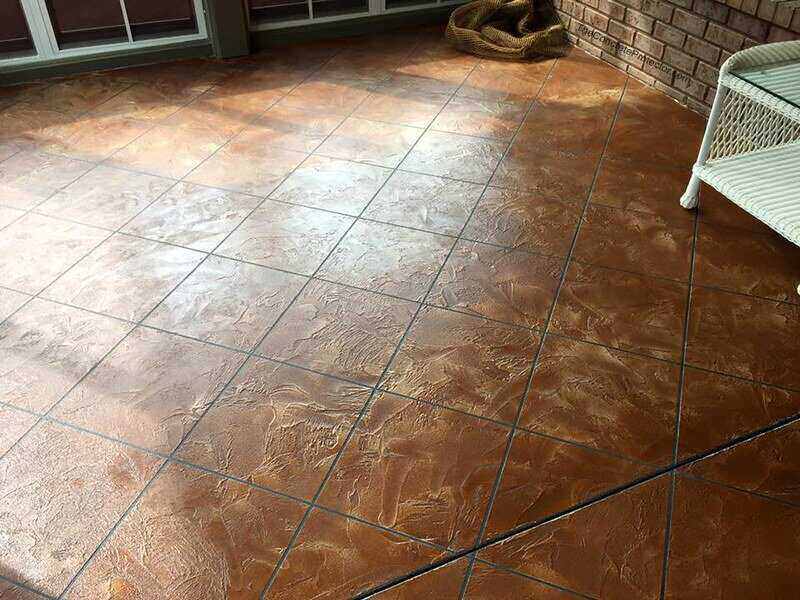
Concrete
What it is: Concrete tiles are molded from poured concrete
Price (material only): $1 – $15 per square foot
Pros
✓ Affordable compared to other tiles
✓ Made in different textures and colors to mimic natural stone or ceramic
Ceramic
What it is: Ceramic tile is made of glazed clay
Price (material only): Ceramic tile costs $2 – $20 per square foot
Pros
✓ Different colors and styles
Cons
✗ Not good for areas with heavy foot traffic
Porcelain
What it is: Porcelain tile is made of tightly compacted clay dust
Price (material only): $2 – $30 per square foot
Pros
✓ Durable
✓ Low-maintenance
✓ Many different sizes and styles
Slate
What it is: Slate tile is natural stone
Price (material only): $4 – $22 per square foot
Pros
✓ Extremely hard and durable
✓ Water-resistant
✓ Naturally textured so it’s slip-resistant
✓ Usually gray or black but comes in other colors
Travertine
What it is: Travertine tile is natural stone
Price (material only): $4 – $83 per square foot
Pros
✓ Generally considered very attractive
✓ Very durable
Cons
✗ Collects dirt and may need regular polishing
✗ Slippery when wet
Granite
What it is: Granite tile is natural stone.
Price (material only): $4 – $83 per square foot
Pros
✓ Durable
✓ Comes in several different colors
Cons
✗ Slippery when wet
Limestone
What it is: Limestone tile is made of natural sedimentary rock.
Price (material only): $4 – $83 per square foot
Pros
✓ Softer than other stone; chips or scratches easily
✓ Best for dry climates without freezing winters
✓ Comes in earthy tones like brown, tan, gray, or red
Soapstone
What it is: Soapstone tile is made of natural metamorphic rock mostly composed of the soft mineral talc
Price (material only): $4 – $83 per square foot
Pros
✓ Water-resistant and stain-resistant
✓ Doesn’t absorb heat, so good for hot climates
✓ Good option for regions with freezing winters
✓ Smooth, silky texture
Sandstone
What it is: Sandstone tile is made of natural sedimentary rock
Price (material only): $4 – $83 per square foot
Pros
✓ Aesthetically appealing texture
Cons
✗ Very soft and prone to scratches and chips
✗ Not good for areas with freezing winters
Labor Cost
In addition to the cost of the tile you choose, you’ll have to pay your installer’s labor rates (unless you install the tile yourself). Most professional tile installers nationwide will charge around $5 to $14 per square foot to place outdoor tile.
Your labor rate will likely fall closer to the low end if you’re installing tile on flat ground in a simple pattern. Expect higher labor rates if your project will be more difficult to install. A complicated custom tile pattern, sloped land, or natural stone tiles are all examples of things that can make installation more difficult.
Other Cost Factors
For a more accurate look at what outdoor tile installation will cost for you, you need to consider your needs and desires for the project. Several factors of the tile itself and how it’s installed can affect how much you spend in total. We’ll go over a few of those significant cost factors now.
Tile pattern
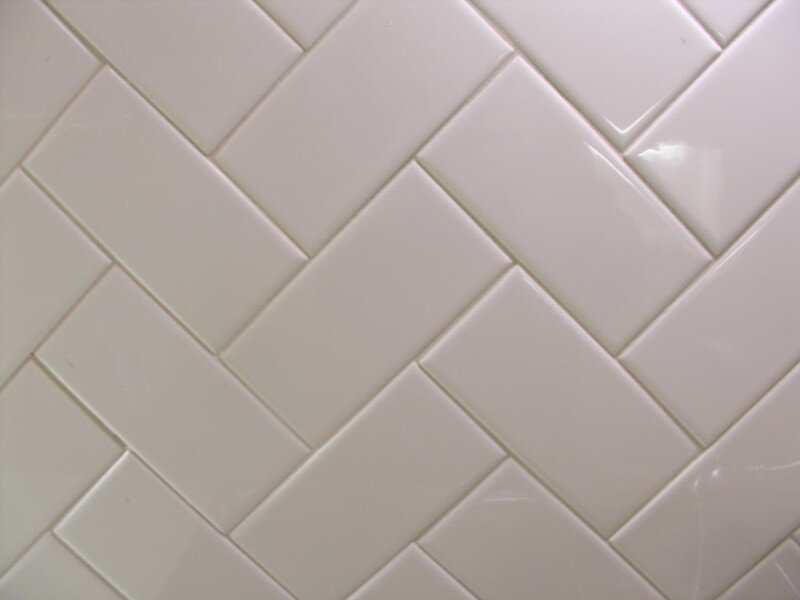
Most of the time, tiles are installed in straight rows. That’s the cheapest and easiest layout to install. If you want a more interesting pattern, your total project cost could increase by 10% to 20%.
Some popular patterns include:
- Diagonal
- Offset rows
- Herringbone
- Cut corner
- Ashlar
- Versaille
- Step
These patterns and others like them use extra material. You (or more likely, your contractor) will have to cut some of the tiles to fit into the desired pattern, meaning you’ll need to purchase more tiles than you would for straight rows. Labor costs for these projects will also be higher because they’re harder to plan and install than straight rows of tile.
Water absorption rating
Where will your new tile hardscape be in the yard? Will the tile get wet often from rain or splashes from the swimming pool? If that’s the case, you need to make sure you choose tiles that won’t absorb too much water, causing the tile to warp and crack.
These are the water absorption ratings you might see while shopping for tile:
- Non-vitreous: Absorbs 7% of water
- Semi-vitreous: Absorbs 3% – 7% of water
- Vitreous: Absorbs 0.5% – 3% of water
- Impervious: Absorbs less than 0.5% of water
Only tiles rated vitreous or impervious are recommended for outdoor use. Tile tends to get more expensive the more water-resistant it is, which is one reason outdoor tiles typically cost more than indoor ones.
PEI rating
Another important rating you should know about while searching for the right outdoor tile is the Porcelain Enamel Institute (PEI) rating.
What is a PEI rating? PEI ratings measure abrasion resistance, which basically means how much foot traffic the tile can handle. The higher the PEI rating, the better suited the tile is for areas with heavy foot traffic.
Tougher tiles with higher ratings generally cost more. That means tile suited for a frequently used patio will probably be more expensive than tile for a decorative garden path.
PEI ratings range from 1 to 5, with 1 being the least abrasion-resistant and 5 being the most. Tile with a PEI rating of 4 or 5 is best for outdoor living rooms, dining areas, and other hardscapes that will see a lot of foot traffic on a regular basis.
Slip resistance
Slip resistance is another important quality for both high-traffic areas and areas exposed to water frequently (like a pool deck). The Coefficient of Friction (COF) rating measures a tile’s slip resistance.
What is a Coefficient of Friction rating? COF ratings fall on a scale between 0 and 1. Tiles with a higher rating will have more friction and be less slippery. Any tile rated 0.4 or higher is considered slip-resistant. The lowest rating recommended for uncovered outdoor tile is 0.6.
High slip resistance is definitely something you should look for in outdoor tile, but it’s difficult to say how this factor will affect cost. How slip-resistant a certain tile is will depend on variables like texture and glaze.
Substrate
A substrate is the base of any tiling project, the surface to which you attach tile with thin-set mortar. For exterior tile projects, the best substrate is a concrete slab. Add an extra $4.34 to $7.73 per square foot to your total project cost for concrete slab pouring. If you already have concrete on your property (like a concrete patio), you’ll save on this expense.
Grout and sealants
The cost of grout makes up a very small percentage of your overall project cost. Grout costs only about $10 to $20 per bag, and one bag covers up to 1,000 square feet. You won’t need to worry about the cost of grout unless you’re installing your own tile, because grout is automatically included with the cost if you hire a professional tile installer.
Sealant is pretty cheap, too, and you might not even need it. If your tile needs sealing, that adds about $1 to $2 per square foot for the initial coat. Keep in mind, you’ll have to apply a new coat of sealant regularly in the future.
The only tiles that need sealing are those that are porous and vulnerable to water penetration or staining. That includes most natural stones.
Some common exterior tile materials that need regular sealing include:
- Granite
- Limestone
- Sandstone
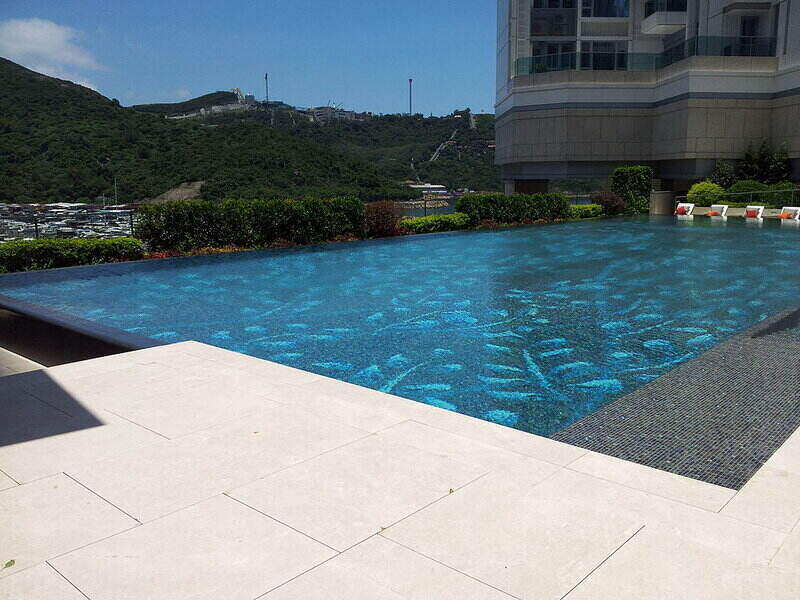
Pool tiling cost
FFinishing an in-ground swimming pool with tile is by far the most complicated and expensive outdoor tiling project you can undertake. Pool tiles can cost anywhere from $2,000 on the low end to $70,000 on the high end for the material and labor.
As with other projects, the exact cost will depend on square footage and the material of tile used. That’s why the cost varies so significantly.
| POOL SIZE | COST TO TILE *materials and installation |
| Standard sized in-ground pool | $2,000 – $15,000 |
| Large in-ground pool | $15,000 – $70,000 |
Additional Services
Think big picture when budgeting for your outdoor tile installation project and when communicating your needs to your contractor. What will you (or the pros you hire) need to do to prepare the site? How will the new hardscape fit into the rest of your landscape?
By factoring in these considerations now, you’ll prevent surprise extra costs later when you break ground on your project. You’re much less likely to blow your budget if you prepare for everything you might end up paying for.
Removal of old tile
If you want to give an existing tile feature a makeover, the first step is removing the old tile. Your tile installer should be able to remove tile for an extra $2 to $4 per square foot.
In addition to removing the old tile, your contractor may need to do some work on the underlying concrete to prepare it for attaching the new tile. That might include filling in chips and cracks on the concrete’s surface and cleaning off built-up dirt, mold, or moss.
Depending on how much work needs to be done, this extra labor could increase the cost of removing old tile.
Land grading
Land grading can cost anywhere from $100 to $3,400 depending on your yard’s specific issues and how much work it will take to fix them.
Is the ground where you want to install tile even and flat? If there are any bumps, dips, or holes, your contractor may need to do some minor grading before they can lay the concrete substrate and install your tile feature. Small grading jobs like these will be less expensive.
It’s a different ballgame if your whole yard is on a slope. In that case, you may be looking at a major land grading project that will involve specialized equipment and hours of work. Jobs like this will fall toward the high end of the cost range.
Landscape design
Why stop at outdoor tile installation? While you’re already working with a pro landscaper, maybe it’s time to overhaul the entire front yard or backyard with a brand new landscape design. Large landscape design projects that involve the whole yard will usually cost you between $2,204 and $6,182.
Your new tile feature, whether it’s a patio, walkway, or outdoor living space, is only a piece of the puzzle that is your landscape. A new design ensures that your new feature fits perfectly with the rest of the landscape and can even include other complementary features.
A whole new landscape is a significant investment, for sure, but your home will look better than ever, and your curb appeal will go through the roof.
DIY Costs for Outdoor Tile Installation
Simple tiling on top of existing concrete makes a great DIY project for handy homeowners with home improvement experience. You’ll need patience and precision to install a high-quality outdoor tile feature, but it’s not a difficult job if you take your time and know what you’re doing.
Block out a few days if you plan to install your own tile. It’s a good idea to have a second pair of hands if possible to make installation easier and faster.
Warning: Tile installation involves a lot of bending over and spending time on your hands and knees. If you’re prone to back pain, this probably isn’t the best DIY project for you.
What you’ll need
You’ll cut out labor costs by going the DIY route, but you’ll still have to purchase whatever tile you choose and the equipment you’ll need to install it.
There are a few power tools involved in laying tile, but luckily, they’re all available for rent from big-box hardware stores like Lowe’s and Home Depot. The other tools and materials you’ll need are all pretty affordable, which makes this a great landscaping project for the thrifty homeowner.
In the table below, we’ve laid out the average price of everything you’ll need to install outdoor tile (other than the tile itself). For information on pricing for tile itself, see the Cost by Tile Material section above.
| EQUIPMENT NEEDED | AVERAGE COST *based on data from Home Depot and Lowe’s |
| Sponge | $2 |
| Spacers | $3 for pack of 300 |
| Flooring trowel | $7 |
| Grout float | $12 |
| Mixing attachment for hammer drill | $14 |
| Plastic sheeting | $15 |
| Rubber mallet | $16 |
| Bull point chisel | $17 |
| Outdoor-rated thin-set mortar | $21 for 50-pound bag |
| Level | $21 |
| Grout | $25 for 25-pound bag |
| Pressure washer | $37 per day to rent |
| Hammer drill | $38 per day to rent |
| Sealant | $40 for 1 gallon |
| Tile saw | $58 per day to rent |
| TOTAL: | $326 |
How to install outdoor tile DIY in 10 Steps
1. Prepare the concrete base. You want to start with a clean base, so before you install anything, clean up the concrete slab on which you’re going to install your tile.
Start by pressure-washing the concrete to remove dirt, mold, and any other debris that has accumulated. After pressure-washing, you might do a quick once-over with a leaf blower or broom to remove any leftover dust or debris, but that’s up to you.
2. Set up tools and materials. Once the concrete is set and you are ready to begin tile installation, the first thing you want to do is set up your power tools and lay out all the materials you need so they’re handy.
Here’s why: After you spread the mortar, you’ll have limited time to lay the tile, so prepare in advance.
3. Mix the mortar. Follow the specific instructions on the bag of mortar you purchased to find out how much water you need to add.
After adding the appropriate amount of water, mix the mortar using a hammer drill with a mixing attachment. You have the option to mix the mortar by hand, but that would take a lot more time and hard work.
4. Start by installing the outside rows. Start with the outer edges of the area you plan to cover with tile.
With a flooring trowel, spread an even layer of mortar. Lay the outer tiles on top of the mortar and pound them down with a rubber mallet. Lay only a few tiles at a time and don’t rush.
Ensure the rows are straight. You should also use a level as you go along to make sure all the tiles are perfectly flush with each other.
5. Work your way in. Continue installing tiles a few at a time, lining them up with the outer edges you laid first to create straight rows.
Insert spacers between each tile if necessary. The size spacers you should use depends on how much space you want in between each tile. For most projects, you’ll use 1/16-inch or 1/8-inch spacers. Leave about 1/2 inch between the last tile in each row and the wall (if your project area butts up against a wall).
6. Cut pieces as necessary. As you work, you’ll eventually reach a spot where an entire tile won’t fit, usually in corners or around the edges.
Measure the space exactly, then use a tile saw to cut tiles into the appropriate size and shape. If you’re using tile with a pattern on it, do your best to keep the pattern consistent on the cut pieces.
7. Let the mortar cure. Once you finish installing every tile, cover the area with plastic sheeting and leave it alone for about 24 hours so the mortar can cure.
Refer to the instructions that came with the specific mortar you bought to find out exactly how long it needs to cure.
8. Mix the grout. After waiting the appropriate amount of time for the mortar to cure, mix the grout with water the same way you did the mortar. Refer to the instructions on the bag for exact mixing needs.
9. Remove excess mortar. Before spreading grout over the tiles, go around with a bull point chisel and remove any excess mortar spilling out of the joints between tiles.
10. Finish with grout. Spread grout across the entire tiled area using a grout float or similar tool.
Go over the area a few times with a damp sponge to remove excess grout. Keep cleaning until the only grout left is in the cracks between tiles (the grout lines).
If you’re using a porous type of tile that needs to be sealed, apply sealant over the surface after grouting.
Need a visual aid for how to install tile outdoors? Check out this tutorial on YouTube:
DIY cost vs. professional installation cost
Whether you install an outdoor tile feature yourself or hire a professional tile installer to do it for you, the cost of the tile itself will be the same. Let’s compare the additional costs to find out how much money you could save by installing your own tile.
You’ll recall that labor rates for outdoor tile installation usually fall between $5 and $14 per square foot, for an average price of about $10 per square foot. Going by that average rate, professional labor for a 49-square-foot patio would cost about $490 total.
If you have to buy or rent all the equipment for DIY installation, the total cost would be about $326, regardless of project size. So, you would save around $160 on a small patio by going the DIY route.
If your project is larger or you already own some of the necessary tools, your savings will be even greater. It’s up to you to decide if those savings are worth the time and effort you would have to put into DIY installation.
Outdoor Tile Installation Cost by Location
Labor will be the largest cost variable between different cities because the rate you pay will depend entirely on the cost of living in your area.
If you live on either coast or in a major metropolitan area, expect your labor cost to fall toward the high end of our estimated range (so, around $14 per square foot). On the other hand, if you live in a small town where prices are usually more affordable, you’ll likely see lower labor rates (around $5 per square foot).
Availability of material will vary by location, too, which will affect cost. This mainly applies to natural stone, since it occurs naturally in abundance in some regions and not at all in others. Certain natural stone tiles may need to be shipped from far away, and you’re the one who will have to pay for that shipping.
Because prices vary depending on where you live, it’s important to get quotes from at least three local contractors. Those quotes will give you a better and more accurate idea of how much you’ll spend than the national averages we’ve covered in this pricing guide.
FAQ About Outdoor Tile
Here’s what to look for when choosing tiles for outdoors:
— Water absorption rating of vitreous or impervious
— PEI rating of 4 – 5
— Slip-resistant COF rating of 0.6 or higher if the tiles will be uncovered and exposed to rain
Ceramic tiles and concrete tiles are typically the cheapest options for outdoor projects.
High-quality tiles worth their cost will have these features:
— Perfectly square or rectangular in shape
— Actual size shouldn’t exceed 1 mm in length and width or 3 mm in depth of the dimensions on the label
— Uniform color, texture, and pattern on all tiles
— No warping (check for warping by setting tile on a perfectly flat surface)
— No cavities, depressions, cracks, specks, or spots on tile surface
Conclusion
Though generally more expensive than indoor tile floors, outdoor tile installation can be an affordable way to spruce up your landscape or outdoor living space. You have several different materials, patterns, styles, and colors to choose from, so you can really get creative when designing a tile feature.
DIY is definitely an option for tiling projects, but for the best results, hire a tile installer with experience and lots of positive customer feedback. Expect to pay between $1,380 and $3,520 for a typical outdoor tile feature if you hire a contractor.
Main Photo Credit: Pixabay