Slice seeding is the most effective seeding technique for lawns that need a complete makeover. It lays down grass seeds in narrow grooves dug into the soil, providing a germination rate of up to 90%. On the other hand, slice seeding is difficult to approach DIY, and not ideal for the regular reseeding of a healthy lawn.
Read our detailed guide to learn what slice seeding is, when it’s your best choice, and what to expect from slice seeding as a process, costs, duration, and results.
What is Slice Seeding?
Slice seeding is the best grass seeding method for partial or total lawn renovations. It uses a machine that cuts through the thatch layer and the soil surface to deposit grass seeds directly into the ground for optimum seed-to-soil contact.
The method is also known as “slit seeding” or “power seeding,” while the machinery is called a “slice seeder.”
Slice seeders have metal disks or blades that cut parallel furrows into the ground, up to 1 inch deep. A seed dispenser with tubes then pushes down seeds into the freshly cut grooves at a precise rate.
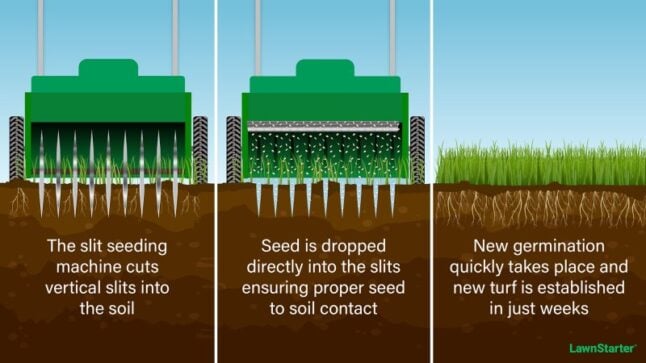
Because slice seeding spreads the grass seed in neat, parallel rows, the turf it creates grows in a dense, velvet-like carpet.
Slice seeding also ensures the best seed-to-soil contact and germination rate. Up to 90% of the seeds sprout when using slice seeding compared with 30% when using traditional overseeding.
When is slice seeding the best choice? Slice seeding works best when renovating lawn areas with less than 70% healthy grass. Is your lawn covered in brown patches and dead, bare spots? Slice seeding is the way to go. But not so much if you’re just planning the regular annual overseeding to keep a healthy lawn thick.
While digging into the ground, the slit seeder disks can cut existing grass, damaging blades, crowns, and roots. This potential damage makes it less suitable for regular overseeding on a healthy lawn.
Consider it when you need a complete makeover on one or more areas in your lawn. Here are the top five situations when slice seeding is the way to go:
- Dry patches and bare spots cover your lawn
- Your lawn is thinned with less than 70% healthy grass
- You have areas of lawn with lots of weeds or invasive grasses you want to get rid of and replace with turf
- You want to replace the turf type on your entire lawn with a different species more suitable to your local climate and sun exposure
- It’s a new lawn, and this is the first seeding
What is the best time to slice seed? Regardless of the seeding technique you use, the best time to spread seed is at the start of the growing season:
- Late summer to early fall for cool-season grasses like Kentucky bluegrass and tall fescue
- Spring to early summer for warm-season grasses like Bermudagrass, Zoysia, and St. Augustine.
You also can seed winter grasses early in the spring if you miss the fall window. If you go with this second choice, ensure the sprinklings have enough time to grow strong roots before the summer heat.
Pros and Cons of Slice Seeding
Slice seeding is an effective and precise method to revive a damaged lawn. It comes with great benefits, but also some weak points to consider. Here are the main pros and cons of slice seeding.
Pros of Slice Seeding
- Ensures great seed-to-soil contact by pushing the seeds directly into the ground.
- Provides a higher germination rate compared with other seeding methods.
- Protects seeds from elements, birds, and animals without the need to add extra straw or mulch.
- Seeds have better access to water and nutrients and sprout faster than with traditional overseeding.
- Slice seeding also breaks the thatch across the soil, improving airflow and water absorption.
- It builds dense lawns with a beautiful velvet-like look.
- Supports natural weed control by creating thick lawns with less room for weeds to take over.
- It has good results on slightly sloped lawns without the risk of seeds sliding down the hill.
Cons of Slice Seeding
- It can be more expensive than other seeding methods.
- Slice seeding is labor-intensive and not suitable for seeding on large lawns.
- Using the slice seeder on a DIY project is complicated and can result in a lawn with clumps and bare spots.
- Slice seeding can’t fight problem grasses like tall fescue, creeping bentgrass, or rough bluegrass alone. If invading your lawn and overtaking desirable turf, you must kill them with herbicide (or a sod cutter) and then reseed the area with the desired grass type.
What to Expect from Slice Seeding
How Long to Lush Grass
Results depend on grass type, specific seed germination times, weather, and care. Generally, you can expect up to 80% coverage after about four weeks and a healthy, thick lawn six to eight weeks after seeding.
Slice Seeding Cost
Slit seeding requires expertise and specialized machinery. These factors make it more expensive than traditional lawn seeding methods. You can expect to pay about $0.08 to $0.18 per square foot to slice seed the lawn.
Slice Seeder Rental
While it can double up as a lawn dethatcher, it doesn’t pay out for homeowners to buy a slice seeder. If you want to slice seed DIY, you can rent a seeder from stores such as Home Depot or Lowes for $60 to $65 for 4 hours or $90 to $95 a day.
How long does it take to slice seed a lawn? Slice seeding is a fast technique. Most residential lawns and small commercial projects take less than a day.
Slice Seeding vs. Hydroseeding vs. Traditional Overseeding
Slice seeding, hydroseeding, and traditional overseeding are the three main seeding options. Here’s a basic comparison to help you decide if slit seeding is the best option for you.
Traditional overseeding with aeration
The traditional overseeding technique is spreading grass seed across the soil surface with a drop or a broadcast spreader. The terrain is often prepared by core aerating.
- Costs with aeration: $0.08 to $0.25 per square foot
- DIY option: Easy to DIY with low to medium risk of errors and accessible equipment
- Germination rate: 15% to 30%, depending on soil preparation; lawn aeration and dethatching improve germination rates
- Best suitable for: Overseeding healthy, thinned lawns and bare patches; small to large areas
- Site preparation: Requires aeration and dethatching to improve seed-to-soil contact. Works well on bare ground and existing lawns.
Hydroseeding
The hydroseeding method uses a liquid mix of grass seeds, water, mulch, fertilizers, and sometimes biostimulants. A hydroseeding system sprays the mix onto the bare ground that was previously leveled and amended.
The mulch ensures high seed-to-soil contact, and fertilizers provide the needed nutrients for healthy grass growth. A separate application of starter fertilizer is not needed in this case.
- Hydroseeding costs: $0.06 and $0.20 per square foot (more expensive for small and mid-sized projects)
- DIY alternative: High risks of error, results based mainly on experience
- Germination rate: Up to 90%
- Best suitable for: Installing new lawns; large properties
- Seeding conditions: Requires extensive site preparation and bare soil
Slice Seeding
With slice seeding, grass seeds are mechanically placed into narrow furrows dug by the seeder into the soil. Oftentimes, the slice seeder is used directly on the thatch layer because it can easily cut right through it.
- Costs: $0.08 to $0.18 per square foot
- DIY alternative: Medium to high risks of errors; rental equipment is costly and hard to find
- Germination rate: Up to 90%
- Best suitable for: Renovating damaged and old lawns with dry patches and bare spots; small to medium-sized areas
- Seeding conditions: Might require aeration; works on bare ground and existing lawns
How to Prepare Your Lawn Before Slice Seeding

- Identify and measure the lawn areas needing slice seeding. Knowing the total surface helps you determine how much herbicide (if the case), grass seeds, and lawn fertilizer you need.
- Find a slice seeder to rent and reserve it for your seeding day.
- If you have weeds or invasive grass, spread a non-selective herbicide. Glyphosate products are the most popular weed control options to use. Follow the instructions on the product label, and wear protective equipment. Leave about a week for the solution to kill the grass and weeds. Repeat application two or three times if stubborn weeds keep growing.
- If healthy, desirable grass on your site, mow the grass short, to about 1 to 2 inches high. Gradually set the lawn mower blades lower. Use more mowing sessions to cut no more than ⅓ of the grass blade height in one session.
- Mark sprinkler heads and tree roots.
- Remove any debris from the lawn (stones, branches, toys, etc.). Put garden hoses away.
Note: Consider leaving at least a month to get rid of your weeds. It takes time for herbicides to work, and you’ll also have to wait at least a week between weed-killer application and seeding. Choose a post-emergent herbicide without pre-emergent action.
Should You Aerate Before Slice Seeding?
Opinions vary on this subject. The bottom line is to decide depending on the state of your lawn’s soil.
If the soil is hard and compacted, then aeration is a must. Slice seeder disks only scratch the surface to make room for seeds. They don’t loosen the soil deeper than 1 inch and new sprinklings will have a hard time developing a healthy root system with compact soil all around.
Lawn aeration loosens the topsoil 2 to 6 inches deep, where the roots develop. It makes it easier for roots to grow and access oxygen, water, and nutrients. You can try to fix soil compaction DIY or hire a professional to aerate the lawn for $78 to $238.
If your soil is loose, easy to penetrate by plant roots, and with good drainage abilities, aeration is not necessary.
Should You Dethatch Before Slice Seeding?
It depends on the thatch thickness. With a thin layer of about ½ inch, the slice seeder’s blades can cut through the thatch to plant seeds directly into the soil.
However, a thicker layer or clumps of thatch on the lawn might reduce seed-to-soil contact and seeding efficiency. In this case, dethatching before slice seeding can improve results, especially if the layer is more than 2 inches thick. Most slice seeders can be used as dethatchers with the seed box empty. Professional lawn dethatching costs $0.04 and $0.06 per square foot.
How to Slice Seed Step-By-Step
Step 1: Familiarize yourself with the machinery. Read the instructions carefully. Check the seeding rate and depth twice to ensure you do this right. You’ll find them on the grass seed bag or written on the seeder (look on the seeder sides or inside the seed box).
Step 2: Slice seeders have sharp blades and make a lot of noise and dust, so put on protective equipment:
- Safety glasses
- Hearing protection
- Breathing mask
- Working shoes
- Gloves
Keep kids and pets away from the site while working.
Step 3: Set the proper depth for your type of turf seed. Most models have a lever that allows you to set the blade’s depth from ⅛ to ½ or 1 inch.
Step 4: Set the proper seeding rate. You’ll make two passes over the lawn, so divide the rate you see on the seeder graph or grass seed bag by two. Here are the average seeding rates for the most popular turf types:
| Type of Grass | Seeding Rate Per 1,000 sq. ft. |
| Bahiagrass | 5.0 to 10.0 |
| Bermudagrass | 2.0 to 4.0 |
| Zoysiagrass | 1.0 to 3.0 |
| Carpetgrass | 3.0 to 5.0 |
| Centipede grass | 0.5 |
| Buffalograss | 1.0 to 3.0 |
| Bentgrass | 0.5 to 1.0 |
| Fine fescue | 3.0 to 6.0 |
| Tall fescue | 5.0 to 6.0 |
| Perennial ryegrass | 3.0 to 5.0 |
| Kentucky bluegrass | 2.0 to 3.0 |
If you’re reseeding an area where healthy grass already grows, use half the amount. Keep in mind seeding rates may vary with the turf cultivar and for seed blends and mixtures.
Step 5: Fill the hopper with the grass seed.
Step 6: Start the machine and walk it in straight, parallel lines across the lawn. Begin in one corner and always overlap a bit on the last seeded row to avoid any gaps.
Step 7: Make the second pass crosswise. When finished, take the slice seeder around the perimeter to ensure the margins also receive a decent amount of seeds without any gaps.
What to do After Slice Seeding
Lawn maintenance after slit seeding includes:
- Fertilization
- Dealing with the grass clippings
- Proper watering.
Fertilize the Lawn
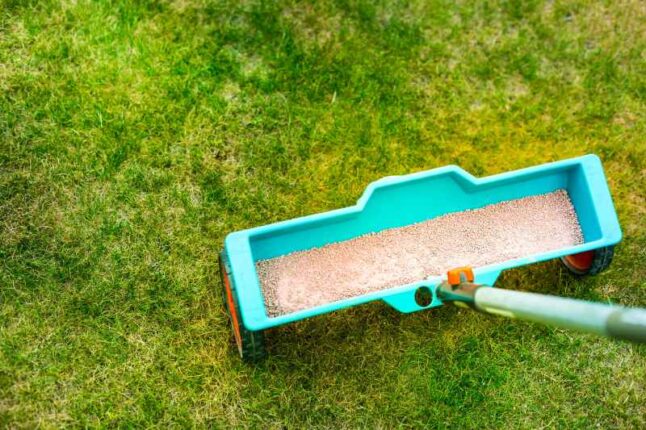
After you’ve finished spreading the seeds, apply a starter fertilizer. It has all the nutrients new grass needs to grow healthy and develop strong roots.
Follow the application rates and instructions as mentioned on the product label. A broadcast spreader will help you ensure uniform coverage across the seeded area.
Deal with Grass Clippings
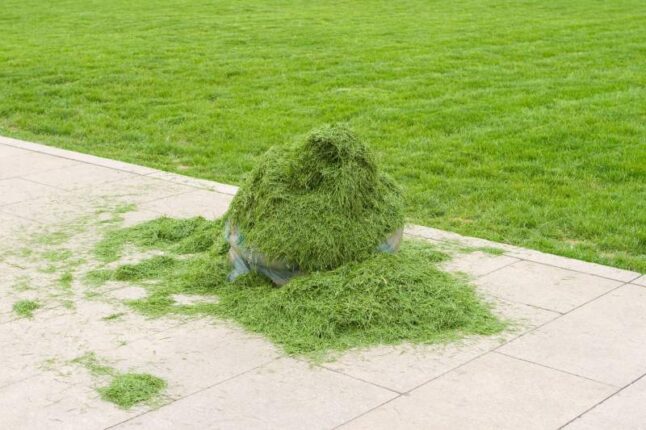
Slice seeding brings out lots of grass clippings and cut thatch. All this dead vegetation works like a layer of mulch or straw. It protects the seeds from dryness, heat, birds, and animals. Leave it on, but ensure it’s only a thin layer up to 1 inch thick.
If you see large clumps of thatch 3 to 4 inches thick on your lawn, use a leaf blower to spread them uniformly or rake the clumps off the lawn.
Water Properly
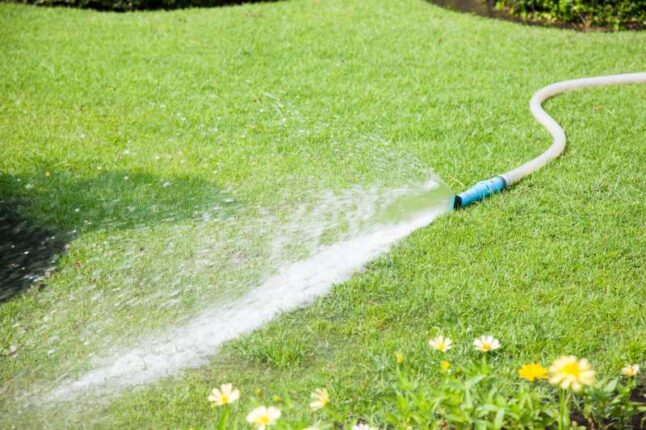
- Keep the soil moist but not soggy for the first two weeks to keep the new seed from drying out. Apply ¼ to ½ inch of water daily, depending on the weather and soil type (sandy soil dries out faster).
- During the third week, water only once a day.
- During the fourth week, reduce irrigation to three waterings a week in the morning.
- After a month, water once or twice a week, 1 to 1.5 inches a week. Aim to moisten the soil 6 to 8 inches deep each watering session.
Continue providing water as the lawn needs it. Watering deeply and less often helps your grass develop strong, deep roots and gain higher resistance to drought.
FAQ About Slice Seeding
How Often Should You Slice Seed the Lawn?
Consider slice seeding your lawn every two or three years and using traditional overseeding yearly to keep the lawn thick and healthy. Slice seeding is more of a treatment and repair technique than a maintenance one. You only need it when the lawn is visibly thinned, covered in dry patches and bare spots, or invaded by weeds.
Is Slice Seeding Worth it?
Yes, slice seeding is worth the investment. It’s an effective way to revive a dead, brown yard and turn it into a thick, green lawn in a few weeks.
Is Slice Seeding Better than Overseeding?
Slice seeding offers better results than overseeding on bare soil, areas with dead vegetation, and highly thinned lawns.
When to Call a Pro
Slice seeding is a powerful seeding method that can turn a patchy lawn into a dense green carpet in a few weeks. You can try to use it DIY, but results are always better with a pro. Find a lawn care professional on LawnStarter, discuss the project, and get a free quote. Get your lawn back in shape and enjoy thick, healthy grass!
LawnStarter participates in the Amazon Services LLC Associates Program, an affiliate advertising program. LawnStarter may earn revenue from products promoted in this article.
Main Photo Credit: esolla / Canva Pro / License