
Mowing your lawn but skipping out on the edging is like washing your laundry without detergent. It’s simply not a clean look. If you’re not sure how to edge a lawn, rest assured that it’s easier than you might think.
Edging your lawn accentuates your favorite landscape features, like your natural stone walkway, flower beds, or brick pavers. You don’t need to be a lawn care professional to get the job done right. Take a drive to your local home improvement store, choose between a motorized or manual edger, and you can be edging your lawn in no time flat.
Read the guide below to learn how to turn an average lawn into a crisp, manicured landscape with eight easy-to-follow edging steps.
What Does Edging a Lawn Mean?
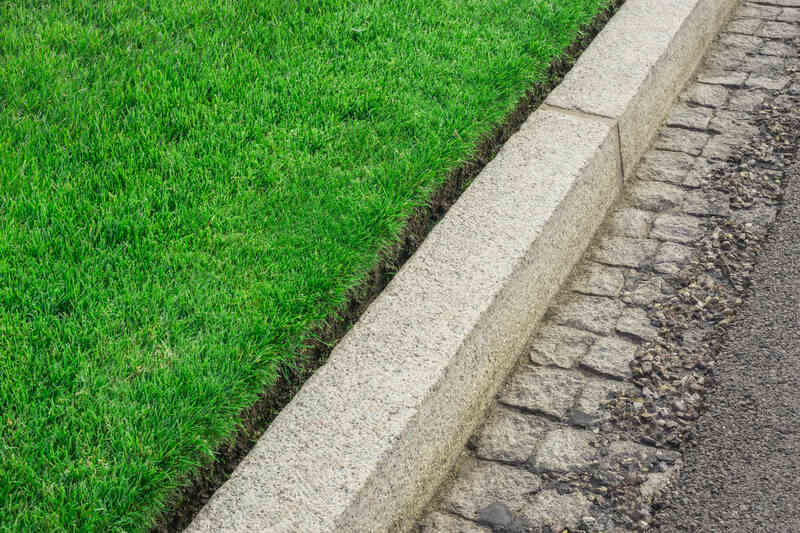
In short, to edge a lawn means to form a clear boundary between your turf or other ground cover and another surface, such as a paved pathway, a series of stepping stones, a garden bed, or the sidewalk near the edges of your lawn.
Unlike simply trimming against the fence, edging the lawn involves making an actual cut between the grass and a hard surface. This creates a thin gap that serves as the border you’re trying to create.
What Is a Lawn Edger?
A lawn edger is a tool that’s used to form clear boundaries between your lawn and the hard surface you’re separating it from. Lawn edgers are either manual or motorized and typically cut straight into the ground to create a distinct, trench-like boundary between the lawn and your other surface.
Motorized Edgers
Motorized edgers are either electric or gasoline-powered. They’re excellent for edging straight lines, right angles, and large perimeters since they can easily cut through heavy grass and weed buildup. If you’re not a lawn guru or just don’t want to deal with the hassle of a manual edger, motorized ones could be the option for you.
Electric edgers are either battery-operated and cordless or need to be plugged into an outlet. They’re typically lightweight and work well for small yards. In comparison, gas-powered edgers are heavier and better for a larger yard.
Unfortunately, motorized edgers are more expensive and have more parts that can malfunction or sustain damage. Motorized edgers require more maintenance than manual ones, and may need to be replaced more often.
There are two basic types of motorized tools used for edging:
- String Trimmers
- Bladed Edgers
Manual Edgers
Manual edgers are, as the name implies, edgers that are powered manually instead of relying on gasoline or electricity. For this reason, they require a bit more physical effort on your part but are easier to handle and are better for fine-tuning your lawn’s border. They’re excellent for those hard-to-reach places or to edge around curved surfaces that require more control.
Manual edgers for landscaping often work similarly to a small shovel. You’ll need to dig the half-moon blade into the ground to remove the overgrown grass. A manual edger may also feature a spiked roller wheel attached to a handle. Push the edger along the path and the spiked roller wheel digs the boundary trench.
Manual edgers are durable tools that rarely need replacement. They’re also typically less expensive than motorized lawn edgers. If you’re looking for something that lasts and aren’t one to shy away from the extra effort required, this could be the option for you.
There are three basic types of manual edgers:
- Hand Shears
- Spade-Based
- Roller-Based
How to Edge a Lawn
Step 1: Mow Your Lawn
The first step in edging your lawn is to give it a good mow beforehand. Mowing the lawn before you edge helps to reduce the grass and weeds around the areas you’ll soon be edging, which makes it easier to create a neat border. A freshly cut lawn also will add to the polished look.
Don’t hesitate to break out the edge trimmer or weed whacker – these tools will help shorten the grass in hard-to-reach places, making lawn edging much more manageable.
Step 2: Plan Your Landscape Edging
You can give yourself an edging guide with thin pieces of wood or another sturdy material. A guide can be especially helpful if you’re using a manual edger and need assistance with keeping a straight line or going around a curve. Note that you will be edging in between the surface (such as a pathway) and the guide.
While edging, give yourself plenty of room between the surface and the guide for a distinct boundary trench.
If you feel you can maintain proper control over your edger and prefer not to give yourself a guide, you can skip this step.
Pro Tip: Avoid using spray paint to plan your edging. You may miss your target, or the wind may blow it off course. Avoid using garden hoses, rope, or other similar materials, as you may accidentally pierce them with the edger, which will ruin them and possibly leave bits of the hose or rope in your new edge in the process.
Step 3: Choose Your Tool
The next step is to choose the tool you’ll be edging with. There are a variety of different ones, all falling under either the motorized or manual category. Here’s a short list of the different kinds of edgers available:
- String Trimmers
- Bladed Edgers
- Hand Shears
- Spade-Based Edgers
- Roller-Based Edgers
Using these tools is fairly simple. Manual edgers are very similar to shovels and trowels, so treat them like one and dig a thin trench between your lawn and your hard surface.
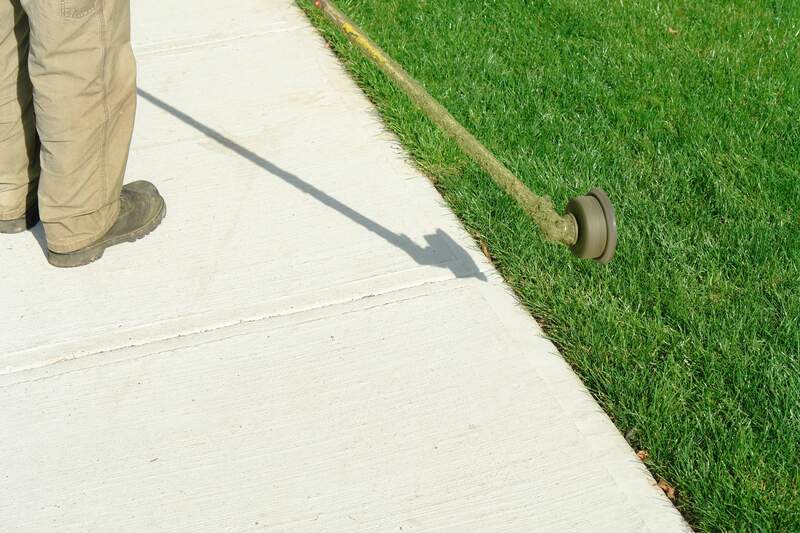
When using a motorized bladed edger, there’s typically one or two wheels by the blade. Put the blade between the lawn and your hard surface and turn it on. The edger will take care of the cutting, so all you have to do is support the handle so that the edger doesn’t go askew and push it along your path on the edger’s wheels. The hardest part is keeping it straight.
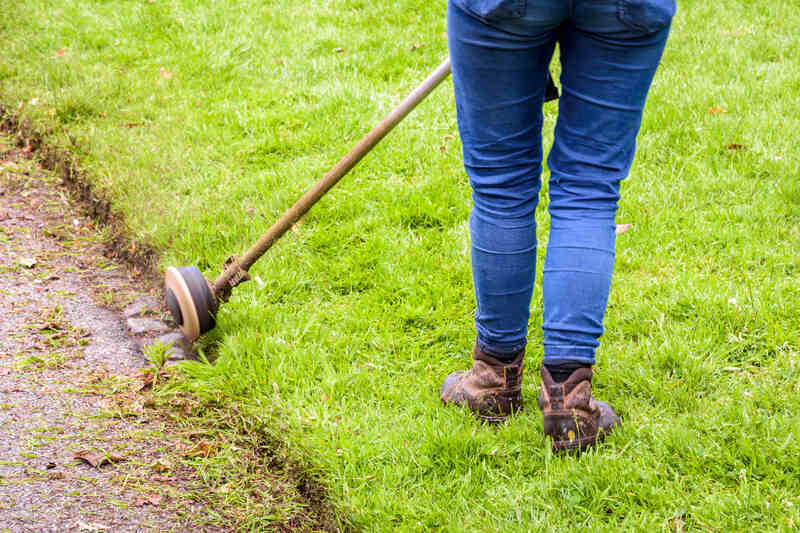
String trimmers may sound difficult, but they’re really just a fancy way of saying weed wackers. Rotate it 90-degrees so that the strings are cutting vertically and use it as you would normally to carve your boundary trench. Depending on your model, you may even be able to rotate the head so that you don’t have to hold it any differently. For more specific instructions, check out our article, “How to Edge a Lawn With a String Trimmer.”
Step 4: Begin Edging Your Lawn
When edging your lawn, it’s essential to maintain control of your tool. Assume a solid stance that allows you to slowly walk forward while also maintaining firm control over the edger. It’s important to engage your core, keep your arms straight, and make deliberate movements. If you go too fast, you may lose control and ruin your clean edges.
If you’re edging a straight line, it’s best to begin from one end and work your way to the other. Edging from Point A to Point B will help ensure clean lines. If you’re working with a curved edge, find a starting point that works best for you. You can always start from the middle and work your way to one end, return to the middle, and edge toward the other end.
While edging, be mindful of the depth of your trench. If you don’t dig your edge deep enough, the grass will overtake it more quickly via rhizomes. Digging a deeper edge will help it last longer and look neater with less effort.
If you’re using a motorized bladed edger, you don’t have to worry about how deep to make the trench since it will already have a set depth it will dig. The same goes if you’re using a manual rotary edger.
If you’re using a spade-based manual edger, on the other hand, you should dig the trench as deep as the length of the blade. In other words, the top edge should be flush with the ground.
Pro Tip: If it’s your first time using an edger, we recommend beginning in the backyard. If you make a mistake here or there, no one will know. Once you feel confident in your edging, then move on to the front yard.
Step 5: Pause and Observe Your Work
As you edge your lawn, stop and take a look at your work. Step back to see how your path is looking. A different view can help you spot any mistakes, such as slanted lines or wobbly curves. Make any corrections you need to make, and then resume edging.
Step 6: Store Your Tools
Now that you’ve edged your lawn, store your tools properly. If you leave your edging tools or lawn mower out in the yard, you risk needing to replace them due to damage or theft. Refer to your edging tool’s instruction manual for proper storage.
Step 7: Clean Up Your Yard
To ensure your yard looks ready to welcome the neighbors or family, use a leaf blower or broom to remove grass clippings and dirt from the pavement. Either leave the grass clippings on your lawn for fertilizer, gather them for your compost pile, or use them as mulch.
For more information on what to do with your grass clippings, check out our guide, “How to Compost Grass Clippings.”
Step 8: Enjoy Your Newly-Edged Curb Appeal
Your tools are stored, your landscape is clean, and now all you have left to do is admire your fresh-looking lawn. Aren’t you glad you didn’t skip out on landscape edging?
The Importance of Landscape Edging
You wouldn’t make a good impression at an interview with a stain on your blazer, and neither will your landscape if the grass is creeping over your front walkway. For the best-looking lawn, you can’t not edge. Edging tools are a must for any homeowner who wants their property to impress.
Edgers are easy to use, too. Remember, you don’t need to be a professional landscaper to get the lawn of your dreams.
FAQ About Landscape Edging
How often should I edge my landscape?
It depends on how quickly your grass grows. Most lawns stay looking neat and tidy with one edging a month, though some homeowners prefer to edge every two to three weeks. Find a schedule that works best for you and stick to it.
Does edging harm my lawn?
No. You’re only removing a very small part of the grass at the very edge of your lawn. The lawn as a whole won’t suffer for it.
What is hardscape edging?
Hardscape edging is essentially a physical barrier, such as bricks or pavers, between your lawn or ground cover and the hard surface you’re edging against. It replaces the trench you would normally leave in landscape edging.
When to Call a Professional
While you can edge a lawn in eight simple DIY steps, sometimes you’ve got to call in the professionals. Even when we can do the yard work ourselves, hiring help can make all the difference.
Hire a lawn care pro near you if you’re edging hard-to-reach places, if you’re not a fan of mowing lawns yourself, or if you want to spend extra time with the family.
Main image credit: Andy nunn / Flickr / CC BY 2.0