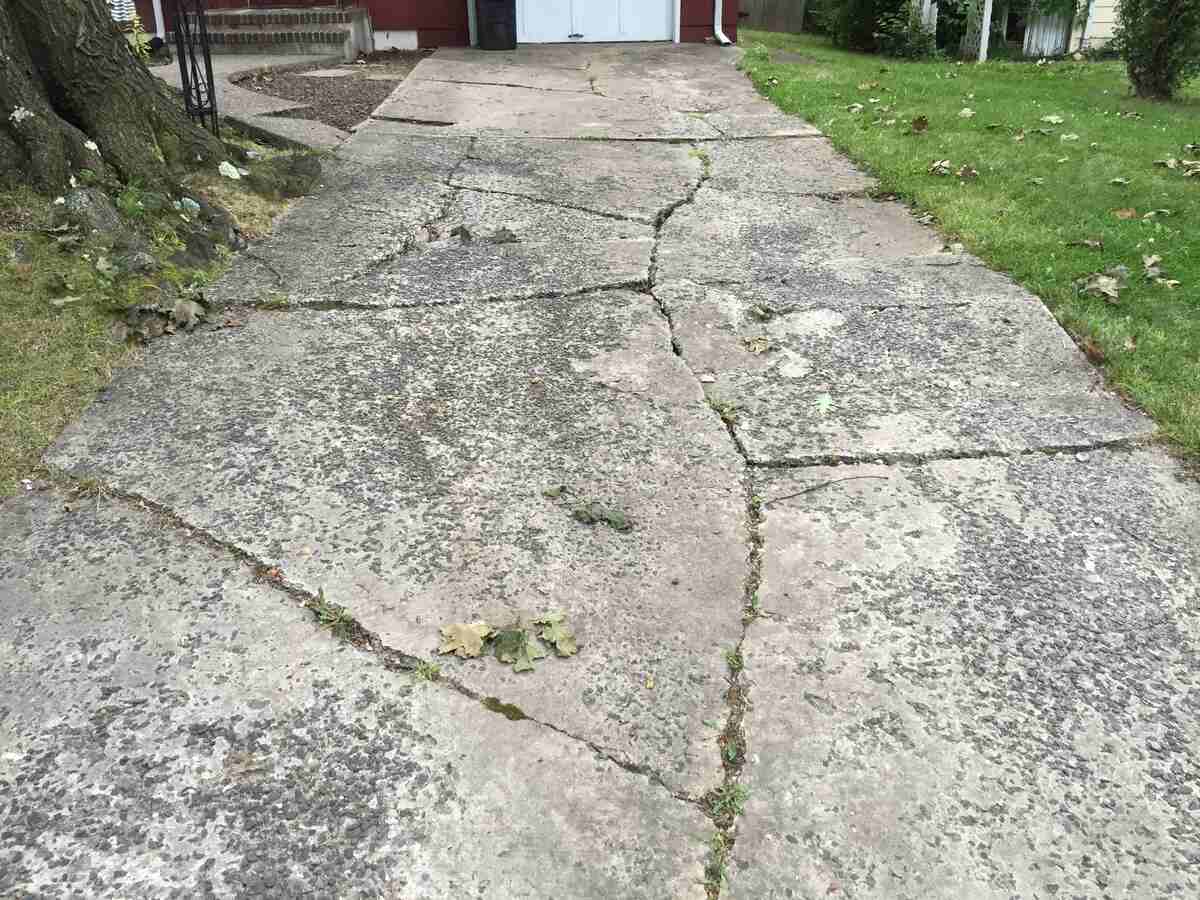
Concrete driveways typically last for more than 25 years, and it’s normal for them to develop cracks from settling or everyday use. In this article, we’ll show you how to fix cracks in a driveway (concrete or asphalt) and how to prevent future cracks in your driveway.
How to Fix Cracks in a Driveway (in 5 Steps)
Before you get started fixing the cracks in your driveway, round up the tools you’ll need:
Tools and Materials
| Caulk gun | Wire brush |
| Paintbrush | Utility knife |
| Broom or leaf blower | Bucket |
| Pressure washer | Backer rod |
| Tape measure | Trowel |
| Protective clothing | Squeegee |
| Driveway patch |
Supplies:
- Water-based acrylic sealant or caulking for outdoors
- Patching compound
- Sand
Step 1: Inspect Your Driveway Cracks
Inspect the cracks in your driveway to assess the extent of damage. Measure all the cracks wider than a hairline with a tape measure or ruler to determine the amount of material you will need to fill them.
Step 2: Clean and Prep Your Driveway Surface
If your driveway has weeds or grass growing in the cracks, use a weed-removing tool, spade, or lawn edger to scrape it away. Use a mason chisel or hammer to chip away any crumbled or soft concrete around the cracks.
Next, clean the driveway of all the dirt and debris. Use a stiff wire brush to dislodge all the loose concrete particles and remove them from the surface. Then, use a power washer, garden hose, or air compressor for quick and thorough cleaning.
You can rent a pressure washer for about $37 per day or purchase one if you’re a regular DIYer. Pressure washers cost around $246 on average.
Hose the driveway from the center toward the edges. Sprinkle the wet driveway with detergent and use a brush to scrub the surface clean. Hose off the soapy water and let it dry.
If your driveway has moldy or stained areas, clean those areas using a mixture of ¼ cup bleach and 16 cups of water.
Step 3: Fill Cracks with Sealant
Once your driveway is completely dry, it’s time to fill in those cracks. Driveways are typically made of two materials, concrete and asphalt. Each driveway type requires different treatment to fill cracks.
Concrete
For Small (¼-Inch Wide) Cracks: For smaller cracks use a concrete filler or masonry crack elastomeric filler with a caulking gun. You can also add a layer of primer or a concrete bonding adhesive on the crack to create a bond between the driveway surface and the patching material.
Choose a product with a flexible formulation so that it won’t pull away from the old concrete when it freezes and thaws. Work it into the crack with the help of a pointing trowel, push the compound in, and completely fill or “stuff” the crack.
You can also use a cement mixture to patch thin cracks. Mix one part cement with three parts sand and work it into a stiff paste with water. In another bucket, mix a small amount of cement with enough water to make cement paint.
If you can reach the inner side of the crack, start there and apply the thinner cement mixture as a primer. Let it sit for an hour then apply the cement and sand paste in a circular motion with a trowel or float. Blend and even it with the surrounding surface.
NOTE: Do not use caulk or crack fillers for hairline cracks because caulk tends to peel off the surface over time.
For Medium (¼- to ½-Inch) Cracks: Use a vinyl concrete patching compound or pre-mixed mortar. Prepare the patching compound or pre-mixed mortar as instructed by the manufacturer and pour it into the clean cracks.
Smooth it with a putty knife, press lightly, and add more until the crack is filled.
For Large (More Than ½-Inch) Cracks: Cracks that are more than ⅛-inch wide and ½-inch deep are considered large cracks. Use a concrete backer rod to support them and pre-mixed concrete to patch them. The flexible backer rod is pushed into the crack to reduce the amount of filler needed. It also prevents the surface from sinking back into the crack as it dries and ages.
Force the flexible rod into the crack with a putty knife and patch the area above it as you would with a small crack.
Smooth the surface of the patch by feathering the compound with the trowel. Let it set for a few hours, and then cover it with a plastic sheet to keep it slightly moist for a few days. This helps the concrete to set better and longer. Follow the manufacturer’s instructions to let the compound cure.
Then, paint or seal the surface of the repair patch and the surrounding area if needed.
Asphalt
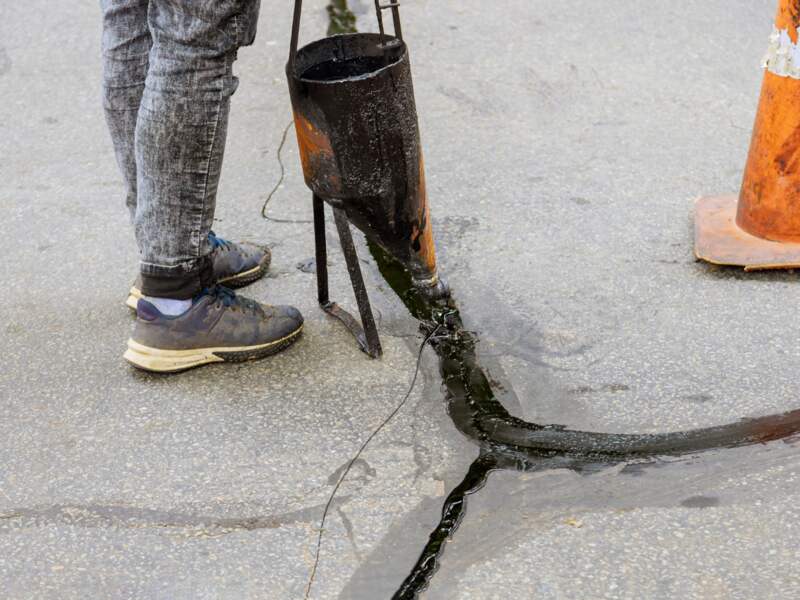
For Small (Less Than ½-Inch) Cracks: Use a patching product that has some self-leveling qualities, meaning that it is liquidy. You can use a bottle of crack filler and pour it into the cracks with the help of pourable squeeze bottles. Allow this filler to set and dry for the next four to eight hours before you seal it.
For Large (Bigger Than ½-Inch) Cracks: Larger holes and cracks in the driveway usually have a definitive boundary. Use a water-based acrylic filler or sealer and a non-porous foam backer rod to fill the crack.
Place the backer rod inside the crack and fill it with sealant. Smooth the excess material away with a putty knife. Once you fill the cracks, wait for at least a day for the patch to cure. Then, it’s time to seal in the asphalt. Mix the sealant well in a bucket before you start. Mist the driveway with water evenly and pour a 1-foot wide ribbon of sealant on the surface of the driveway.
Use the squeegee side of a brush applicator to push, pull, and spread the sealant. Repeat the process and cover the entire area of the driveway. You can also use a paint roller to even out the sealant.
Apply two thin coats instead of one thick coat for good results. Make sure you allow the first coat to sit and dry for 4 to 12 hours before applying the second one.
Step 4: Seal and Resurface Your Driveway
After the repair work is complete for all the cracks in your driveway, it’s time to seal and resurface your driveway.
For concrete driveways, mix the resurfacing concrete into a thin pancake-batter consistency, much thinner than the one used to fill cracks. Blow off any leaves or debris, and wet the surface before applying the resurfacer. Pour a thin coat of the resurfacer when the driveway is ready and spread it with the help of a rubber squeegee. Work in small areas to avoid getting lap marks.
You can also use a broom with an extended handle to give your concrete surface some texture. Texture prevents the driveway from becoming slippery.
Step 5: Let Your Driveway Dry
Allow at least six hours before you walk on the driveway and more than 24 hours before driving on it. To be safe, we recommend leaving your driveway as-is for 48 hours for everything to settle properly.
Why is it Important to Deal With Cracks Quickly?
You must deal with driveway cracks quickly because they can get bigger, deeper, and more problematic if ignored.
The first thing that makes its way and invades a crack in your driveway is water. And when it does, water finds a resting spot. This is more dangerous in climates where freeze, thaw, and refreeze cycles are common. The water expands under the surface of the driveway and crumbles the crack further.
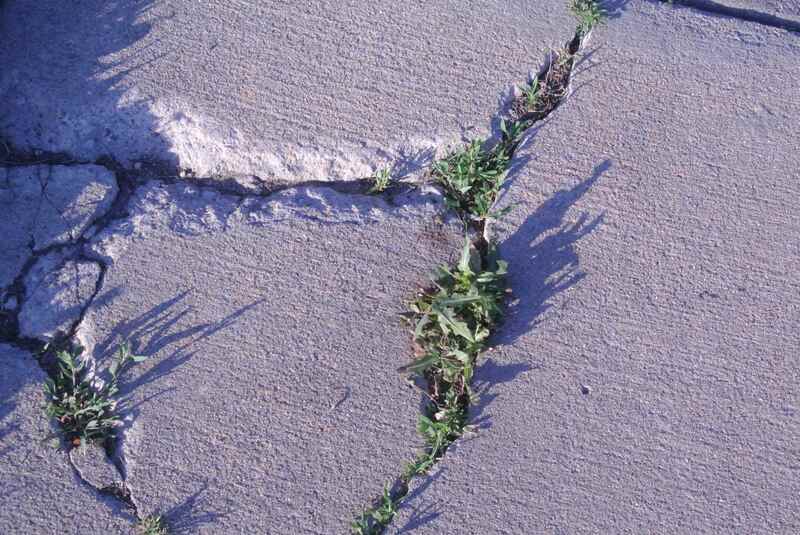
If your driveway has small, hairline cracks and you don’t fix them, they will eventually open enough for dirt and dust to get in. Soon after this happens, you will get to see vegetation and insects sprouting up. Small plants and grasses can damage your concrete driveway just like larger trees because they develop roots quicker.
Your driveway cracks will keep getting bigger or protrude to a point where they become a tripping hazard.
Moreover, cracks can alter the contour of your driveway which means water may start flowing back toward the foundation of your home. A water buildup known as hydrostatic pressure can cause the foundation walls to bow. Once this happens, related issues can occur, such as mold, cracks, chipped paint, etc.
7 Tips to Prevent Cracks in Your Driveway
While there is no way to guarantee that your driveway won’t develop cracks, you can still successfully prevent future cracks with regular maintenance. Here’s how you do it:
1. Maintain Good Water Drainage Systems
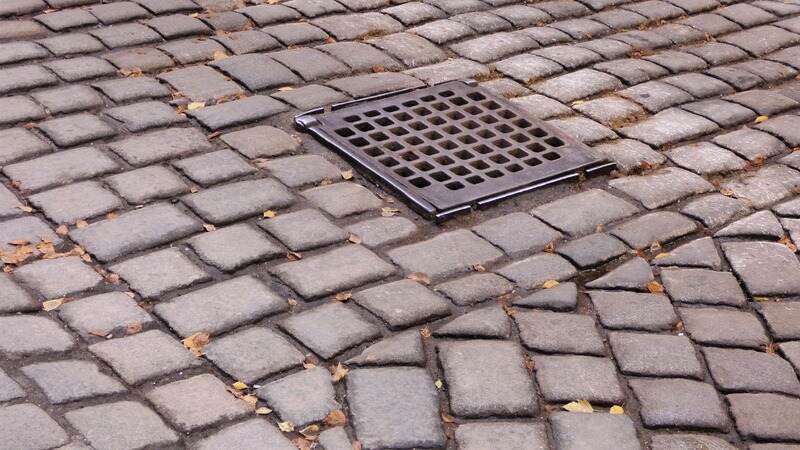
Observe how rainwater, melted snow, and ice flows from your gutters and downspouts. If there is a leak or clogging, the water runoff can pool up or flow underneath your driveway. The water freezes and thaws with the temperature changes, and the repeated stress of these cycles results in cracked concrete and botched asphalt.
Make sure that water coming from gutters and downspouts is directed away from your home’s foundation and is also safely flowing away from the driveway, porch, sidewalk, or patio. If your drainage system has a problem area causing the runoff to reach the driveway or part of it, fix it.
Cleaning your gutters twice a year can help prevent water problems. On average, gutter cleaning costs $120 to $200 if you hire a pro and $38 to $230 if you do it yourself.
Similarly, water may not drain if your driveway doesn’t have a proper slope. You may want to get your driveway repaired or even replaced to fix the drainage issue and prevent serious, more costly damages later.
Asphalt driveways are also prone to damage from frost heave. If the soil under an asphalt driveway gets wet and moist, it can freeze, swell, and push the surface upwards to crack.
2. Manage Vegetation
Plants, especially ones with near-surface root systems, exert pressure on the driveway surface as well as the foundation, leaving the surface cracked and the foundation weak.
Consider removing or moving trees or vegetation growing around your driveway. You can easily dig up small trees and bushes and replant them at a distance. For larger trees, install a tree root barrier system or remove them. You can hire a landscaping designer for $50 to $150 per hour and get a detailed landscaping plan that manages vegetation around the driveway.
Another silent culprit of driveway cracking is sod and weeds. Keep the driveway edged so there is room for melted snow and rainwater to flow away from the driveway. This guide explains how to do it yourself.
3. Regularly Monitor and Fix Cracks
As your driveway ages, it will form a few cracks even if you take care of it. Keep an eye out for cracks and fix them before they snowball.
4. Keep it Clean
Leaves and dirt might not seem like a problem, but these seemingly harmless things can also degrade your driveway. Keep your concrete and asphalt clean to prevent cracks.
5. Distribute Weight Evenly
Managing weight can be a bit challenging for driveways since they’re meant for parking. You can reduce damage from weight by changing the location of your vehicle when you park. Asphalt is more prone to cracking from weight fatigue and reducing prolonged stress on certain parts will help.
6. Seal and Resurface
An important part of driveway maintenance is sealing concrete driveways annually and sealing asphalt driveways every few years. This prevents water from penetrating the surface, freezing underground, expanding, and cracking the driveway.
7. Patch Holes
Sometimes potholes can appear out of nowhere. The reason could be a faulty installation or improper base. But when they do, take care of it as soon as possible to avoid further damage.
Potholes can damage your vehicle’s suspension and tires, and may even become a tripping hazard for people walking over the driveway. Make sure you remove any debris such as leaves, sticks, or trash from the pothole before repairing it to prevent weeds and insects from growing.
FAQ About Fixing Driveway Cracks
Concrete driveways can have cracks from the get-go because pouring a large concrete driveway can be tricky. Or, they develop cracks over time.
Let’s look at a few other reasons cracks can appear in a driveway:
• Freeze and Thaw Cycles: Water is the biggest enemy of your driveway. It gets into the surface any chance it gets. Heavy rainfall, snow, and ice melts may also cause water to seep into the driveway’s surface. As the temperature changes, it freezes, expands, thaws, and refreezes over and over, resulting in cracks and crumbles.
• Expansion From Heat: Concrete can crack from heat expansion. As the surface heats up, the concrete expands and pushes up to relieve the pressure buildup and causes cracks. Sun exposure and warm temperatures can dry up your asphalt driveway and leave it brittle.
• Sharp Object Damage: Sharp items like snowblower blades and snow shovels can scrape and scratch or even tear chunks out of your driveway. These dings and scrapes can draw in water, salt, and snowmelt and cause further cracking on the surface.
• Improper Curing: If moisture isn’t correctly controlled during initial curing, the surface can lose moisture faster and cure quicker than the rest of the concrete slab. This causes cracking. Subpar concrete mix can result in early cracks, too.
• Tree Roots: If your driveway is close to trees, the tree roots might grow and spread beneath the concrete or asphalt and apply pressure from below. As the base layers push up to make space for growing roots, the surface will crack.
• Poor Base and Foundation: Your driveway may also crack due to a faulty foundation installation. If the base isn’t packed tightly with crushed stone and gravel or has sand or soil substrates filled, it can shift and erode over time, causing cracks on the surface.
• Excessive Weight: Heavy or oversized vehicles can crack your driveway because both asphalt and concrete have weight limits. Even if they can endure the weight, the ground beneath might not. It will shift from the weight and crack the concrete surface.
• Incorrect Spacing of Control Joints: Control joints are strategically placed to prevent concrete cracks and when it’s not done right, your driveway will crack.
Driveway crack repairs should be done when you’re expecting a string of dry, warm days. Ideally, the temperature should be between 55 degrees and 90 degrees Fahrenheit to achieve the desired results. Fall or springtime comes with such moderate temperature levels.
Professional driveway sealing costs around $305 on average, with the typical price ranging from $176 to $444. By contrast, the cost of DIY driveway sealing can range from $15 to $160 mainly to buy the sealer and repair materials.
Here are a few signs that will tell you it is time to replace your driveway:
• If you’re starting to see multiple deep cracks.
• You’re experiencing drainage problems such as pooling in sunken parts of the driveway.
• You see potholes in the driveway.
• Your driveway is older than 30 years.
When it’s time, expect to pay around $1,885 to $6,475 or $6 to $16 per square foot to install a new concrete driveway.
When to Hire a Professional
It isn’t unusual to find cracks in your driveway. An average asphalt driveway lasts for 20 to 25 years, whereas a concrete driveway may be good for more than 30 years. You can even extend the life of your driveway by fixing minor cracks when you see them with the help of this guide. If you can’t make the time or don’t feel like getting your hands dirty, hire a driveway repair pro near you to fill your driveway cracks.
Main Image Credit: Famartin / Wikimedia Commons / CC BY-SA 4.0


