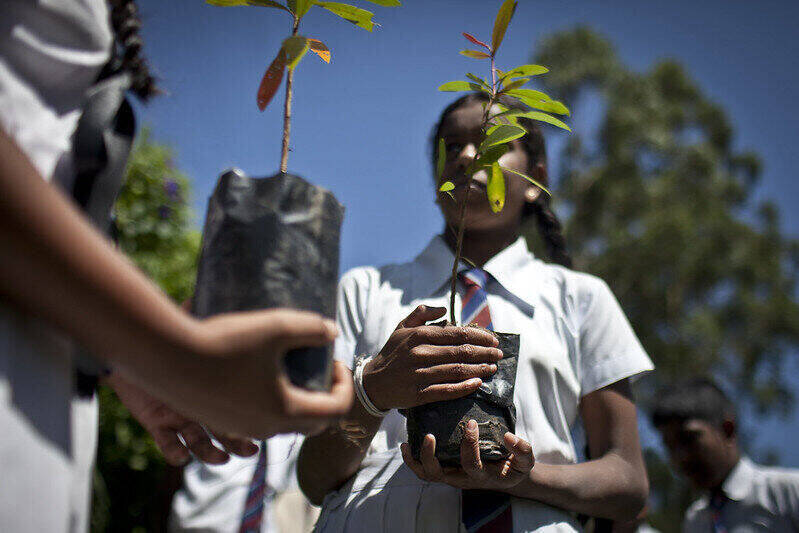
Planning to plant a tree in your backyard? Well, you’re off to a good start. But whether you already have a specific tree in mind or still musing about it, you need to understand how to plant a tree.
In the fairy tale Jack and the Beanstalk, Jack just threw beans to the ground, and they magically grew into a big tree. But it doesn’t work that way in reality, especially since you’re not planting a tree in its natural habitat. But don’t worry. From selecting a tree to fertilizing it, this definitive guide will help you. You may not end up with a giant beanstalk, but you deserve golden eggs for what you’re about to do.
In this article, we’ll cover:
What You’ll Need for Planting Trees
You don’t need a special tool or expensive equipment for the task – just the following items will be enough:
- Spade
- Garden hose
- Tape measure
- Shovel
- Yard cart or wagon
- Tree stakes
- Bucket
- Utility knife
- Rake
Step-by-Step Guide on Planting a Tree
While you need to take certain steps when planting trees, they’re not really that hard. Of course, you will have to be physically strong and mentally patient to succeed.
But even if you’re planning to hire a landscape expert, it’s still crucial to understand the process. At the very least, this step-by-step guide can help you assess the work done by your gardener or professional landscaper.
Step #1: Select a Tree
Choosing the right tree for your yard can be as simple as picking the one that appeals to you the most. You can even pick the same tree as your neighbor’s. However, what looks good in a picture or another’s yard may not be as appealing on your property. Since trees have to be nurtured and grown, the outcome is not necessarily the same for everyone.
So how do you pick the perfect tree for your home? Here are some factors that can help you narrow down your choices:
- Anticipate its growth: Unless you’re planting a container tree, you need to consider how much space your tree will fill without hindering its growth or affecting nearby structures and underground utilities. For instance, a mature tree’s overhanging branches near a fence can be detrimental. Aside from the possibility of damaging the fence, its shade can promote mold and mildew to grow on a wood or vinyl fence.
- Consider the development condition: Moisture, amount of sunlight, and varying weather conditions can affect the growth of your tree. Remember this when narrowing down your choices. You need to pick trees that will not only survive but thrive in your area. If you need to make compromises like amending the surrounding soil or improving drainage, you must take these into consideration beforehand.
- Set your priorities: Define the various purposes of the tree. Will it offer shade to a specific spot? Do you want the tree to support local wildlife? Are you planning to have a tree to add curb appeal to your property, especially during fall? Rank these priorities and eliminate tree types that don’t match your requirements.
- Give some thought to wintertime: Out of all the seasons, winter has the most visible effects on trees – particularly deciduous trees. Do you want a tree that sheds leaves during the cold months or one that’s more evergreen? Also, consider the volume of fallen twigs, seeds, or fruits you’re willing to clean up, as trees can be messy.
Step #2: Choose a Site

Now it’s time to choose the area where you want to plant the tree in your yard. Here are some tips to help you determine the best place for it based on the type of tree you’ve picked.
- Shade trees: As they occupy a huge space, especially when they mature, you need to place them in the more open areas of your yard. Maintain a good distance from structures or power lines, around 15 to 20 feet away if possible. Also, take into consideration where you want the shade to be.
- Clump trees and evergreens: These trees don’t have large, extensive branches, so they’re safe to place near and along the property lines. They can shield your property from the wind, acting as windbreaks. You can place this type of tree in your front or backyard, but never close to your house, as they get very tall and thick.
- Ornamental trees: Trees such as hawthorns and crabapples have fewer restrictions when it comes to placement. Fortunately, their purpose is to add color and beauty anywhere in your yard. However, it’s best to avoid placing them in a location where they block the view of the rest of your front or backyard.
Before you finalize your tree placement, you should also consider utility lines, driveways, sidewalks, sheds, and other structures. You don’t want your tree to damage these while it’s growing. Likewise, you don’t want these to hinder your tree’s development.
Some specific ground rules to keep in mind are:
- Plant your tree 3 to 4 feet away from sidewalks and patios.
- If you choose a tree that can grow taller than the height of utility lines, don’t plant it directly under the line.
- Depending on the tree’s mature size, position it at least 12 to 20 feet from your house.
- For multiple trees, place them around 10 to 30 feet apart from each other.
You should always consider the tree’s mature size when choosing a site. But if you’re unsure about some of these factors, you can always contact a tree care professional for assistance.
Step #3: Prepare the Site
Preparing the site is crucial for a tree’s growth. It can greatly influence the tree’s health as well as its lifespan. Of course, nobody wants a short-lived tree. Here’s the three-step process usually done in preparing a site:
- Site assessment: The soil in urban areas is typically compacted, so it’s hard for the roots of a budding tree to penetrate it. Then there’s also the lack of oxygen and soil moisture, which is more apparent in lands with different soil types. During this step, the goal is to identify what needs to be done to prevent the area’s native soil from stunting the tree’s health and growth.
- Soil preparation: Loosening up the earth usually solves the problem with compacted soil. However, this is not the only thing that needs to be done during the preparation stage. You’ll also need organic matter or compost to improve the nutrients in the soil.
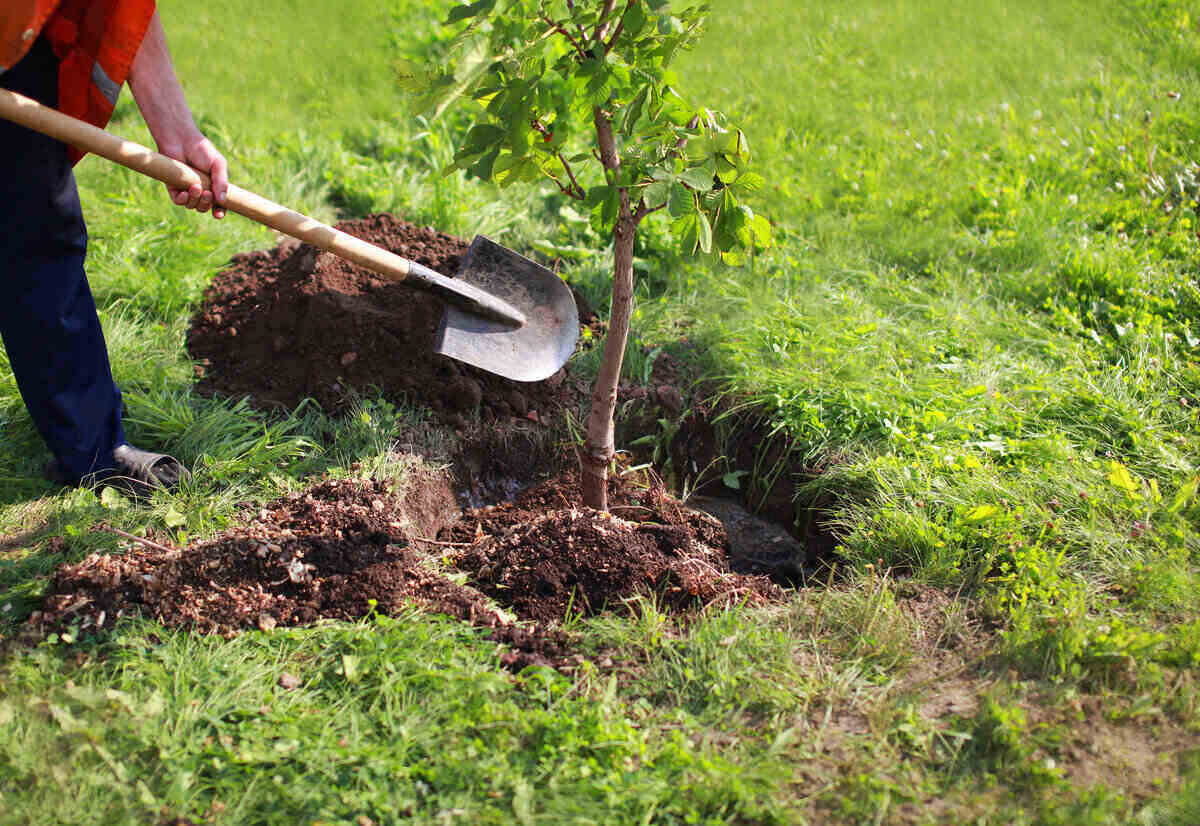
- Hole digging: When the soil is ready, it’s time to dig a hole customized to your tree’s root mass and measurement. The rule of thumb is to dig a hole that’s 3 times wider than the current root mass. The depth should not be more than the length of the distance between the root mass to the trunk flare. You’ll know you did it right if the trunk flare is slightly above the soil grade.
Remember that site preparation depends on the needs of the tree. So if you’re not really sure if your yard can support the tree you want to plant, reach out to a local tree care company. They have the experience necessary to prepare sites in your area.
Step #4: Prepare the Tree

Carefully remove the tree from its container while ensuring that the soil around the roots remains intact. If it gets stuck, tap the outside of the container to loosen it up. Do not yank the tree out of the container. Remember that this has to be done carefully so as not to separate the roots from the tree.
If there is wrapping, remove the cover around the root ball and trunk. Cut up to two rings off the wire basket so that it would not hinder root growth in the future. Also, don’t forget to inspect the root ball and straighten or cut any circling roots.
Use a sharp knife if you have no choice but to cut them. Make four vertical slices along the sides of the root ball and cut an X across the bottom.
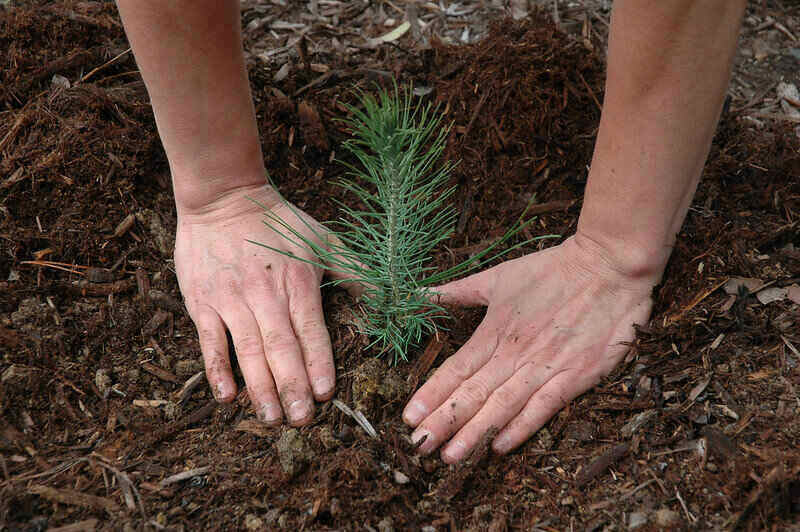
Step #5: Plant the Tree
Once you’ve done all the prep work, you’re now ready for planting time. It’s as simple as placing the tree in the hole. If you’ve followed the site preparation carefully, you will have a hole matching the size of your tree. When placing the tree, remember not to lift it by the trunk. Instead, lift the tree by the root ball.
Again, avoid planting the tree in a deep hole since most of its roots develop in the top 12 inches of soil. But just in case the root collar ends up sitting below the top of the hole, there’s a quick remedy. Simply remove the tree from the hole and compact some soil underneath the root zone. It will help to elevate the tree’s position so that its root flare at the base of the trunk sits slightly above the ground.
Step #6: Position the Tree
Positioning is an important step because it will affect how your tree will look when it grows. It would be best if you have someone to help you adjust it.
Stand back so you can have a better view of your tree. Did you know that every tree has its best face? Determine which side of your tree has it and rotate it so that it’s facing the direction of the street. Finally, have your helper straighten its position, and remember to view it from different angles.
If you want to ensure your tree doesn’t get damaged while rotating it, one of you should support the crown of the tree while the other moves it.
Step #7: Stake the Tree
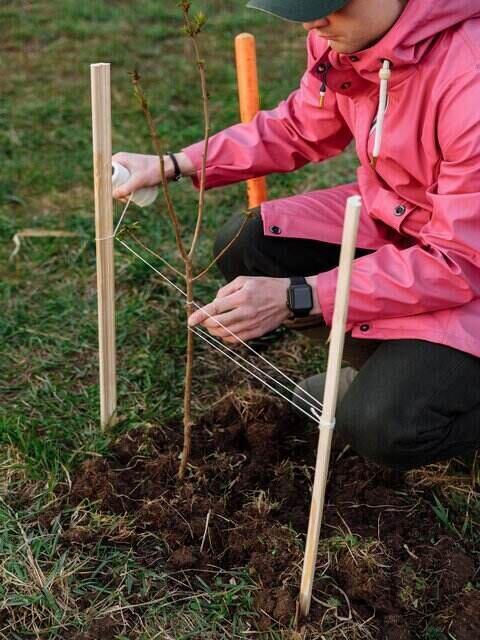
Staking trees is not a requirement because trees develop stronger roots and trunks when they’re not staked. So when is this deemed necessary? Here are some of the conditions that require staking:
- The area where you’re planting gets very windy and could uproot your newly-planted tree.
- The tree has small root systems which may not be able to support the growing stems.
- Your tree’s trunk needs support, or it will bend.
To install tree stakes, drive them into the ground and through the root ball. For the best setup, use three stakes to surround the tree so they can support it from any direction.
You must do staking correctly. Otherwise, it can end up harming the tree instead of helping it. Remember to tie the stakes loosely so the tree can sway with the wind, and remove them no later than its first year of growth. Also, use a wide and flexible trunk attachment material to prevent it from damaging the tree.
Step #8: Backfill and Water
In the past, it was common for a backfill soil to have amendments like peat moss, aged manure, and other ingredients. While it may seem a good way to add nutrients to a growing plant, it also discourages the roots from spreading out. Adding nutrients to the soil is best done at the site prep stage, distributing it to your entire yard.
You may still choose to add amendments, but they should be minimal. You don’t want the tree’s roots to stay only within the boundary of the planting hole.
Since the soil you’ve dug out to make a hole has already been prepped, it’s best to use it as your backfill. Here are the steps:
- Add backfill to your planting hole all the way until you reach almost halfway up the root ball.
- Eliminate air pockets by firming the soil with your hand or foot.
- Check if the trunk remains vertically straight and adjust if necessary.
- Confirm if the trunk flare will be sitting above the soil grade after you’re done backfilling.
- Add more backfill while packing it down and continue to do so until you reach the top of the root ball.
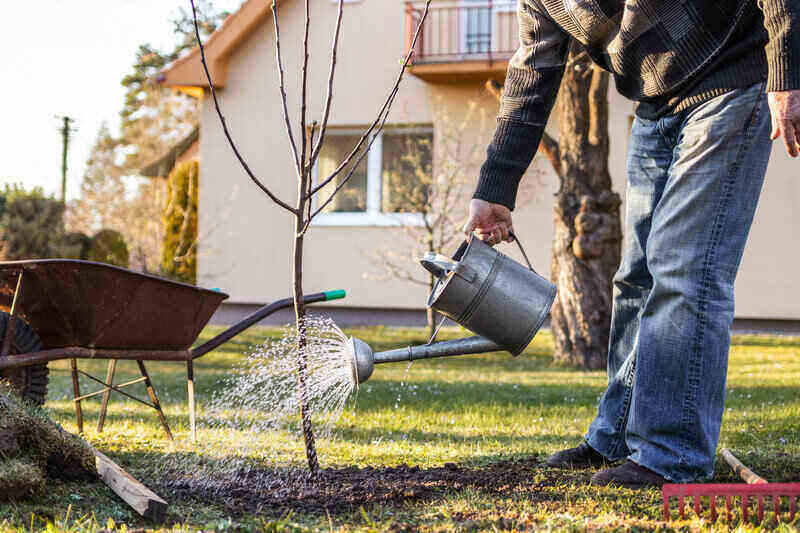
Before you water the tree, you must first create a simple irrigation setup to hold the water and concentrate it over the roots. To do this, construct a ridge of soil around the outer edge of the planting hole 3 to 4 inches high.
After constructing the ridge, you have two ways to water the plant. Using a garden hose, you can let the water trickle for up to 30 minutes. Or, you can fill the basin and allow the water to soak, repeating this step several times. Whatever method you choose, you should evenly add water to the soil, drenching it to remove any large pockets of air.
Step #9: Mulch the Tree
Mulching offers several benefits for your newly-planted tree, including:
- Preventing weed growth
- Maintaining moisture in the soil
- Regulating the soil’s temperature
- Minimizing erosion of soil
The general rule is to apply organic mulch around 2 to 4 inches thick over the soil’s surface. Remember not to allow the layer of mulch to touch the trunk or stem so as not to promote stem rot. Pine needles, hardwood bark, wood chips, and partially ground leaves are some of the most commonly used mulches.
Step #10: Fertilize the Tree

Fertilizing the tree must only be done after the first year of growth, or you could kill your newly-planted tree.
This particular step deserves its own section to emphasize its importance. If this is your first time planting a tree, chances are you would want to add fertilizer to the tree right away.
Avoid adding fertilizer immediately after planting trees. Studies have shown that nitrogen – one of the primary components of fertilizer – can suppress root growth. This is the stage when the young plant’s energy is mainly directed toward root development.
When Is the Best Time to Plant a Tree?
With container-grown plants, anytime is the best time. It’s the same with balled and burlapped trees – you can plant them regardless of the time of year. Since they already have a well-developed root system, their planting and growing season can be year-round.
Ideally, though, you should plant new trees during the cooler months. As such, the dormant seasons remain to be the most optimal times. This is because the conditions are cool and peaceful during early spring or fall, allowing the young trees to establish and grow new roots.
But if we are to choose between the two seasons, fall is the best time for planting trees. While pruning is best done during winter, we can’t say the same for planting new trees. Since the winter season does not encourage growth from the top, the plant’s energy is more focused on growing its roots.
FAQ About Planting Trees
Burying the entire root ball because the hole dug is too deep is one of the common mistakes. Another close contender is not watering enough after planting the tree. Believe it or not, even some professional landscapers sometimes make these mistakes.
There have been numerous studies about how trees add value to a home. Having large trees on your property can add between 3% to 15% to your property value. It is the reason why most buyers prefer homes adorned with beautiful trees.
While homeowners associations and local governments may have specific rules covering this, under common law, both parties on either side of the property line will own the existing tree. Therefore, both homeowners will have to be responsible for maintaining it. But if there’s a need to remove the tree, whoever planted it will be accountable and cover the necessary expenses.
Planting a Tree Goes Beyond Its Aesthetic Appeal
Don’t wait until Arbor Day to plant trees in your backyard. It’s a noble act that will help heal the Earth, which in turn helps everyone on the planet. And with the right tree, you’ll be able to beautify and add more life to your home.
These step-by-step instructions are very easy to follow. But if you still find the task daunting, you can always ask your local landscaper for help.
Main photo credit: Shutterstock