Need to chop down a tree that’s in a bad location? Stop. You always have an option to move it to a new spot instead. Yes, it might take some effort to transplant a tree. But it’s a much better option than removing a tree you love and growing another one from scratch.
The entire process can take months since you need to do the prep work beforehand. For example, you will need to do the root pruning several months prior to replanting to keep them healthy and ensure the tree can survive and thrive in its new home. Exposing a tree’s roots can be a traumatic experience for the plant, so you want to make the process as gentle as possible.
You also should consider the tree’s state of health, which you can quickly measure by its trunk size. A healthy sapling usually has a trunk diameter no larger than 2 inches. The key to avoiding any mishaps is to take your time and do things methodically – and the best way is to follow the steps outlined below.
In this article, we’ll cover:
- What You’ll Need for Transplanting Trees
- Step-by-Step Guide on Transplanting a Tree
- Step #1: Water to Moisten the Soil
- Step #2: Assess How Much to Prune
- Step #3: Prune as You Dig a Trench
- Step #4: Replace the Soil
- Step #5: Choose a New Site
- Step #6: Water the Tree Before Moving It
- Step #7: Make a Hole in the New Area
- Step #8: Dig Around the Tree
- Step #9: Dig Under the Root Ball
- Step #10: Use Burlap to Lift the Tree Out
- Step #11: Transfer the Tree to the New Spot
- Step #12: Put the Tree in the Newly-Created Hole
- Step #13: Fill the Hole
- Reasons for Transplanting a Tree
- When Is the Best Time to Transplant a Tree?
- How To Maintain a Tree Once It’s Transplanted
- FAQ About Transplanting Trees
What You’ll Need for Transplanting Trees
Before running to the hardware store to buy the items below, check your garage or tool shed first. You might already have them lying around somewhere.
- Spade
- Garden hose
- Shovel
- Yard cart or wagon
- Pruning shears
- Burlap
- Twine
- Loppers
- Bucket
- Tape measure
- Utility knife
- Rake
- Tarp
- Cardboard
Step-by-Step Guide on Transplanting a Tree
No job is intimidating if you have a checklist you can easily follow. And that goes for tree transplanting, as well. Here’s the 13-step process that begins with the prep work right down to watering the tree after replanting it.
Take note that the entire transplanting process can’t be done in a single day. For steps 1 to 5, you will have to perform them 3-4 months prior to transplanting the tree.
Step #1: Water to Moisten the Soil
Before you can start pruning the roots, you want to guarantee that the soil around the tree is easy to dig and that it sticks to the roots. To do this, you must water the soil around the mature root ball at least one day before pruning. Also, set your garden hose to low flow and let the water drip slowly for the water to seep into the soil more effectively.
Note that if you have sandy soil, it will be easy to dig. On the other hand, you will find it harder to dig if you have clay soil. But if the soil around your tree is loam, it is much easier to dig and work with.
Step #2: Assess How Much to Prune the Roots
With the soil already prepped 24 hours prior, it’s almost time for root pruning. But before doing so, you need to check if this is something you can do on your own. Following this chart from PennState Extension, you should have a good idea of the approximate weight of the plant to be transplanted, including the soil ball. If your tree is too heavy, don’t hesitate to call a professional tree service company to help transplant it.
If the tree size is not a problem, then it’s time to determine how much of the entire root ball you need to trim. The rule of thumb is that every inch of trunk diameter corresponds to a foot of the root ball’s diameter. So if you have a tree with a trunk 2 inches in diameter, you should mark the area around the root ball in a circular fashion around 2 feet out from the trunk.
Step #3: Prune the Roots as You Dig a Trench
In this step, you’ll be hitting two birds with one stone since you’ll be able to prune the roots while digging the trench. But before you start digging a trench around the root ball, you must be aware of any underground utility lines. Place a call to 811, the call-before-you-dig number, so they can provide you with the approximate location of buried utilities. You will need to know if there are any lines near your tree’s current location or the location you are transferring it to.
- Using a flat spade, dig a trench around the root ball following the mark you placed earlier. The trench size should be about 1 foot wide and 2 feet deep.
- If you need to force a sharp point through the root, you can place the spade perpendicular to the ground and then forcefully step on it.
- Remember to segregate the soil while digging them out, separating the subsoil from the topsoil.
Step #4: Replace the Soil
Now that you’ve finished pruning, it’s time to replace the soil, but don’t just do this haphazardly. Carefully place the subsoil first, followed by the topsoil. Then add a layer of mulch on top of the soil line to help retain moisture.
Doing this during fall is even more crucial as it will help protect the roots from cold damage — about 2 to 3 inches of mulch should be enough.
After a few months, when you are about to move the tree, you should see new feeder roots near the trunk. This is an excellent indication that your tree is starting to develop a strong root system.
Step #5: Choose a New Site
While waiting 3 to 4 months before moving the tree, you can finalize the new location where you want to transfer it. You should consider several factors when choosing a new site.
- Some trees have specific requirements for them to thrive, so use this time to do some research.
- Assess the new location based on the mature tree’s size and check if it can accommodate its growth both above and below.
- Determine if the plant would require a lot of sun or shade as it grows.
- If you’re going to have other plants near it, check its compatibility with them. For example, will it be sitting beside plants that don’t require a lot of water?
Remember that relocating the tree is your second chance to start over again, so try to make it right this time.
Step #6: Water the Tree Before Moving It
A day before moving the tree, don’t forget to water it. Doing so will help make the soil moist so it can be easier to dig. At the same time, it makes the root ball more intact. Use the same watering method as in Step #1 and let the water drip slowly throughout the area where the trench encircles it.
As mentioned above, transplanting will be a traumatic experience for the tree, so it’s best to reduce the stress on its roots as much as possible.
Step #7: Make a Hole in the New Area
Take note of the measurement of the root ball and dig a new planting hole 2 to 3 times wider. It will give enough room for the lateral roots to spread out. However, the hole must only be as deep as the size of the root ball. Anything deeper and it might cause the roots to rot.
To lessen the transplant shock, remember to keep this new plant hole moist until you actually place the root ball.
Step #8: Dig Around the Tree
This step involves the following tasks:
- Start by removing the topsoil using a shovel.
- Then start digging around the tree, a few inches past the trench, using a sharp flat spade. Remember to do this while facing away from the plant.
- Continue digging around the tree, going deeper and deeper – to about 1 to 2 feet down.
It’s possible to have missed pruning some root sections months before. So if you encounter such roots, simply cut them with pruning shears or use loppers for larger ones.
Step #9: Dig Under the Root Ball
When you finish digging around the tree’s circumference, it’s time to start digging under the root ball. Doing this will sever the roots underneath and allow you to lift the tree.
Remember the measurements you took when you were assessing how much to prune? Use it as a guide for how deep you should dig. For instance, if your tree’s trunk diameter is 2 inches, you should dig 2 feet down.
To guarantee that no roots remain attached to the root ball, gently rock the tree. Then remove any loose soil from around the root ball.
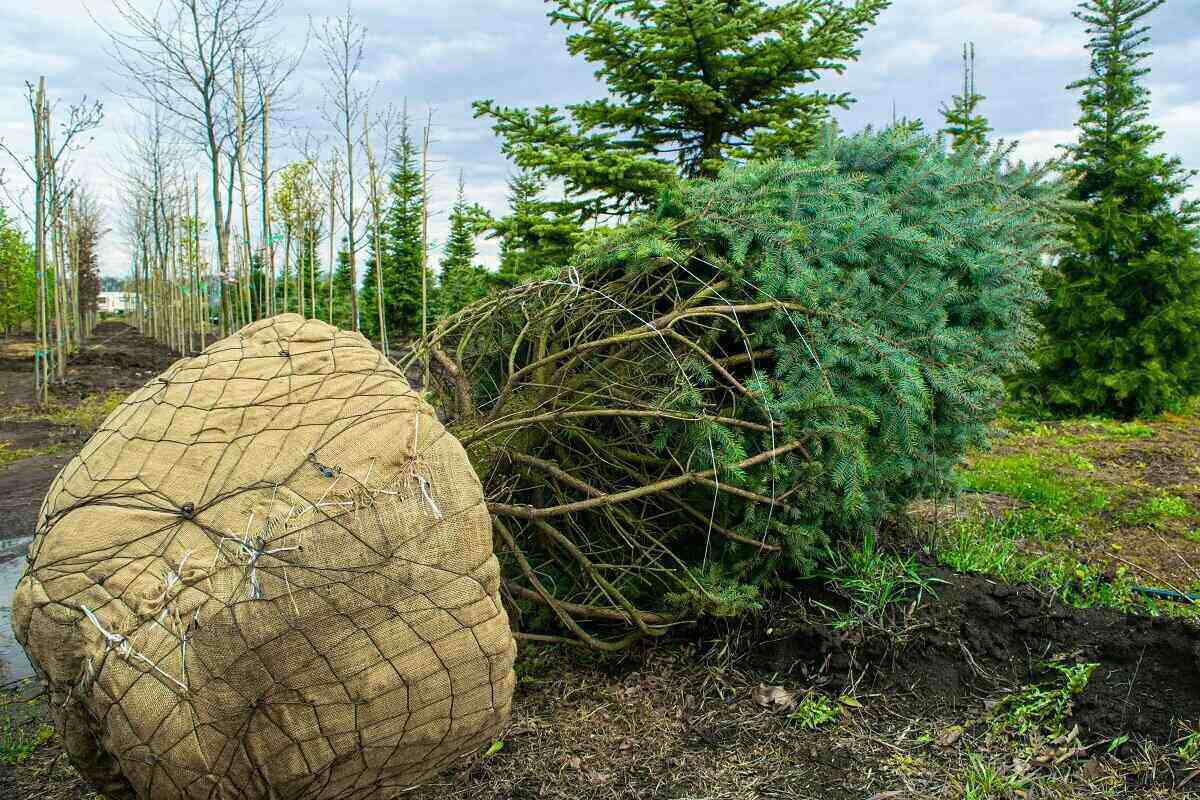
Step #10: Use Burlap To Lift the Tree Out
After removing enough soil from around the tree’s root ball, you should be able to slip your shovel and loosen the plant’s grip underneath. When you’ve confirmed it’s now loose, slide a sheet of natural burlap under the root ball. The size should be big enough to cover it.
Then lift the tree from the hole with the burlap to prevent damaging it. Never try to lift the tree by its trunk. It would be best if you had a couple of people help you with this task, especially for larger trees. They can help leverage the root ball out of the ground and roll it from the hole onto the burlap sheet.
Step #11: Transfer the Tree to the New Spot
Before moving the tree, you need to secure the burlap first so as to keep the soil intact. You can do this by wrapping a twine vertically around the burlap and tying the ends loosely around the trunk.
For smaller plants: Carry it by the burlap and toward the new planting hole.
For heavier trees: You can place the burlap-covered root ball on a tarp and use it as a sled. Drag the tarp to the new location carefully.
You can also use cardboard or a cart to make the relocation easier.
Step #12: Put the Tree in the Newly-Created Hole
Gently slide the tree into the new hole. The plant has to be at the same level – or a little higher – as its old location. You can use the discoloration on the tree crown and trunk area as a guide for the soil level. If necessary, adjust the hole to achieve the proper height.
When the tree is at the correct level, rotate it gently so that its best-looking face is positioned out toward the entrance or sidewalk. Also, see to it that the tree’s trunk is vertically straight.
Once the tree is all set, remove the twine by untying the ends from the trunk and sliding the burlap out from the root ball.
Step #13: Fill the Hole
Fill the hole by shoveling the excavated soil back into the hole. When backfilling, remember to place the subsoil at the bottom and the topsoil on top. You also need to gently tamp them down as you’re shoveling. It will help ensure that no air pockets get trapped, which could cause the plant to shift.
Finally, create a small ditch around the plant along the perimeter of the hole with a mound of soil. Water thoroughly. The ditch will help maintain water to the roots while the tree adjusts to its new location.
Reasons for Transplanting a Tree
Things change, and usually, this is the reason why we need to move a tree or cut it down. If you think about it, we don’t intentionally plant a tree only to move it sometime later.
Here are some of the reasons for transplanting a tree:
- The tree is growing too close to a structure, such as a fence or house
- Nearby utilities and plumbing pipes below the ground are at risk because of the extending roots
- Landscaping projects or new home additions like fence installations
- The tree is not getting enough sunlight or nutrients from the soil in its current location
Regardless of the conditions, most homeowners decide to relocate a tree instead of cutting it down because trees don’t grow out of thin air. It takes a lot of effort and patience to grow one, which is why it would be a waste just to get rid of it.
When you transplant a tree, you are not only providing a solution to a problem but also saving a tree.
When Is the Best Time to Transplant a Tree?
There are two specific time frames throughout the year best suited for tree transplanting. One is in late winter or early spring, and the other is during fall.
These windows are the dormant period when the weather is neither too cold nor too hot. They give a newly-transplanted tree enough time to adapt to its new environment without getting stressed about the harsh weather.
So to properly plan your transplanting, first determine when you’re actually going to move the tree, then work your way backward for prep time. Let’s say you want to do it in early spring, around March 21. You should start your prep work 3 to 4 months prior, sometime between Nov. 21 and Dec. 21.
How To Maintain a Tree Once It’s Transplanted
You still need to perform proper tree care after transplanting. Generally, you should treat it as you had when it was first planted. The tree will have to recover from the shock and re-establish its roots, which is basically similar to what it went through when it was planted in its original location.
So, for the most part, you’ll have to keep the soil moist with mulching. Distribute a layer of mulch around the transplant about 3 inches high. The rule of thumb is to keep the mulch several inches away from the base of the tree for air circulation. Otherwise, having the landscape mulch too close to the trunk can encourage rodents.
Water the plant well, and if you need to use stakes, be sure to follow proper staking steps.
FAQ About Transplanting Trees
You can relocate a tree that has a 2-inch or less trunk size within the same yard. And for small trees with a trunk diameter of 1 inch or less, transplanting can be done even without digging a solid root ball. Remember, though, that the bigger the trunk diameter, the more difficult the task is. So for other large trees with a trunk size above 4 inches, the transplanting should be delegated to professionals.
Since the tree is still re-establishing and growing new roots, adding fertilizer can discourage it from spreading outward. As such, you should not add fertilizer to a transplanted tree immediately. We recommend waiting it out for at least a year before adding fertilizer to an established tree.
The steps in moving a tree can become exponentially hard the more mature it is. Professionals will have to use specialized equipment to dig up the tree and wrap its enormous root ball. Even the cleanup process is very daunting. So you’re looking at an approximate cost of $2,700.
Transplanting a Tree Is Always Well Worth the Effort
Don’t waste time and effort planting trees from scratch. You can always choose to relocate an existing one to a better area if the conditions of its current location are no longer suitable. While you should be able to do this by yourself if your tree is still small, it’s also okay to ask for professional help. After all, we’re talking about a living thing here, so you must exercise proper care throughout the process.
Looking to move a tree? Connect with local landscape professionals today and have them help you accomplish this task.
Main photo credit: Shutterstock