If you’re looking to add more space for ornamentals in your lawn (or reduce your water bill), there are 4 ways to remove grass: use heavy machinery, apply herbicides, dig manually, or smother with cardboard.
The last method, sheet mulching, is a no-dig method that transforms lawns into garden beds by layering cardboard, compost, and mulch.
Also called lasagna mulching, this technique smothers grass naturally, eliminating the need for tilling, herbicides, or back-breaking sod removal, while improving your soil. The process is straightforward: Cover unwanted grass with cardboard, add compost and mulch on top, then wait 4-6 months for everything to break down. We’ll show you how.
| Ready to transform your yard without the hard work? LawnStarter’s landscaping pros can handle the heavy lifting — from lawn grass removal to garden bed installation. Get a free instant quote today. |
| Project Difficulty: Easy to intermediate (requires a great deal of labor) Estimated Time to Complete: Typically takes 1 day of active work Project Cost: Expect to pay $85 to $250 on materials for 50 sq. ft. at an 18-inch depth |
What Is Sheet Mulching?
Sheet mulching smothers existing vegetation, forcing grass and weeds to die while creating fertile soil. The technique earned the nickname “lasagna mulching” because you layer cardboard or newspaper (your “noodles”), then alternate layers of compost and mulch.
When you cover grass with light-blocking materials, plants can’t photosynthesize and eventually suffocate. Meanwhile, the cardboard attracts earthworms, which tunnel through and create air channels, improving decomposition. Their castings also add valuable nutrients as the layers break down.

“A lot of people think that they need to till their soil for gardening, but actually, it can damage it,” says Ben Falk, permaculture expert at Whole Systems Design in Vermont’s Mad River Valley. “Sheet mulching works well for any type of garden or plant bed. It’s easy to do and much better than tilling because as it breaks down, it creates nutrients and all types of biological activity in your soil.”
Sheet Mulching Benefits
- Builds rich, loamy topsoil
- No herbicides or chemicals needed
- Reduces lawn irrigation costs and water use
- Free or low-cost materials
- Minimal weeding once established
Potential Drawbacks
- Takes 6+ months for full decomposition
- Attracts slugs and snails
- Sourcing enough materials for large areas takes effort
See Related:
– What is Compost?
– What Is Mulch?
Sheet Mulching vs. Other Lawn Removal Methods
| Method | Cost (50 sq. ft.) | Ready to Plant |
| Sheet mulching | $85-$250 | 6+ months (improves soil) |
| Tilling | $50-$125 rental | Immediate (damages soil) |
| Sod cutter | $100-$140 rental | Immediate (removes topsoil) |
| Herbicide spray | $30-$60 | 2-4 weeks (chemical residue) |
| Manual removal | Free | Immediate (very hard work) |
Sheet mulching works best when you want to convert a lawn without chemicals, can wait 6+ months for planting, have access to free materials, and prefer low-maintenance landscaping.
Not ideal if you need immediate planting beds, have severe slug problems, can’t source enough materials, or are working on steep slopes without erosion control.
How to Sheet Mulch: Step-by-Step Guide
Step 1: Test Soil and Gather Materials
Start with a soil test to identify nutrient deficiencies and test the soil pH. You can add amendments on project day.
For 50 square feet (18-inch depth), you’ll need:
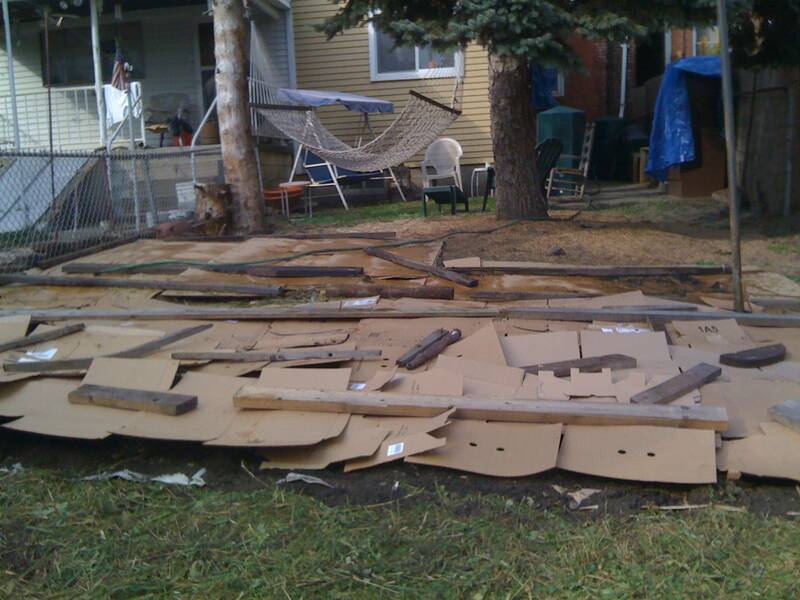
- Plain brown cardboard: 75 to 100 square feet (remove all tape, labels, staples)
- Non-glossy newspapers: 2- to 3-foot stack — if using instead of or with cardboard
- Finished compost: 1.5 cubic yards
- Carbon-rich “brown” organic matter as mulch: 1.5 cubic yards (wood chips, shredded bark, straw, pine needles)
- Tools: Garden hose, wheelbarrow, shovel, rake, flagging markers
Note: See below for alternative materials. For deeper beds (up to 36 inches), increase compost and carbon materials proportionally.
See Related:
– How to Use a Soil Test Kit
– 9 Reasons Why Soil Testing Is Important for the Lawn
– Composting 101: How to Start Composting
Step 2: Prepare the Lawn Area
- Clean up debris, rocks, and trash.
- Remove invasive plants and woody vegetation, including stumps.
- Mow the grass short, leaving clippings in place.
- Cut plants to the ground.
- Flag sprinkler heads.
Note: If you are sheet mulching along a sidewalk, driveway, or patio, remove a 6-inch strip of sod along the hardscape to prevent mulch spillover.
Step 3: Amend the Soil
- Change the soil pH by sprinkling lime on acidic soils, and sulfur on alkaline soils.
- Address nutrient deficiencies from the soil test report.
- Open up compacted soil with spike or manual aeration.
- (Optional) Add a thin layer of compost or grass clippings.
See Related:
– Lime for Lawns: Why, When, and How to Lime a Lawn
– How to Aerate Your Lawn: A Complete Guide
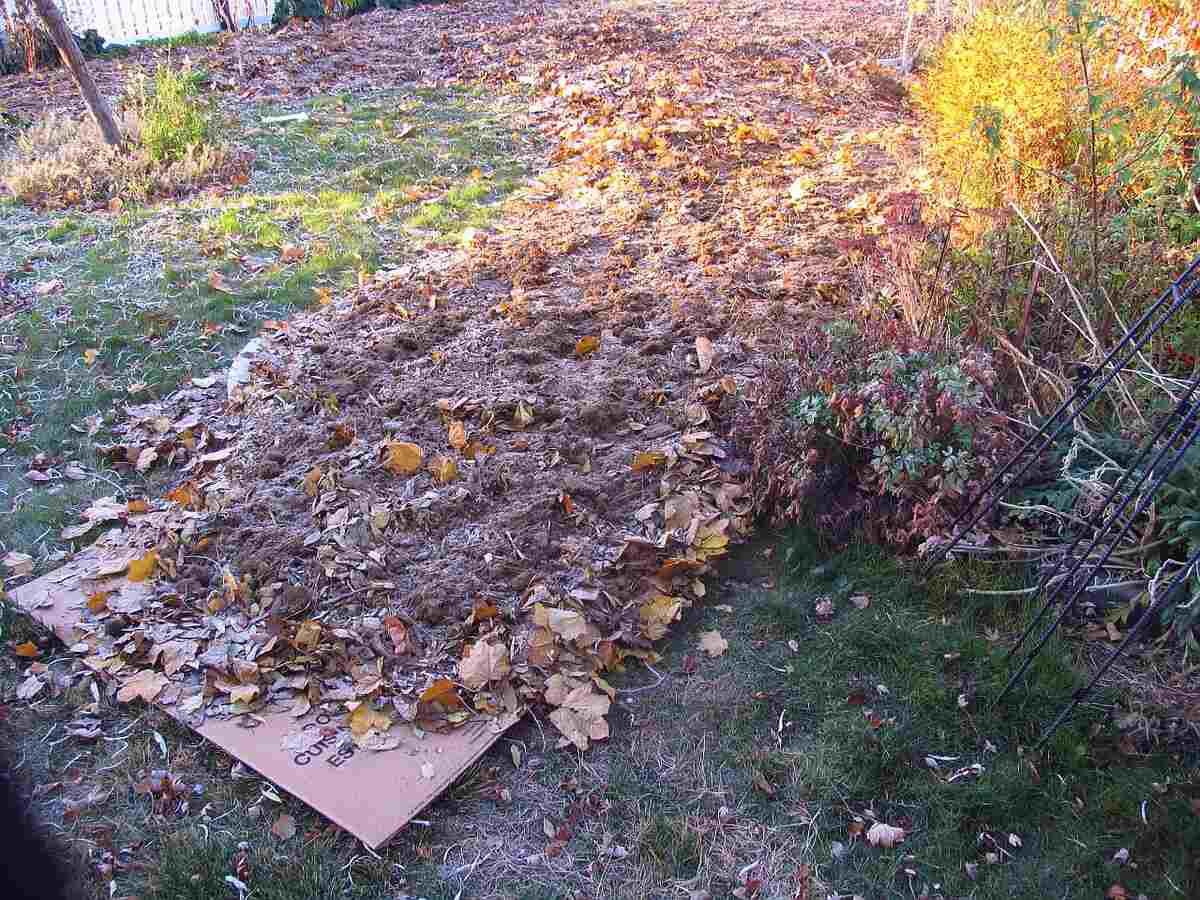
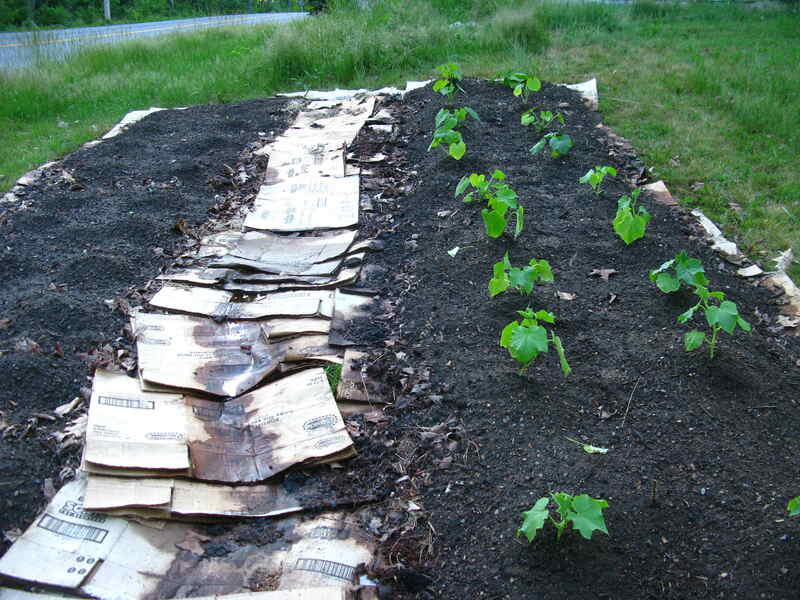
Step 4: Lay Down the Weed Barrier
- Cover the area with a layer of cardboard, overlapping the edges by 6 to 8 inches, or a 1/4-inch-thick layer of newspaper, overlapping the edges by 3 to 4 inches.
- Cut around plants you want to keep and sprinkler heads.
- Wet the layer down with the hose.
- For extra insurance, double-layer with newspaper underneath and cardboard on top, spreading a thin layer of nitrogen-rich material (like grass clippings) between layers.
Step 5: Add Compost and Mulch Layers
This is where the “lasagna” happens. These layers build fertility and weigh down your weed barrier.
- Spread 2-3 inches of finished compost directly on the cardboard to add immediate nutrients and jump-start decomposition.
- Wet this layer so it has the consistency of a wrung-out sponge.
- Add 2-3 inches of carbon-rich material.
- Wet this layer so it has the consistency of a wrung-out sponge.
- Repeat as many times as you want, until the layers are 18 to 36 inches deep. Always end with a carbon-rich layer.
Step 6: Maintain and Monitor
- Water weekly in dry weather to keep decomposition active.
- Add more mulch if settling exposes cardboard.
- Patch any gaps where grass pokes through.
How Long Does Sheet Mulching Take to Break Down?
Timeline: 6 months to 1 year for full decomposition. The process is slow because it lacks the microbes needed to generate heat, like in hot composting.
Factors that speed it up:
- Warmer temperatures
- Regular watering
- Thin cardboard layers
- High-nitrogen compost
Ben Falk’s shortcut: “If you use plenty of compost on top of the cardboard layer, you don’t have to wait to start using it. But more compost does mean more expense.”
Four-inch potted plants can go straight into the compost layer on top of the cardboard. For larger plants or colder regions, wait until after materials have broken down.
Best Time to Sheet Mulch
Fall is ideal: Mulching in October gives you planting-ready beds by April. Winter moisture and freeze-thaw cycles accelerate breakdown.
Mid to late spring works too: Especially for targeting crabgrass and summer weeds before they go to seed.
Avoid summer: Heat slows decomposition, and materials dry out quickly, requiring constant watering.
See Related:
– How to Get Rid of Crabgrass in Your Yard
What Materials Can You Use for Sheet Mulching?
The materials listed in Step 1 are the most commonly used, but here are some common alternatives and materials to avoid.
Weed Barriers Safe for Gardens:
- Cardboard rolls (Some landscapers use commercial cardboard rolls — also called mulch paper or brown kraft paper — for efficiency on large projects. These typically come in 36-48 inch widths and eliminate piecing together boxes.)
- Printer paper
- Burlap or natural fiber cloth
“Green” Materials to Add to Compost:
- Fresh grass clippings
- Kitchen scraps (vegetable and fruit waste)
- Coffee grounds
- Well-rotted manure (horse, cow, or chicken)
- Fresh, green leaves
Alternative “Brown” Materials:
- Dry leaves
- Unbleached paper towels and napkins
- Sawdust from untreated wood
- Natural fibers like wool, silk, leather, and cotton
Avoid These:
- Plastic sheeting (doesn’t decompose)
- Landscape fabric (blocks beneficial organisms)
- Glossy or heavily coated cardboard
- Treated wood products
- Materials with tape, staples, or adhesives still attached
- Meat scraps
- Dairy products
Sheet Mulching Cost
DIY Budget: $85-$250 for 50 square feet
Cost breakdown:
- Mulch: $26-$102 (1.5 cubic yards at $17-$68/yard)
- Compost: $38-$75 (1.5 cubic yards at $25-$50/yard)
- Cardboard/newspaper: $0-$25 (usually free)
- Other amendments: $20-$50
Ways to reduce costs:
- Source free cardboard from appliance stores, bike shops, or moving companies
- Contact tree services or local municipalities for free wood chips
- Make your own compost
- Ask neighbors to save newspapers and boxes
| Need professional help? LawnStarter’s landscaping professionals can handle garden bed creation, including soil prep, material installation, and planting at competitive rates. |
Troubleshooting Common Sheet Mulching Problems
Worried about your cardboard staying put? Check out solutions to these common sheet mulching problems:
- Grass growing through: Cardboard had gaps or was too thin. Add more layers immediately.
- Weeds after 6 months: Deep-rooted perennials need thicker cardboard (3-4 sheets) or 12+ months smothering time.
- Materials blowing away: Water thoroughly during installation. Use landscape staples for windy sites.
- Cardboard visible through mulch: Settling exposed barrier layer. Topdress with 2-3 more inches of mulch.
- Water pooling: Poor drainage on compacted soil. Poke drainage holes with a garden fork, or aerate before mulching (see Step 3).
- Slugs and snails: Use copper tape barriers, diatomaceous earth, or hand-pick at dawn. Reducing moisture helps.
Frequently Asked Questions About Sheet Mulching
No, sheet mulching won’t harm established tree roots. The cardboard and mulch layers are too thin to suffocate mature root systems. However, avoid piling materials against tree trunks, which can cause rot — leave 6-12 inches of clearance around the trunk base.
Yes, but anchor cardboard with landscape staples or stakes to prevent sliding. Install a physical edge (wood borders or stone) at the downhill side to contain mulch, and consider terracing steep slopes. Slopes over 15 degrees may require erosion control fabric.
No need to remove existing mulch — it becomes part of your organic layer. Simply mow or rake it flat, then lay cardboard over everything. The old mulch adds extra carbon and helps smother grass more effectively.
Get Professional Help With Your Landscape Transformation
While sheet mulching is DIY-friendly, there’s significant prep work involved: soil testing, material sourcing, measuring, and installation. If you’d rather spend your weekend relaxing than hauling cardboard, LawnStarter’s local landscaping pros can handle everything from lawn removal to garden bed installation.
Get a free instant quote and transform your yard the easy way.
Sources
Ben Falk, permaculture expert of Whole Systems Design, Mad River Valley, Vermont. Personal interview.
Main Image: Lasagna garden mulching layers in progress. Image Credit: natural flow / Flickr / CC by-SA 2.0