Mulching is the easiest way to make your yard look polished, and it’s simpler than most people expect. A good mulching job comes down to 4 easy steps: clear the bed, figure out how much mulch you need, spread 2-4 inches evenly (keeping it a few inches from stems and trunks), and water it in.
A few hours of work buys you fewer weeds, steadier soil moisture, healthier plants, and that satisfying look of a landscape that has been tended.
Rather hand this one off? LawnStarter connects you with our local landscaping pros who can handle everything from bed prep to final cleanup.
| Key Takeaways |
|---|
| • Apply mulch 2-4 inches deep, keeping it 2-3 inches away from plant stems and 6 inches from tree trunks. • Remove weeds and edge beds before mulching for best results. • Water the soil before mulching and after installation to help it settle. |
| Project Difficulty: Beginner Estimated Time to Complete: 2-6 hours, depending on the area’s size Project Cost: For DIY projects, mulch costs $30 to $135 per cubic yard, depending on the type. If you hire someone, mulch installation costs range from $77 to $94 per cubic yard. |
Tools You’ll Need for Mulching
The right tools make this job so much easier on your back. Here’s what you’ll need:
Essential tools:
- Work gloves, long sleeves, and sturdy boots
- Edging tool for creating clean borders
- Wheelbarrow for transporting mulch
- Large shovel or pitchfork for loading
- Garden rake for spreading and leveling
- Garden hose for watering
Optional but helpful:
- Hand weeder or weed fork for prep work
- Hoe to dig out stubborn weed roots
- Measuring tape for calculating areas
Pro Tip: Wear old “yard clothes” you don’t mind getting dirty, shares Harley Grandone, a landscape designer with 20+ years of experience. “Moist mulch sticks to everything (especially triple-ground) and can be prickly on your skin.” Dyed mulch may also stain your clothes when wet.
Step 1: Prepare Your Beds
A little prep work goes a long way here. Skip these steps, and you’ll fight weeds through the mulch layer all season.
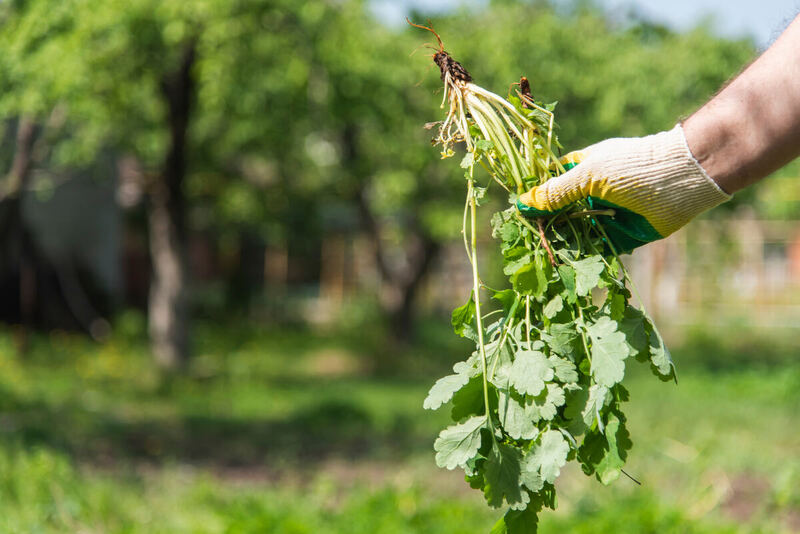
Remove All Weeds
Get rid of existing weeds before mulching. Don’t try to smother them under mulch; it doesn’t work. Hand-pull weeds or use a post-emergent herbicide to knock them out first.
If using herbicides, wait 24-48 hours between the application and mulching. Better yet, plan the mulching 1-2 weeks after the post-emergent, when all the weeds are dead.
See Related:
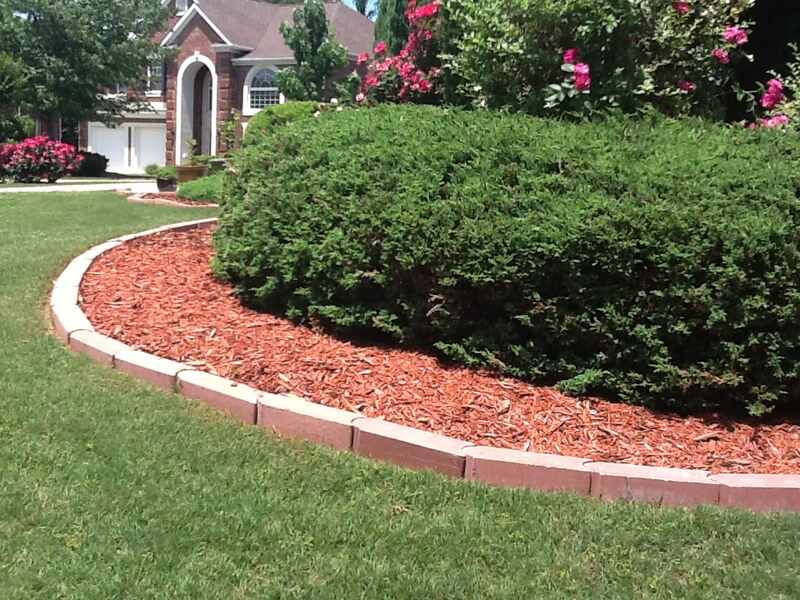
Edge Your Beds
A clean border between your garden beds and lawn keeps mulch where it belongs and stops grass from creeping in. You can use a manual edging tool (such as a half-moon edger), a powered edger, or install physical garden edging made of metal, stone, or plastic.
That crisp edge will make your mulched areas look sharp and well-maintained.
See Related:
Water the Soil
Moisten the soil before mulching so water reaches plant roots directly rather than slowly filtering through dry mulch. Thoroughly soak the area until the top 2-3 inches of soil feels damp.
If you used a post-emergent herbicide, wait 24 hours before watering.
Apply Pre-Emergent Herbicide
Apply a pre-emergent herbicide in spring and fall to prevent weed seeds from germinating. You can apply it either directly on the soil before adding mulch or on top of existing mulch.
Pre-emergents that break down easily, such as those containing pendimethalin, trifluralin, or oryzalin, are best applied under the mulch layer. If you’re not sure how fast yours breaks down, better to apply before mulching.
See Related: Why Pre-Emergent Didn’t Work (And What to Do Now)
Step 2: Calculate How Much Mulch You Need
Whether buying bagged mulch or ordering bulk, you’ll want to know how much you actually need to avoid wasting time or money.
“Ordering too little means you have to order again, which means more delivery fees or another trip to the store. Ordering too much means you have excessive mulch that you didn’t have to spend money on,” says Ciondre Pinnock, owner of Full Cycle YDM, a landscaping business in New Jersey.
Here’s a handy rule of thumb: One cubic yard of mulch covers about 100 square feet at 3 inches deep.
To find out how much mulch you need for your garden bed size, use the mulch calculator below.
[Mulch Calculator]
Mulch Calculator
Quick Mulching Tips
DON’T
- ❌ Pile mulch against tree trunks. This can cause bark rot and invite pests.
- ❌ Pile mulch against your house foundation
- ❌ Till carbon-rich mulch (e.g. sawdust) into the soil, it can tie up nitrogen.
DO
- ✓ Remove weeds before applying mulch
- ✓ Keep mulch 2-3 inches away from plant stems and 3-4 inches away from tree trunks
- ✓ Refresh mulch when it starts to decompose, usually annually.
See Related: How Much Does Mulch Cost?
Step 3: How to Spread Mulch Properly
Now for the fun part — watching your beds come together. These techniques will give you that professional look we’re all striving for.
Transport and Distribute
Load your wheelbarrow and drop small piles throughout your beds. Space piles evenly, so you’re spreading similar amounts across the entire area.
This saves you from having to haul mulch across the yard while spreading.
Start from the Back
Just like mopping a floor, start at the back of your garden bed and work your way out. That way, you’re not stepping on freshly spread mulch.
Use your rake to spread mulch evenly in all directions.
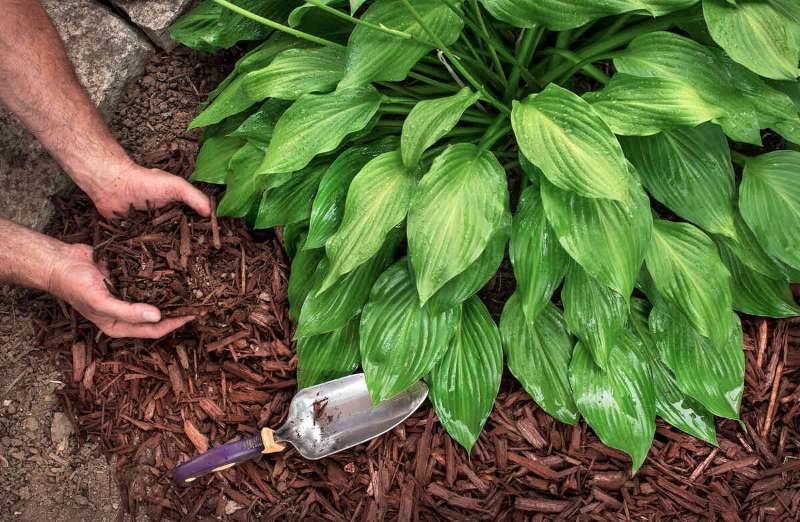
Maintain Proper Spacing and Depth
This part’s important: Never pile mulch against plant stems or tree trunks. Moisture trapped against the bark can cause rot and invite pests.
Proper spacing guidelines:
| Area | Clearance from the stem/trunk |
| Flower beds and vegetable gardens | 1-2 inches |
| Shrubs | 3-5 inches |
| Trees | 6-inch (extend mulch ring 3 feet out) |
Avoid “mulch volcanoes”— those big piles of mulch against tree trunks. They look nice, but they slowly kill trees. Keep that 6-inch clearance and extend the mulch ring by 3 feet.
“When my landscaping crew spread mulch around trees, they created a ring 3 feet wide around the tree,” says Grandone, “which is standard practice in the landscaping industry.”
Here’s how to use mulch by type: Spread fine mulches, like triple-shredded hardwood, no more than 2 inches deep — thicker layers mat together, blocking oxygen and water from reaching roots.
Coarser wood chips allow better airflow, so you can go 3-4 inches on well-drained soils or 2-3 inches on heavy clay.
See Related:
Create Tapered Edges
Taper mulch at bed edges so it gradually thins toward the perimeter. It’s a pro trick that creates clean lines and prevents border plants from being buried.
After spreading, level everything with your rake for an even and tidy appearance.
Step 4: Water Your Mulch

After spreading mulch, give the whole area a good watering. This does a few things for you: It helps fine particles settle, weighs down lighter mulch so it doesn’t blow around, and activates any pre-emergent herbicide you applied.
Water until the soil beneath feels damp but not saturated. You want moisture to reach the roots, not pool on the surface.
Pro Tip: If you use dyed mulch (black, brown, or red), there’s a risk of staining, says Grandone. “Dyed mulch can stain asphalt and concrete when wet. To clean it, use a stiff-bristled brush with dish soap or diluted vinegar, scrubbing in circular motions. Rinse off with a garden hose.”
How to Maintain Your Mulch
Mulch isn’t a set-it-and-forget-it deal, but it doesn’t need a lot of pampering either. A little upkeep keeps it looking fresh and doing its job.
Organic Mulch Maintenance
Organic mulch is any natural material (such as wood chips, straw, or compost) spread over the soil to retain moisture, block weeds, and improve soil health as it decomposes.
Organic mulches break down at different rates depending on the material, your climate, and soil activity. Here’s how to keep them performing:
- Refresh yearly: Add new mulch to restore to a depth of 2-4 inches.
- Fluff it up: Between applications, rake or flip your existing mulch with a lightweight rake or pitchfork. This improves airflow and prevents the mulch from turning into a compacted, water-repellent layer.
- Try mulch dye: Want a quick refresh without adding more mulch? Spray existing mulch with mulch dye (brown, black, or red). Keep the nozzle low to avoid spraying plants.
Inorganic Mulch Maintenance
Stone, rubber, and other inorganic mulches won’t break down, but they still need some attention:
- Weed regularly: Remove weeds that sprout through.
- Rake periodically: Freshen up stone or rubber mulch by raking to dislodge trapped dirt.
- Rinse annually: After weeding and raking, rinse the area with a garden hose to wash away debris.
See Related:
Mulching Mistakes to Avoid
Even seasoned gardeners make these common errors:
✗ Don’t mulch against structures: Keep it 6 inches from your house foundation, fences, and wooden structures. It holds moisture, which can rot wood siding and invite termites.
✗ Don’t till carbon-rich mulch into soil: Materials like sawdust or fresh wood chips hog nitrogen as they decompose, temporarily starving your plants. Let them break down on the surface instead.
✗ Don’t over-mulch: Mulch deeper than 4 inches creates waterlogged soil, suffocates roots, and encourages disease. If you already have existing mulch, measure its depth before adding more.
✗ Don’t use landscape fabric under organic mulch: It stops organic mulch from enriching the soil and makes replanting difficult.
See Related: Landscape Fabric Types and How to Use Them [Guide]
Types of Mulch: Which Should You Choose?
Different mulches have different strengths. Here’s a quick rundown:
| Type of Mulch | Best for | Replace |
| Wood chips | General landscaping | 1 year |
| Shredded bark | Slopes, erosion control | 1 year |
| Pine straw | Acid-loving plants (azaleas, blueberries) | 6-12 months |
| Rubber mulch | Playgrounds | 8-10 years |
| Stone or gravel | Xeriscaping and modern designs | 10+ years |
| Compost | Vegetable gardens | 3-5 months |
Pro Tip: Pinnock says it’s best to avoid dyed, colored rubber mulch. “This sounds like a good option because it seems like a great permanent solution. But at the same time, it’s a long-term headache that burns your plants, leaches chemicals into your soil, like zinc, and adds no nutritional value to your soil like wood mulch.”
See Related: Types of Mulch: How to Choose the Right One for Your Landscape
When to Mulch Your Yard
Timing matters more than you might think. Here’s when it’s best to mulch your beds:
| Spring (March-May) | Fall / Early winter (September-December) |
| – Prime mulching season – Apply after the soil warms but before summer heat kicks in – Pair with a spring pre-emergent application | – A close second (fall mulching insulates roots for winter) – Apply just after the first hard frost (plants should be dormant) |
What about summer mulching? Summer mulching works well if it’s early summer and is fine even later if you’re filling in bare spots or refreshing faded mulch. Skip the hottest days (fresh mulch can actually warm the soil more).
Winter mulching has its limitations. Applying too late in the cold season may expose tender plant roots to temperatures below their tolerance. However, if you forgot to protect your plants with mulch in the fall, it’s still better to ensure some cover in the winter than none at all.
FAQ
Usually, no. If last year’s mulch has broken down from 3 inches to 1 inch, add 2 inches of fresh mulch to restore proper depth. But if plants showed disease last season — or you spot mold or fungus — clear out the old mulch completely.
Not really. Grass will push right through, leaving you with a mess. To turn a lawn into a mulched bed, kill the grass first with a non-selective herbicide (or solarize it), then clear away the dead grass before mulching.
See Related: Sheet Mulching: How to Turn Grass Into Garden Beds Without Tilling
Get Professional Help With Mulching
Mulching does wonders for your landscape’s appearance while protecting your plants’ health. With good preparation, the right depth, and a little yearly maintenance, you’ll have garden beds that hold moisture, keep weeds down, and need way less attention.
But if you’d rather skip the heavy lifting, sore back, and mulch under your fingernails, let the pros handle it.LawnStarter connects you with our trusted landscaping pros who can assess your beds, recommend the right mulch type, calculate quantities, and complete installation.
Harley Grandone contributed to this article.
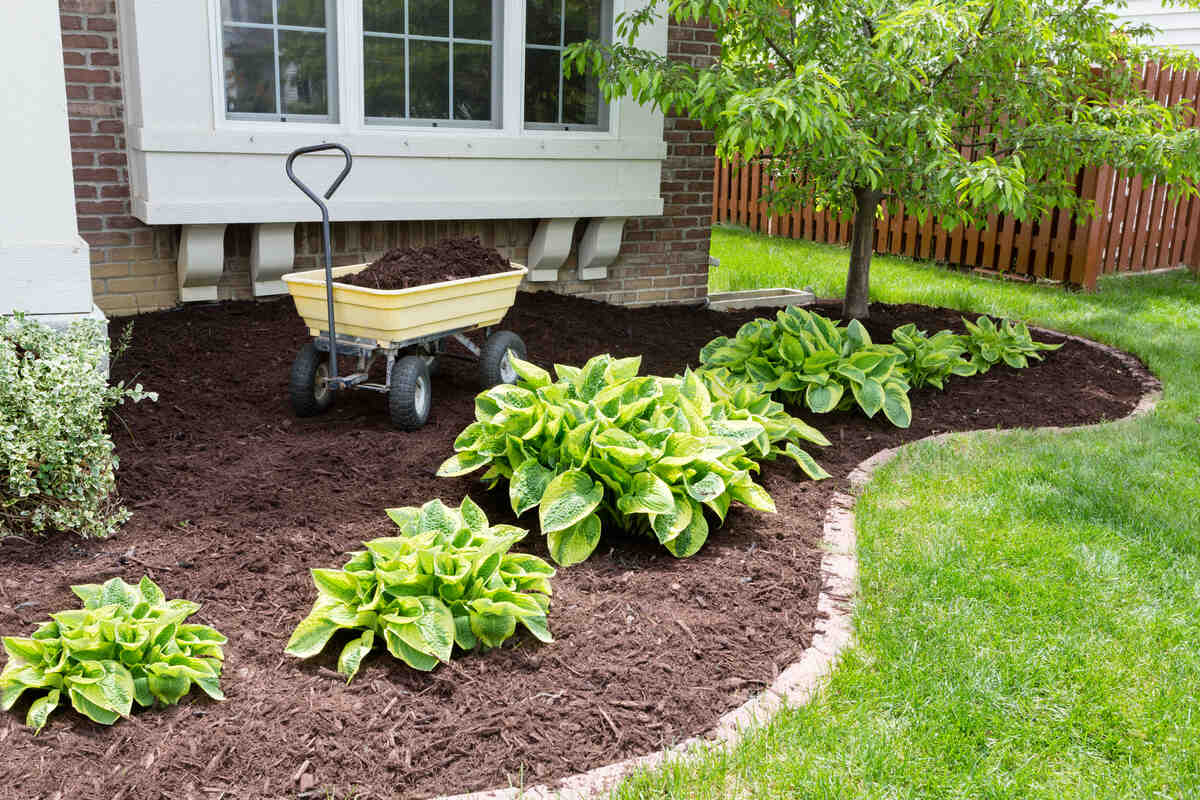
Main Image: Mulched bed with hostas and garden cart. Image Credit: Ozgur Coskun / Adobe Stock