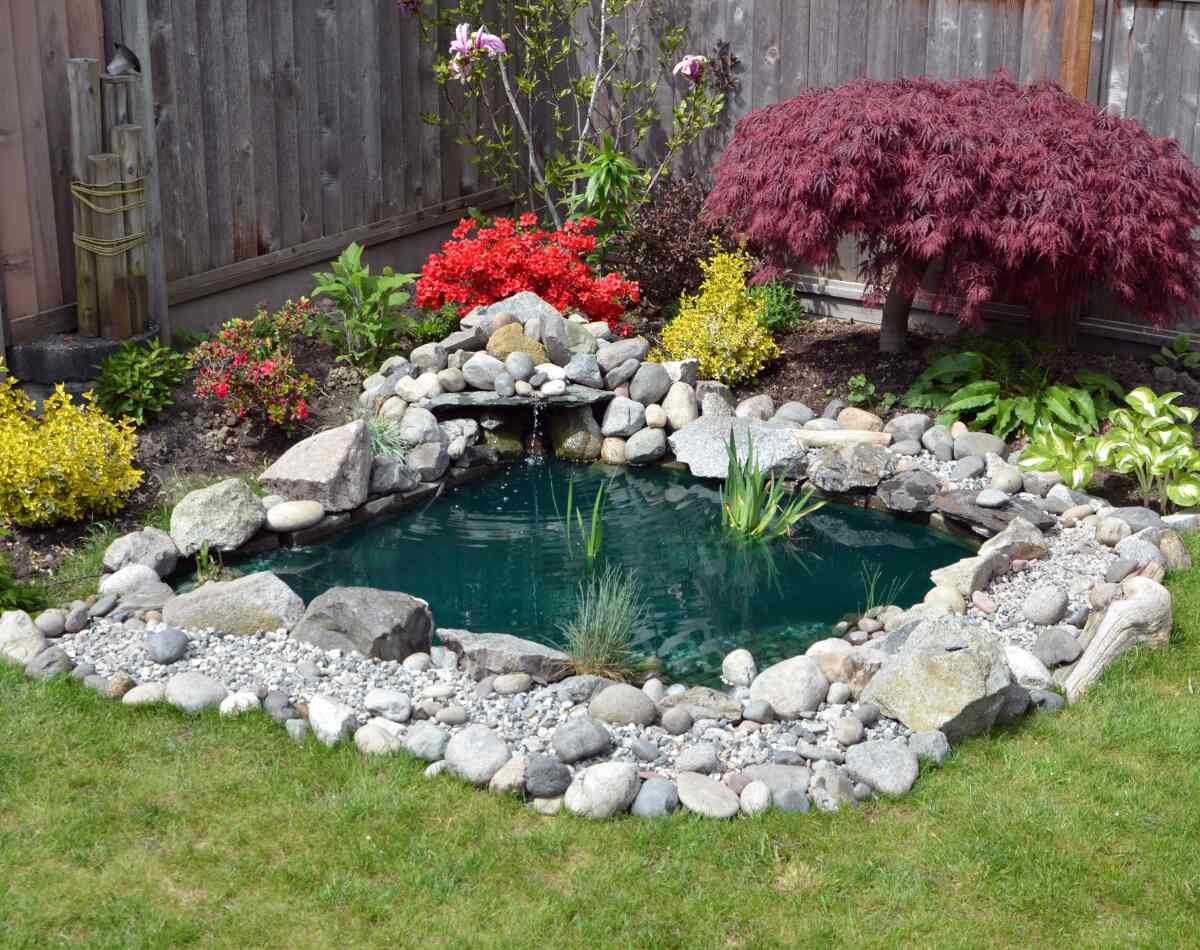
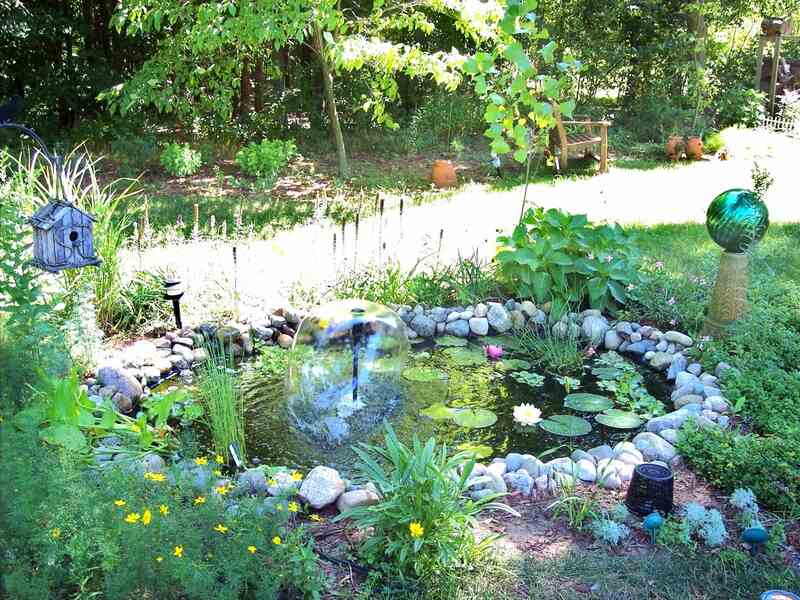
When you build a small backyard pond, you change your garden forever. The calming sound of water flowing is there to stay. Plants start growing lush and green. Cheerful bees, butterflies, and birds find their way to your outdoor space.
Building a pond is a great DIY project for those who are handy with tools. You can create a stunning water feature with just a few materials. Learn how from this step-by-step guide to backyard pond building.
How to Choose Pond Location and Design
Building a backyard pond starts with planning. You choose a location and decide on shape and size. Here’s what you need to consider at this stage.
The Best Location for Your Pond
Every yard offers different opportunities for such projects. Existing features and vegetation can limit space but can also add some lovely color and shade. Sloped gardens are more challenging. Small spaces might force you to dig deeper. Here is how to choose a proper location that’s easy to dig and work with:
- Avoid underground utilities: Call 811 or your local one-call center. Get your underground utilities marked and ensure you won’t dig into buried gas or electric lines.
- A nice view from the house: Most homeowners want to enjoy the view of their pond from the porch, deck, living room, or kitchen window. Find your sweet spot and ensure you get the best view of your pond.
- Proximity to a GFCI Outlet: You’ll need a power outlet in proximity to your pond to plug in the water pump. Remember, the typical pump cord is 25 feet long, and avoiding extension cords is better.
- Nearest water source: You’ll need to add water to your pond periodically. It’s easier if the water source is close.
- A good balance between shade and sun: Water plants need sunlight to grow and thrive. But some shade will help you keep the algae under control and the fish comfortable (if you’re raising fish). To make it easier, think about fifty/fifty exposure to sun and shadow.
- Avoid major root systems: Digging right near your trees or shrubs might damage their roots. Strong roots growing under your liner will also puncture it in time.
- Avoid dense foliage: If you aim for a low-maintenance pond, ensure it is not surrounded by dense foliage. Fallen leaves decay and build up a murky layer that is hard to clean from the pond bed.
- Leveled ground: Look for flat areas where it’s easy to dig a leveled pond. Sloped sites require more work and expose the pond to runoff.
Pond Size and Design
Depending on the location, you’ll have more or less freedom with the pond’s design. Here’s what you need to figure out before your next step:
- Pond area: How large do you want your pond to be? Experts recommend a minimum of 4 x 7 feet or 28 square feet. This allows you to enjoy enough water surface with decorative rocks, plants, and some fish.
- Pond depth: Go for a pond at least 2 feet deep. If you plan to grow fish, dig 3 or 4 feet deep to ensure they have warm water during cold winters. Larger ponds can go up to 5-6 feet in depth.
- Pond shape: Irregular shapes look more natural but are harder to dig. You can also go for a square or round profile for a modern or minimalist garden.
- In-ground or partially raised: Typically, garden ponds are installed in-ground. But, some homeowners raise the edges above ground for more depth or for design reasons. The easiest way to build a partially raised pond is with a pre-formed liner.
What Do You Need to Build a Pond?
To build a backyard pond fast and easily, you first need to ensure you have the following:
- Permits (if necessary)
- Materials
- Tools
Permits
Depending on where you live and how large your pond is, you might need a permit to excavate the yard. Check the local regulations before putting your hand on the shovel.
Materials
Once you know the size and shape of the pond, you also have a good idea about the materials you need to prepare. Here’s a general list:
| Pond liner | Flexible or pre-formed. Popular options for small ponds are: EPDM liners (a synthetic rubber), HDPE (high-density polyethylene), and RPE (reinforced polypropylene). |
| Builder’s sand | Excellent for leveling the pond bed when using a flexible or pre-formed liner |
| Underlayment | It’s typically a geotextile that turns away sharp stones, root growth, and other debris that might puncture the liner. |
| Pond pump | Look for a size (GPH) that allows circulating the entire volume of pond water once an hour. |
| Filtration system | Most options for small ponds include both mechanical and biological filters. Choose a model with the same GPH as the water pump. |
| Gravel | Small rounded rocks used to cover the base of the pond and spaces between rocks or plant pots |
| Flat rocks | Decorative rocks used on the edge to keep the liner in place and decorate the pond |
| Mulch | Shredded bark, wood chips, sawdust, or pine needles you can use to extend the pond’s edge or make it blend better with the surroundings |
| Black foam | Seals the spaces between rocks in a waterfall, helping water flow beautifully across the entire surface |
| Floating skimmer | Captures floating debris, keeping the water clean |
| Aquatic plants | Submerged, marginal, or floating plants that make the pond look natural. Choose native plants, as they are easier to care for. |
Note: Underlayment and liner cover the pond bed, climb the walls on both sides, and spread about 2 feet over the edge on either side of the pond. This means you’ll calculate the material size like this:
- Liner/Underlayment Length (feet) = Pond Length + (2 x Pond Depth) + 2
- Liner/Underlayment Width (feet) = Pond Width + (2 x Pond Depth) + 2
Tools and Equipment
Building a pond requires proper tools for measuring, digging, and installing the materials. Make sure you have access to the following:
- Tape measure
- Rope or marking paint
- Spade or trowel
- Wheelbarrow
- 2×4 wooden board
- Level
- Rake
- Garden hose
Pro tip: Find a place to put the excavated dirt before you start digging. For example, you can use it to create raised flower beds.
How to Build a Backyard Pond Step by Step
Once it’s all decided and you have all the materials and tools, a small backyard pond can be ready in a few hours. It goes faster if you get friends to help you dig and lay the pond liner. Let’s see the next steps to follow.
Step 1: Excavate the Pond
Most garden ponds have shelves or ledges for placing pots with water plants. Here’s how you dig to create two shelves in your pond:
- Start by marking the shape of the pond on the ground with a rope, hose, or marking paint.
- Then, use a spade or a trowel to dig a 1-foot wide, 2 to 3 inches deep trench outside the contour. You’ll use this space to create a beautiful stone border later.
- Dig a 1 to 1.5-foot wide, 12-inch deep shelf inside the outline. This will be the first plant ledge.
- Dig another 1 to 1.5-foot wide, 18-inch deep shelf from the interior edge of the first ledge. This is the second plant ledge.
- Continue your digging inside the ledge to create the base of the pond. This should be 24 inches deep.
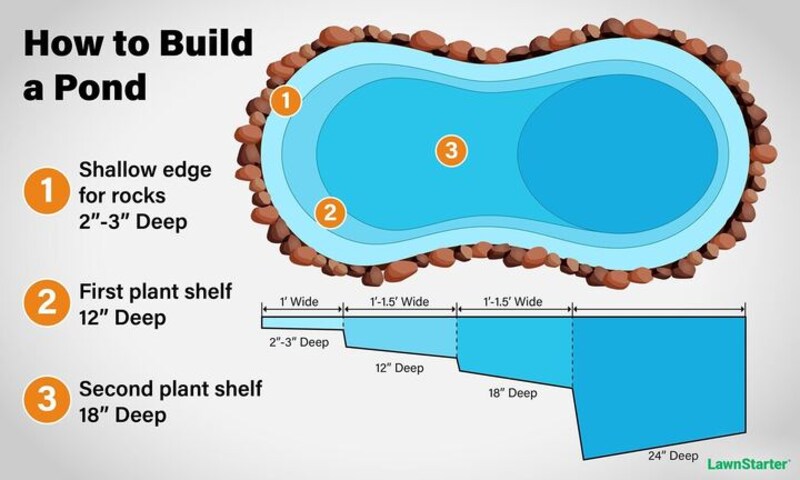
Pro tip: Slightly slope the walls toward the center of the pond. This way, when the water freezes, it will push upward and not directly against the liner.
Step 2: Level the Pond Edges
A pond with unleveled edges looks lopsided, and water can flow out over the lower edge. To check the edges of your pond, do this:
- Set a 2×4 wooden board across the edge of the pond.
- Place the level frame on the wood board and check if the air bubble is in the middle of the vial.
- Adjust the pond edges until the air bubble is right in the center.
Pro tip: Make sure to check the edge level lengthwise and across the width of the pond.
Step 3: Prepare the Pond Base for Lining
This is a step you want to take advantage of. It protects the liner from punctures and makes the pond more durable. Here’s what you need to do:
- Take out any remaining sticks or sharp rocks from the pond area you excavated. You can use a rough, large brush or pick them up by hand.
- Then, spread a 1-2 inch thick layer of sand on the pond base, shelves, and edge. Level it with a rake.
- Cover the entire surface with underlayment to protect the liner.
Pro tip: For a durable pond, use a commercial underlayment. Free options like newspapers and carpets will rot in time, and you’ll lose that protection.
Step 4: Install the Liner
Even for a small pond, the liner can be large and heavy for one person to handle. It’s easier to cut and place into the pond with some help. Here’s what you need to do:
- Cut the liner to size, so it’s at least 4 feet larger than the pond hole.
- Place the liner in the center of the pond bed.
- Roll it toward the sides, over the walls, and on the pond edges. Make sure it’s 2 feet larger than the pond on each side. You’ll cut the excess material later.
- Set a few rocks around the edge to hold the liner in place.
- Start pressing the liner along the terraces and pond bed without overstretching.
- Let some water flow into the pond. Its weight will help you see the natural flow of the liner. Adjust it and make any necessary folds in the corners.
- Smooth out any wrinkles in the liner. Adjust it to ensure a snug fit.
Pro tip: Before installation, lay the liner on the driveway and let it warm in the sun for a bit. This makes it more flexible and easier to work with.
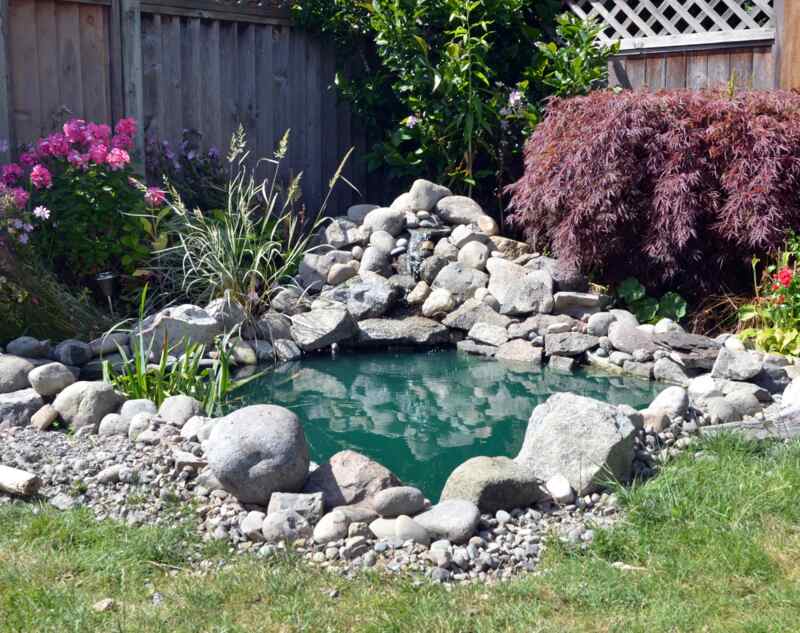
Step 5: Cover the Liner in Rocks and Gravel
This is optional. You can leave the liner as it is. Since it’s black, you won’t see much of it through the water. In this case, skip to step 6.
Or, you can cover the pond floor in gravel and flat rocks to create a natural look. Just follow these steps:
- Wash the rocks and gravel thoroughly before putting them into the pond.
- Start from the bottom of the pond and make your way up. Use large rocks first and then add smaller ones. Place them vertically to cover the walls.
- Spread the gravel to cover the pond bed. Then do the same for the shelves.
Pro tip: This is a trial-and-error process. Arrange and rearrange the flat stones until they interlock nicely and look natural.
Step 6: Fill the Pond with Water
Pressure-wash the inside of the pond and take the water out with a pump. Then, fill the pond with water gradually. This will give the liner time to adjust to the pond’s shape and settle into place. Once the pond is complete, check for wrinkles or leaks in the liner.
Step 7: Make a Rock Edge
The edge is essential for your pond’s look, so you need to arrange it carefully:
- Cut the excess liner, but ensure enough to secure it under the rocks.
- Place large stones around the pond to cover the liner. They should not be more than ⅓ over the edge. Otherwise, they might fall into the water.
- Start with the first layer of flat rocks. Then add a second one.
- Experiment with various combinations until you get a natural look and all rocks interlock nicely.
- Add gravel or mulch between the stones to fill the remaining spaces. Your objective is to cover every piece of liner.
Step 8: Installing the Pond Pump and Filters
You can buy the pump and filter as a kit or as separate elements. Just make sure they have similar GPH (size/capacity). Installation is pretty straightforward. All you have to do is:
- Place the pump underwater at the bottom of the pond.
- Decide where you want the power cord to go through, and use a few stones to keep it in place on the pond’s edge. You can pass it through a PVC conduit for better protection from the elements.
- Guide the recirculating hose toward where you want to install the filter.
- Place the filter somewhere near the pond. It will be simpler to hide if you dig a cavity for it. Make sure the filter is easy to access.
- Connect the hose coming from the pump to the filter.
- Another hose will come out of the filter, taking the clean water back into the pond. Use it to create a waterfall. Let’s see how.
Pro tip: Where the hoses come out of the pond, dig trenches to hide and protect them.
Step 9: Make a Waterfall
A waterfall is a perfect add-on when creating a natural pond. It looks incredible and also adds oxygen and movement to the water. Here’s how to make one:
- Choose a place on the pond’s edge where you will build the waterfall.
- Place more flat stones to create an elevated spot.
- Set the end of the hose and secure it between two smaller rocks.
- Add another flat rock on top of it to hide it.
- Use black foam to make sure all the stones sit firmly in place.
- Also, use the black foam to fill the spaces between rocks and create an impervious surface for the water to flow down nicely.
Step 10: Test the Pump
Plug in the water pump and turn it on. Watch the water flowing.
Step 11: Hide the Equipment
You’ll have a power cord and two hoses lying around your pond. Try to hide them under gravel and rocks.
Step 12: Place a Floating Skimmer
Floating skimmers are enough to clean the water surface in a small pond. They are also effortless to install. You place the skimmer in the pond and let it float. It will collect leaves, twigs, and other debris.
Step 13: Add Plants
Your project is starting to take shape. It’s time to add some color and textures to the pond with aquatic plants. You can grow them:
Planted in pots: Most aquatic plants, like water lilies or hyacinths, grow best in pots, mesh bags, or planting containers. This makes it easier to control their spread or take them indoors through the winter. Place the pot on the pond shelf where it fits better.
Floating at the surface: Water lettuce and frog bite float on the surface. Just take the plant in your hand, put it slowly in the water, and let it float with its roots hanging.
Planted in the bog: For a beautiful pond edge, you also need marginal plants like cattail, elephant ear, or fiber grass. Take these out of the pot and plant them in the damp soil or gravel around the pond.
If you want to add koi to your pond, you must choose plants that are safe for the fish. Consult our guide about the best koi pond plants for some ideas.
Step 14: Add Fish
The most popular fish for backyard ponds are koi and goldfish. But you can also grow catfish, hi-fin sharks, or plecos. Don’t add the fish until you dechlorinate the water, and make sure your pond is large enough for the number of fish you want to raise.
Check out our top koi pond design ideas and our koi pond maintenance guide to learn more about adding fish to your backyard pond.
Step 15: Maintain the Pond
Regular pond maintenance is vital to keeping water clear and your plants beautiful and healthy. Here’s what you can do:
- Remove floating debris with a hand net weekly.
- Clean the filters and check the pump monthly.
- Test water quality.
- Drain and clean the pond at least once a year.
- Replace up to 15% of the pond water once a month.
Or, hire a professional pond maintenance company to do this for you. You can choose weekly or monthly visits or just a general clean-up from time to time.
FAQ
The average midsize backyard pond costs $3,680 to $14,500, including professional installation. You can save thousands by installing the pond yourself, but make sure you know what you’re doing. An incorrectly installed pond could cost you more money and a big headache down the road.
Backyard ponds with plants should be at least 18 inches deep. Goldfish and koi need more depth, so make a fish pond at least 3 feet deep.
No federal law requires you to build a fence around your pond. But, some local regulations do require a fence for ponds deeper than 18 inches. This is to prevent children from entering the area without supervision.
Yes, but you might need a permit. Check the local regulations before starting to dig.
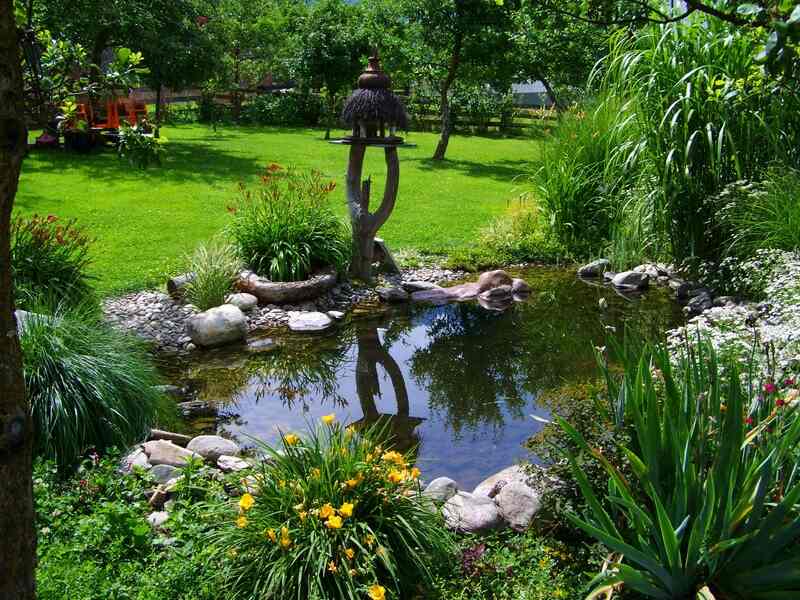
Build Your Dream Pond Today!
As homeowners, many of us dream of a beautiful, complex water garden in our backyard. But sometimes, a small pond can be enough. With a simple design and a fairly easy DIY build, a backyard pond can be the jewel of your outdoor living area. Not sure you’re ready to dig? You don’t have to. Contact a local landscape pro and build your dream pond today!
Main Image Credit: AnthonyRosenberg / Canva Pro / License