
Nothing symbolizes a tropical and beachy paradise better than a palm tree. Adding one, or many, to your home gives an otherwise bland landscape a kiss of the exotic. To grow palm trees properly starts with proper planting and the steps to planting a new palm aren’t difficult. Proper planting gets your palm off to the best start possible so it produces healthy and problem-free growth for years to come. We’ve outlined all the planting tips and removed any mysteries from properly selecting and planting palm trees.
Selecting the Palm Tree
Those lucky enough to live in frost-free regions of the country like portions of Florida have an almost endless supply of palm tree varieties that will perform well planted outdoors. However, don’t despair if your climate is more temperate because there are quite a few options of cold-hardy palm trees. Additionally, there are multiple species of palms that are hardy growing in pots both indoors and outside, so there’s a palm to fit everyone’s needs and desires.
Before you rush out and purchase a new palm, it’s best to do a bit of research to make sure the particular palm is hardy growing in your proposed conditions. Many palms grow well in the outdoor conditions found in USDA zones 8 through 10, with a few tolerating warmer areas of zone 7. Therefore, knowing what USDA zone you live in is helpful in selecting a palm hardy in your locale. You can also find out if the palm you desire is hardy growing in pots or is better suited planted in the landscape.
Types of Palm Trees
Whether you’re looking for feathery fronds, sturdier-looking fan-shape types, palms that are cold-hardy or ones suitable for pots, there’s a palm to tickle your fancy. Some of the more popular palms, their hardiness zones and their characteristics include:
- Parlor palm (Chamaedorea elegans): Hardy in USDA zones 9-10, suitable house plant or potted palm and partial shade to shade, green pinnate fronds and grows slowly.
- Chinese fan palm (Livistona chinensis): Hardy in USDA zones 8-10, suitable house plant or potted palm, with olive green palmate fronds and grows slowly.
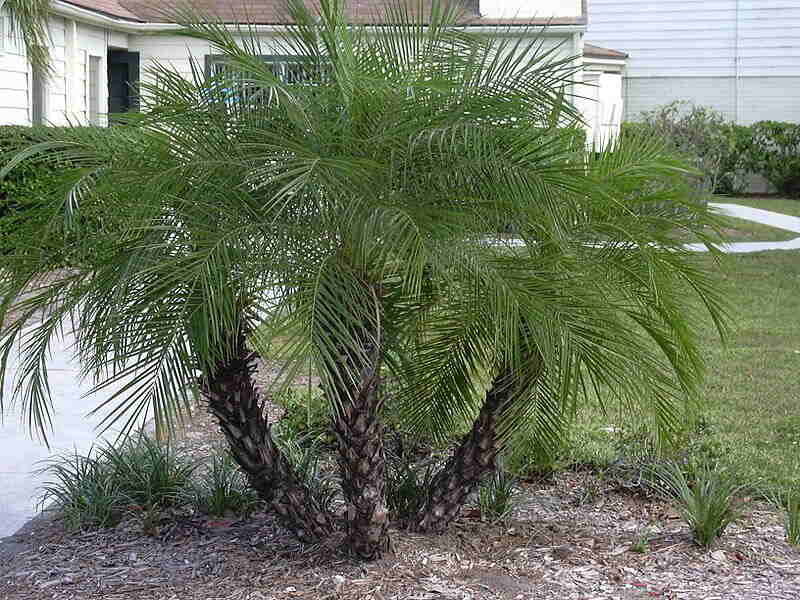
- Pygmy date palm (Phoenix roebelenii): Hardy in USDA zones 9-11, suitable container palm, glossy green pinnate and thorny fronds and slow growth.
- Needle palm (Rhapidophyllum hystrix): Hardy in USDA zones 7-10, cold-hardy, slow growth with green pinnate fronds and clumping habit.
- Sable or cabbage palm (Sable palmetto): Hardy in USDA zones 8-10, cold-hardy, moderate growth with green, fan-shaped fronds.
- Windmill palm (Trachycarpus fortune): Hardy in USDA zones 8-11, cold-hardy, slow growth, suitable house plant or potted palm, fan-shaped, green fronds and trunk looks like it’s covered in burlap.
- Queen palm (Syagrus romanzoffiana): Hardy in USDA zones 9-11, moderate growth and green featherlike fronds.
- Coconut palm (Cocos nucifera): Hardy in USDA zones 10-11, moderate growth, green to greenish-yellow, featherlike fronds.
- Sago palm ():
Check the Palm’s Health
One of the most important aspects of planting a new palm and assuring it gets off to the absolute best start is selecting healthy specimens. You don’t want to purchase an already stressed or sickly palm and then try to bring it back to good health. Some varieties cost a lot and in serious cases, you may never be able to bring the palm back to full health. Some of the basic signs to look for that alert to potential problems include:
- The palm’s roots outgrowing the container.
- Obvious signs of insects.
- Yellowing, brown or spotted fronds.
- Damaged portions on the palm’s trunk.
When selecting your palm, the roots shouldn’t be growing out of the container and the fronds should be green and healthy with no signs of disease or insect problems. If the root system is contained in containers that are too small for too long and the roots are seriously wrapping, the palm may never obtain healthy growth. Be sure to inspect the entire palm to make sure you are purchasing a healthy specimen.
Site Selection
After you have chosen the desired palm tree, the next important step in properly planting the palm tree is selecting an appropriate site in the landscape that meets all the tree’s requirements for proper growth. By checking the plant tag or researching the particular palm’s characteristics and growing requirements, you will find important details about the tree that assist in selecting the best site in the landscape for planting. Important information includes:
- Preferred light conditions.
- Mature height & width.
- Produces single or multiple trunks.
- Thorny or smooth fronds.
When transplanting a new palm tree into its permanent site, it is important to plant the palm in preferred light conditions, as growth is negatively affected when the palm isn’t receiving the light it requires. You don’t want to plant a palm that requires full sun into a site that only receives shade, nor do you want to plant a palm that thrives in shady locations in full sun.
In addition, knowing the expected size of the palm helps pick a spot where the tree won’t interfere with structures or power lines. Planting palm trees near a house or pool is OK, but you want to consider its mature height and width so it doesn’t encroach on something like a roof or outgrow a screened pool enclosure and potentially causing unwanted damage or expense. Select a site large enough for the palm to grow to its full potential and where it won’t cause interference or damage. It’s best to allow room for the palm to spread to its full width without the need for pruning fronds It’s not healthy for the tree to prune off foliage that isn’t completely brown and dead.
Depending on the variety, palm trees grow as single trunk trees or have a clumping habit, producing multiple trunks over time. In addition, some types have smooth fronds and others contain lines of stiff thorns. You probably don’t want to plant palm trees with thorny fronds in areas where there is traffic or children, like an entranceway or pool area.
Tips for Planting Palm Trees in the Landscape
Now that you have chosen your particular palm and selected a site that meets all the tree’s requirements for good growth, next comes the fun part of actually planting the palm tree. Although in frost-free climates planting palm trees in pots or in the landscape is possible year-round, the University of Florida suggests summer as the best time of year for planting palms in the landscape due to the frequent rains. When planting during other seasons, you may have to water the palm more frequently.
Soil Preparation
When preparing the soil for planting palm trees in the landscape, it’s best and probably easiest to go with your native soil, provided it has good drainage. A sandy loam is best. Moisture-holding clay isn’t good. The vast majority of palm species won’t tolerate constantly saturated soils, which lead to root rot.
When asked about the necessity to amend the native soil before planting a palm tree, Sally Scalera, Urban Horticulture Agent & Master Gardener Coordinator, UF/IFAS Extension Brevard County states, “Because the root system of all palms will spread out at least 50 feet from the trunk, it is best to just use native soil, unless you’re willing to amend the entire area where the roots could spread.” For most people, amending an area that size would be too labor-intensive and expensive.
8 Steps for Planting Palm Trees
- Remove all grass or weed growth from an area at least 3 feet in diameter. Clear an area large enough to keep lawn equipment from bumping into the palm’s trunk and causing potential damage.
- Loosen the planting site’s soil. Dig down about 2 feet into the soil. Loosening any clumps and remove rocks. This assists the root system by letting it spread out more easily.
- Dig a hole slightly wider than and as deep as the container holding the palm tree or the exposed root ball.
- Place the palm’s root ball into the hole. Make sure not to plant the tree any deeper than it’s originally growing. Add or remove soil as needed. When it comes to the biggest mistake people make when planting palms, Sally Scalera notes, “That would be planting the rootball too deep. It is important that the top of the rootball be at least at the same level as the surrounding soil. If the hole is dug deeper than the depth of the rootball, the rootball will sink once the fluffed soil settles from the weight of the palm and water.”
- Backfill the hole halfway with soil. Irrigate the hole with water. This helps settle the soil and removes any pockets of air.
- Finish backfilling the hole with soil. Make sure the palm isn’t planted deeper than it was originally growing. Firm up soil around the trunk.
- If desired, add a 3-inch layer of mulch around the planting site. Keep it pulled back about 4 inches from the trunk. Butting the mulch against the trunk promotes pest and disease problems.
- Irrigate the area again, deeply, to saturate the roots.
Planting Palm Trees in Pots
If you prefer a potted palm to dress up an outdoor or indoor location, transplanting palm trees into another pot is relatively basic. Depending on the palm’s size, usually a 3- to 5-gallon pot with bottom drainage is bto produce proper growth. Check the size of the root system. You want to transplant into a pot large enough to contain it and still have room for new growth. Using a pot one size larger than the present one is usually adequate.
Any type of potting mix will work well, as long as it has good drainage. You don’t want a mix that tends to remain soggy, as it can promote disease problems with your palm. Many types of potting soils are too heavy and require amending with sandy soil or a lighter substance like peat or perlite. Palms are relatively hardy in the types of soils they tolerate, as long as they have excellent drainage.
As when planting palm trees in the landscape, just make sure to plant the palm at the same depth it is growing in its original container. Planting too deep puts undue stress on the palm and negatively affects its growth. Water the palm after planting and then place in an area receiving the tree’s preferred light conditions. Continue irrigating by checking the top few inches of soil. If dry, apply water until it runs from the bottom drain holes.
Palm Tree After-Care
The biggest chore after planting a palm tree is making sure it receives a sufficient amount of water. Underwatering can negatively affect its growth. It can take a palm anywhere from six to 12 months to establish itself into the new planting site. Depending on the soil and its moisture-holding capability, you may have to irrigate the tree daily, especially during hot and dry weather. Always irrigate deeply so the water reaches the entire root system.
Depending on the variety of palm’s tolerance to drought and local weather conditions, 1- to 2-year-old trees typically require three to four applications weekly. Trees 3 to 4 years old require two to three water applications weekly.
Properly planting your palm tree and giving it good aftercare is the best guarantee for robust growth. Some species of palms naturally grow faster than others. Providing the palm with the best start possible assures you’ll end up with a thriving tree that adds its tropical wonder to your landscape for years to come. Call a local landscape professional to help you maintain your palms.
Main Photo Credit: SariSyno / Shutterstock / License