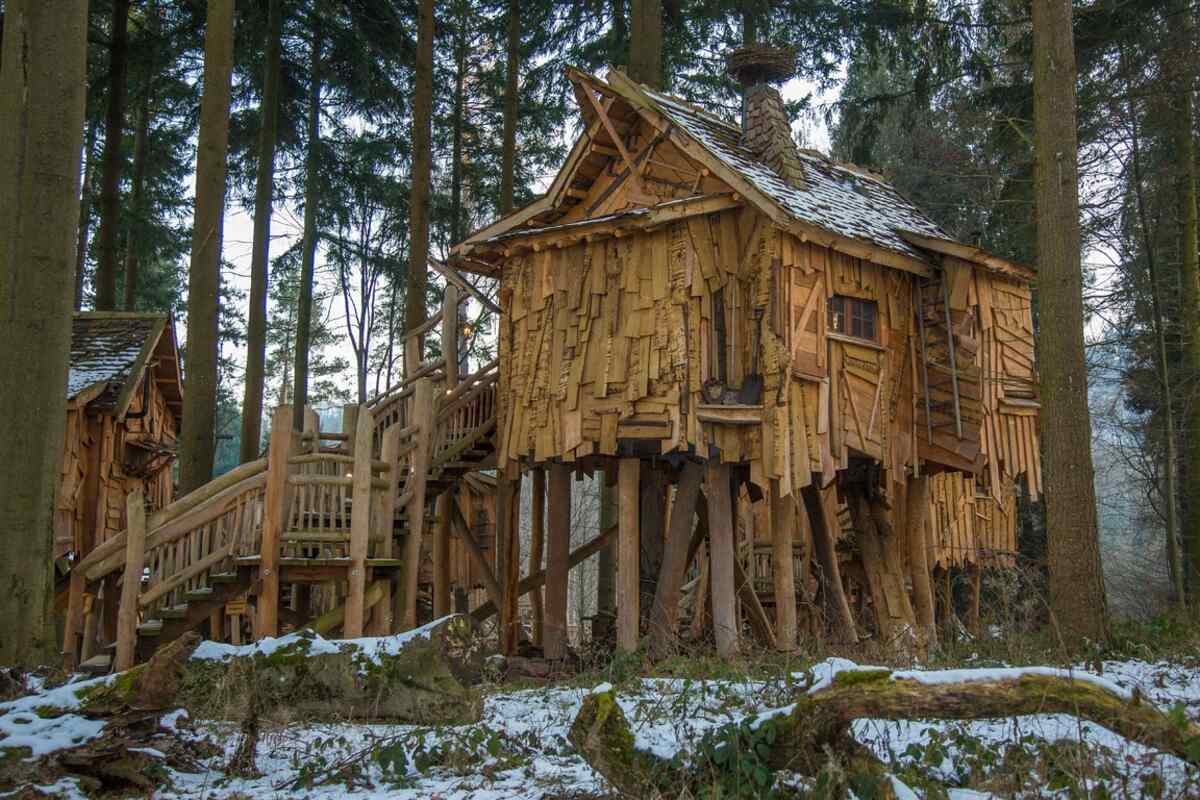
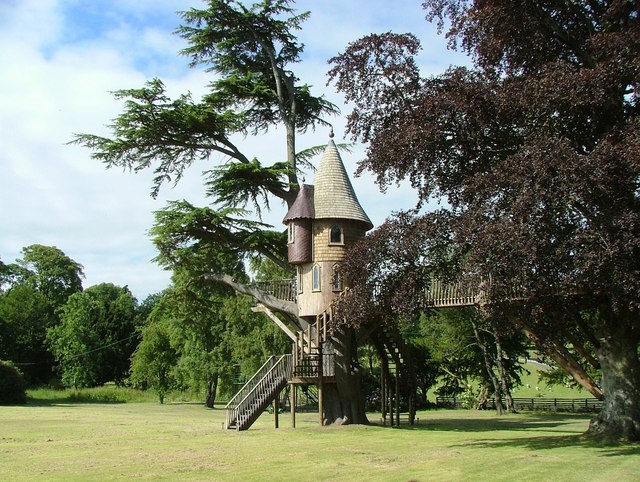
Having your very own treehouse can be a magical thing. It provides a playhouse in the sky for you and your family. But treehouse building is more than just carpentry; it’s an art form. Here’s how to build a treehouse (in 11 steps).
Building a treehouse is a somewhat complicated endeavor. If you want your favorite family hangout spot in a tree, you’ll need building tips before you start. For example, where should you build your treehouse? How will it fit in with your landscaping?
The answers to these and other top-o-the-tree questions are right here:
- How to Build Your Dream Treehouse
- 1. Check Local Building Codes
- 2. Pick the Right Tree or Trees
- 3. Create or Buy a Blueprint or Building Plan
- 4. Gather Materials and Tools
- 5. Build the Treehouse Platform
- 6. Add Posts or Braces as Needed
- 7. Put Down Your Treehouse Floor
- 8. Add Walls, Entrances, Railings, and Windows
- 9. Raise a Roof
- 10. Build Your Ladder
- 11. Apply any Finishing Touches
- Important Notes on Building a Treehouse
- FAQ: Building a Treehouse
How to Build Your Dream Treehouse
Below, you’ll find step-by-step instructions on how to build your DIY treehouse.
1. Check Local Building Codes
There will be some local building code or homeowners’ association guideline that dictates the size and location of your future treehouse. Check with local zoning agencies to ensure you’re allowed to build a treehouse and know of any restrictions or guidelines to follow.
The last thing you want to do is go through all the trouble of building a backyard treehouse only to be told that you have to tear it down.
2. Pick the Right Tree or Trees
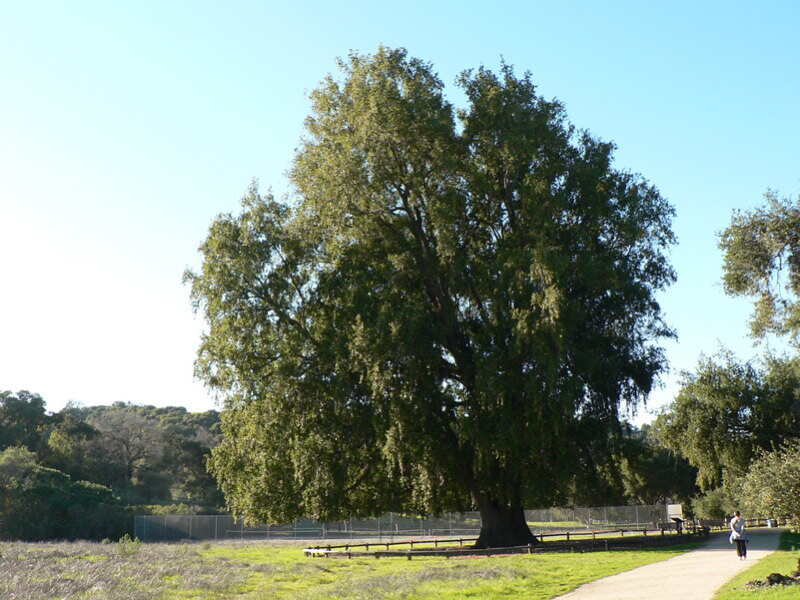
The tree you choose determines what kind of treehouse you build. For example, your treehouse might be built around a single tree with added support posts to hold the structure or secured amongst multiple trees. Ensure your tree is all of the following:
- Strong
- Healthy
- Capable of supporting your treehouse
To be safe, consult a local arborist to determine if the tree can hold and host your treehouse. An arborist can also tell you what sort of tree growth you can expect so that you’ll be prepared for how the tree — and your treehouse — might change over time.
And make sure you build your treehouse without hurting the tree. (We cover this in the FAQ section later in this article.)
3. Create or Buy a Blueprint or Building Plan
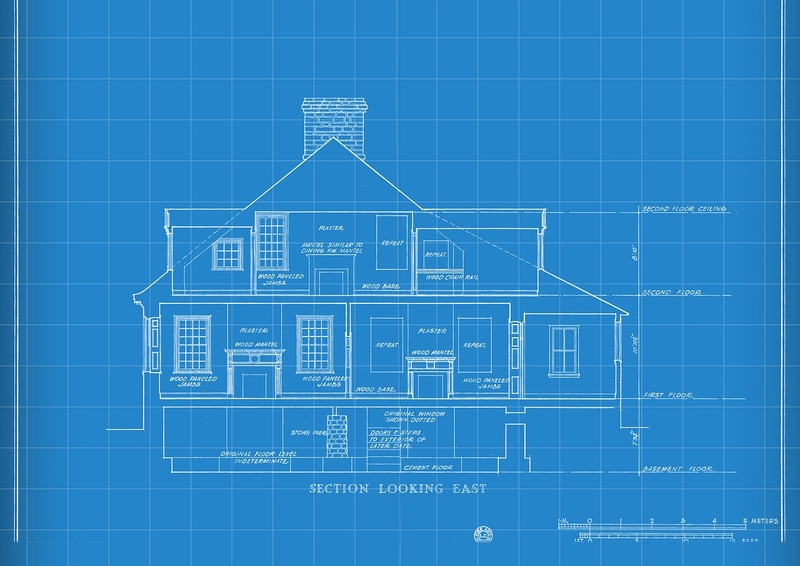
A detailed plan is essential before getting started on your treehouse project:
- Investigate treehouse ideas to decide what kind of treehouse you want to build.
- Map out all of the materials and tools that you’ll need.
- Take measurements.
- Devise a treehouse construction plan.
Get the whole family involved and enjoy putting together the perfect treetop fun spot. After the kids have outgrown the treehouse, it might become a she shed or private hideaway in the trees.
Premade plans: Don’t want to do all of this work yourself? You can find professional blueprints for treehouse plans online.
4. Gather Materials and Tools
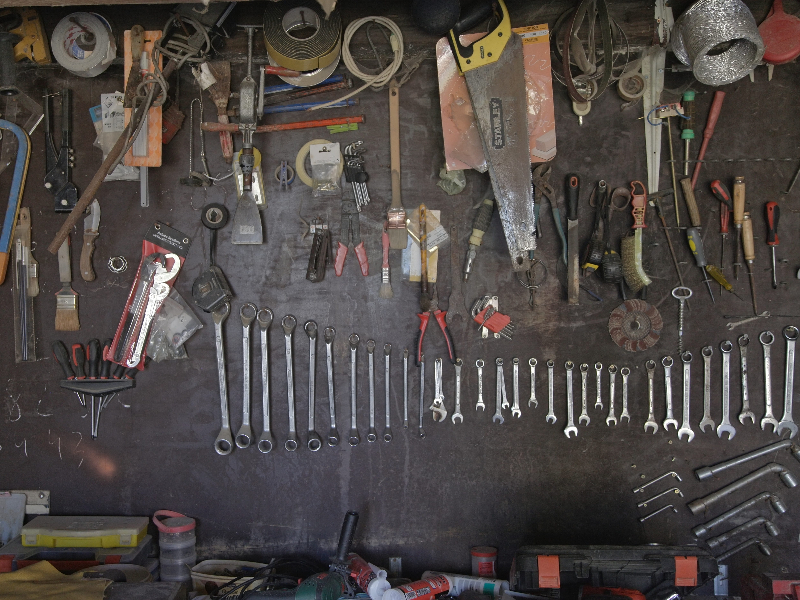
Round up your treehouse-building materials and tools so that you’re ready to go. Use your treehouse building plan to determine every item you’ll need and stage it at the site of your tree. Things such as:
- Joist hangers
- Fasteners
- Rafter ties
- Deck screws
- Washers
- Lag bolts (aka lag screws)
- Building materials
Pro Tip: Since you’ll be working in the yard and eventually up in a tree, it will save you a lot of trouble to have all the necessary items within easy reach.
5. Build the Treehouse Platform
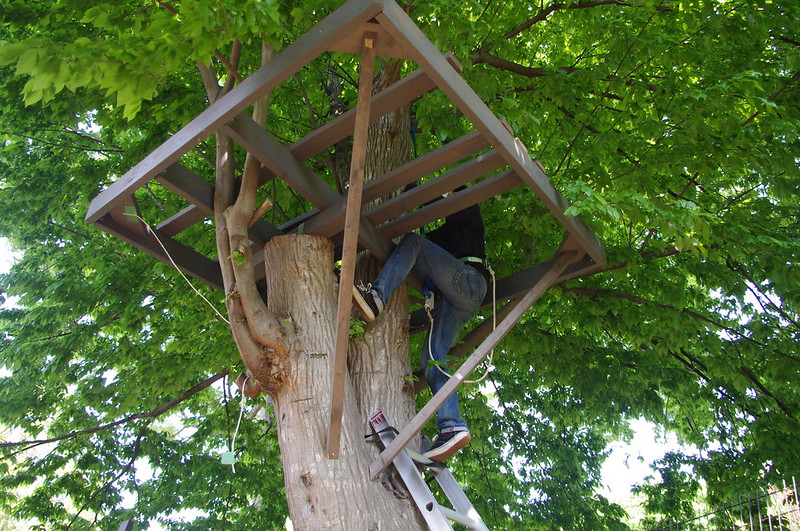
Start with building a treehouse platform. This should include the frame and the interior support beams of the frame.
Then, raise the platform into the tree at your desired height and add the primary supports that will hold up the platform. These might be supports extending from the platform down to the ground or to the tree trunk.
6. Add Posts or Braces as Needed
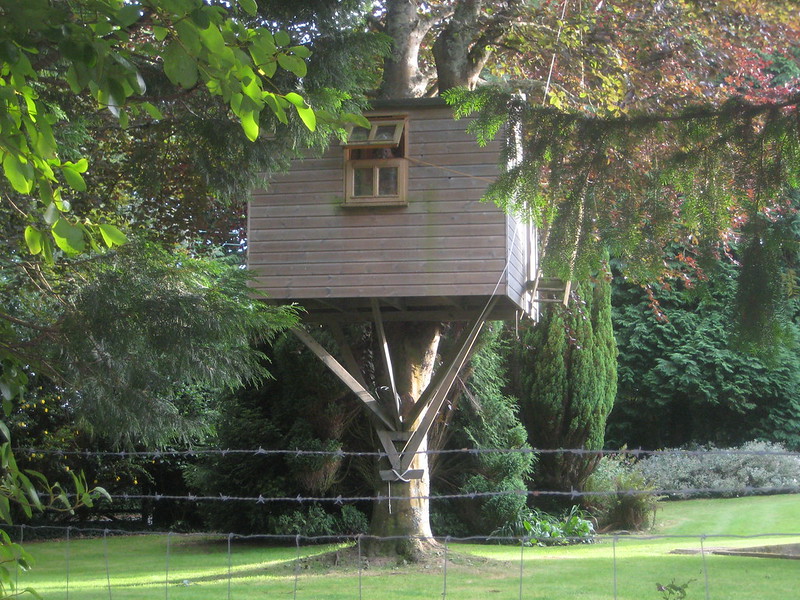
Ensure your treehouse has all the support needed to be safe. This depends on the type of treehouse you’re building, but it could mean additional support to the ground, the trunk, or out to sturdy tree branches using diagonal bracing techniques.
7. Put Down Your Treehouse Floor
Now that the platform is completely secure, start adding your floor of choice. Whether you choose simple flooring, such as plywood deck boards, or go for something more advanced, such as cedar, note that whatever you choose will add some weight. Check again with your arborist to be sure the tree can support your tree fort’s flooring.
Pro Tip: Oh, and since we’re adding the floor, don’t forget to leave room for a trapdoor or firepole if your treehouse plan includes one.
8. Add Walls, Entrances, Railings, and Windows
After your floor is down, begin on the frame of the house portion of the treehouse.
When building the walls, leave room for windows and doors. If your treehouse has a porch, install a handrail for added safety. Once all of these elements are in place, add any other additions, such as the following:
- Slides
- Bridges
- Fire poles
- Zip lines
- Climbing nets or walls
With these, your design starts to take shape.
9. Raise a Roof
If your treehouse will have a roof (and it most likely will), now’s the time to add it. More advanced roofing options include framing, waterproofing, and shingle work, but a well-supported tarp or prefabricated roof does the trick just as well.
Pro Tip: Before you raise the roof, factor in the added weight that a roof (just like you did with the floor) brings to the structure of your treehouse.
10. Build Your Ladder
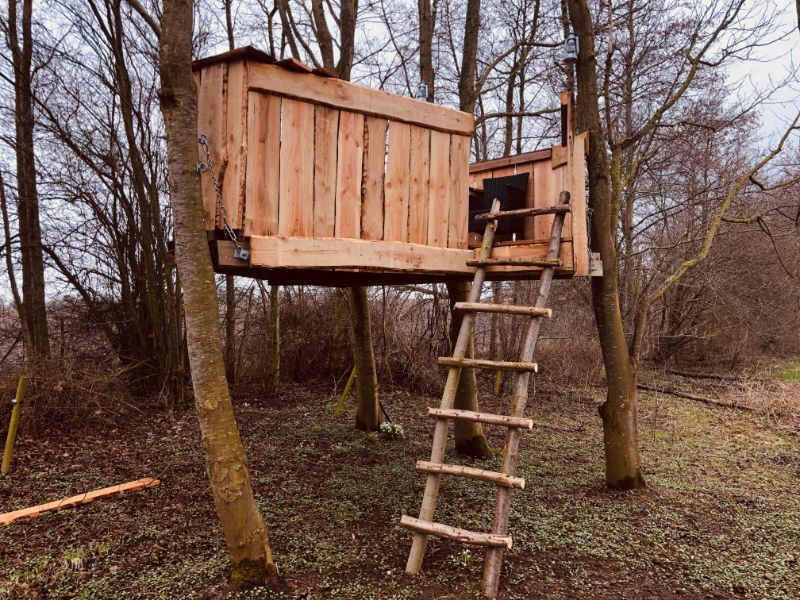
Now that your treehouse is safely in the trees and off the ground add a ladder so that your little ones can climb to their treetop hideaway. A simple ladder works just fine, but a rope ladder or even a climbing wall can add some extra fun to getting up and down from your treehouse.
11. Apply any Finishing Touches
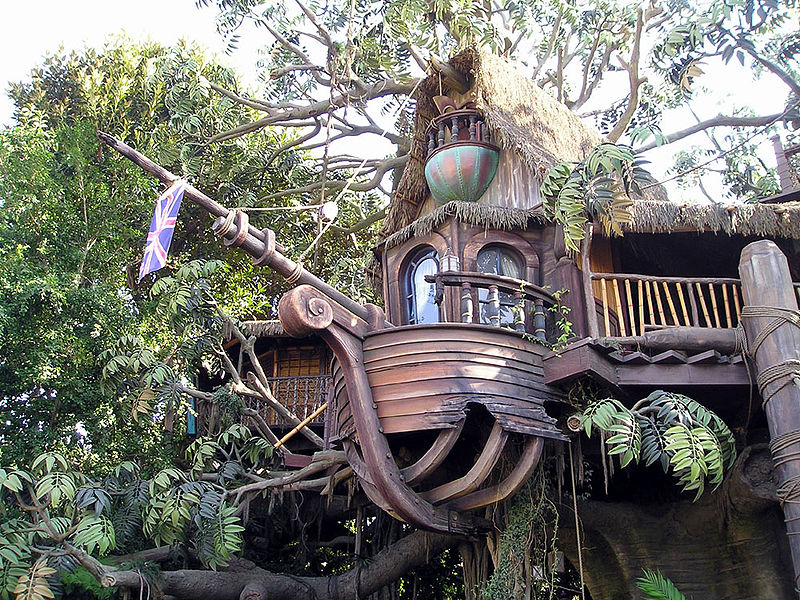
You’ve almost completed your treehouse. It’s time to add the finishing touches and accents that make it unique. Have some fun here and think outside the box, like the following:
- Slides, swings, and pulley systems are nice touches.
- Themed pieces make your treehouse look like a pirate ship or castle.
- Doorknobs, lighting, and interior decorations can take things to the next level.
Important Notes on Building a Treehouse
Use the Right Fasteners
Ensure you use the correct fasteners, but don’t use too many. When drilling into a tree, it tends to seal rather than heal. Using too many fasteners in a close space can lead to disaster because it makes your supports more likely to rip away from the tree when under stress.
Don’t Pin or Fasten Beams
Never pin or fasten an essential beam to a tree or major branches. This either prevents natural tree growth and harms the tree, or it slowly pushes the beam away from its original supporting position, and this is a recipe for collapse.
Avoid Girding
Avoid wrapping or girding wire around a tree, as the tree’s “veins” run up and down the tree, approximately an inch beneath the bark. Wrapping wire around a tree can damage these veins, essentially choking the tree and impeding the flow of nutrients to where they are needed.
Without vital nutrients, the tree supporting your children’s playhouse will die. Eventually, your treehouse may become unstable without the tree supporting it, and the tree could even topple under its weight.
Let the Tree Grow
Leave room for the tree supporting your treehouse to grow. No matter how old your tree is, the odds are that it still has some room to grow.
Even slow growth over time can cause a treehouse disaster. Treehouse masters leave gaps and spacing in the treehouse anywhere it gets close to the tree.
Skip the Nailed Steps
Don’t nail steps into the tree. Although this is a classic look for a treehouse ladder, you may have learned from experience that these ladders aren’t always stable.
Too many nails, too close together, can cause damage and become unsafe over time. Although pulling off a ladder nailed to the tree is possible, it’s not worth the risk.
Protect the Wood
Opt for materials designed to handle years of sun and rain. Use pre-treated wood for your treehouse because it will be outside in the elements for the foreseeable future.
Pro Tip: Even pre-treated wood decays over time, so plan on adding a coat of sealant every one to three years.
FAQ: Building a Treehouse
How Much Does it Cost to Build a Treehouse?
A simple treehouse platform with a floor, walls, and simple roof might cost you just under $3,500, whereas the most advanced treehouse can cost well over $225,000. Size, height off the ground, quality of materials, and complexity of design all play a part in the cost of a treehouse. The more whistles and bells added to it, the higher the cost.
Do Treehouses Hurt Trees?
Yes. Large screws and fasteners damage the tree and can cause infection. The added weight stresses the tree’s branches, trunk, and roots. Even the increased foot traffic proves bad for the tree’s roots.
The good news is that most healthy trees can handle the abuse of hosting a treehouse and survive without significant issues. Just be careful and consult an arborist before you start so you don’t build in a zombie tree. Many tree care specialists have arborists on staff.
How Do You Attach a Treehouse to a Tree?
There’s a fastener specifically designed for treehouses called a Treehouse Attachment Bolt (TAB). These go deep into the tree and can handle thousands of pounds.
TABs are combined with floating brackets that can move with tree growth or sway in the wind.
What Happens to a Treehouse When the Tree Grows?
If you’ve planned for this ahead of time (and you should), you won’t have any issues. Properly built treehouses are made with gaps and floating brackets, allowing tree growth.
If you didn’t plan for tree growth, your treehouse is at risk of becoming unstable over the years. It can even fall out of the tree. Just remember that the tree trunk and branches grow wider over time, not longer. New branches add height at the top of the tree.
When to Call a Professional
Treehouses delight young and old and can be a fun project for an experienced do-it-yourselfer. We tried to make it easy with an 11-step plan. The more elaborate your treehouse design, though, the more you should call a local general contractor or other professional.
Even if you are a DIY pro, knowing who to call if you get bogged down in the details is smart. For example, if your treehouse is intended as a birthday surprise, you may need to call in professionals or reinforcements to make your deadline. The goal remains a treehouse to delight young and old: a clubhouse or quiet space away from the house.
Main Photo Credit: Pxhere