Pulling up a lawn is a daunting task, but the right tool can turn daunting into doable. A grass tiller quickly and effectively removes grass by using tines to break up soil and cut through root systems.
Whether you’re removing grass in preparation to reseed, install a patio, or create a garden bed, a tiller goes deeper than a sod cutter, preventing grass from regrowing. However, choosing the right tiller size and following proper technique makes the difference between a smooth project and a frustrating afternoon fighting tangled grass in your tines.
This guide covers everything you need to know: from selecting the best tiller for grass removal to step-by-step operating instructions that prevent common mistakes like clogged blades and uneven soil.
| Need help removing your old lawn? LawnStarter connects you with local landscaping pros who can handle tilling, removal, and reseeding. You don’t have to rent equipment or spend your weekend wrestling with heavy machinery. |
Tiller vs. Sod Cutter: Which Should You Use?
A tiller (also called a rototiller) uses rotating steel blades called “tines” to break up soil and cut through grass roots 6-12 inches deep. Unlike sod cutters that slice just below the surface, rototillers destroy the entire root system to prevent regrowth.
| Feature | Grass Tiller | Sod Cutter |
| Depth | 6-10 inches | 1.5-3 inches |
| Best For | Permanent removal, garden prep | Quick removal, sod relocation |
| Operating Speed | 2-3 mph | Up to 2 mph |
| Clearing Capacity | 1,000 sq. ft. in 2 hours | 1,000 sq. ft. in 1-1.5 hours (plus time to haul away) |
| Grass Regrowth | Minimal (roots destroyed) | Possible (roots remain) |
| Physical Effort | High | High |
| Cost | $250-$3,000+ (buy) or $50-$125/day (rent) | $350-$7,500+ (buy) or $100-$140/day (rent) |
Quick Decision Guide:
- Removing grass to create garden beds or patios: Tiller (deep soil preparation required)
- Clearing grass to reseed a new lawn: Tiller (destroys roots to prevent regrowth)
- Dealing with Bermuda or other persistent grasses: Tiller (eliminates underground runners)
- Installing new sod immediately: Sod cutter (preserves intact grass pieces)
See Related:
– How to Use a Sod Cutter: Complete Guide for Homeowners
– Bermudagrass Guide: Types, Traits, and Care
Choosing the Right Tiller for Grass Removal
Not all rototillers handle grass removal equally. For this project, skip the mini-tiller and go with either a front-tine model (where the tines sit in front of the wheels) or a rear-tine model (with the tines behind the wheels).
Tiller Size Comparison
| Feature | Mid-Sized Front-Tine | Large Rear-Tine ⭐ BEST |
| Best For | Maintaining garden beds under 5,000 sq. ft., weeding, tighter spaces, sparse lawns (low-duty) | Thick sod, hard-packed soil, open areas, large garden beds (heavy-duty) |
| Tilling Width | 12-16″ | 16-21″ |
| Power | 4-cycle gas (160-200cc) | 4-cycle gas (200cc+) |
| Tine Rotation | Forward rotating (FRT) | Counter rotating (CRT) |
| Grass Removal | ⭐⭐⭐ Fair | ⭐⭐⭐⭐⭐ Excellent |
| Cost | $250-$800 (buy) $50-$75 (rent) | $700-$3,000+ (buy) $90-$125 (rent) |
For removing established lawns: Large rear-tine tillers are most effective at destroying thick sod and root systems, but require physical strength to operate.
For easier handling: Mid-sized front-tine tillers are lighter and more maneuverable but require 2-3 passes for complete removal. Work best on sparse lawns.
Gas vs. Electric Tillers for Grass Removal
Tillers run on either electricity or gas, each with distinct advantages for grass removal.
| Feature | Electric | Gas-Powered |
| Power (torque) | 13.5+ amps needed for grass removal | 160cc+ engines |
| Best For | Small areas, previously tilled soil | Established lawns, compacted soil, large areas |
| Weight | Lighter, easier to maneuver | Heavier, more stable |
| Range | Limited by cord length | Unlimited |
| Maintenance | Minimal (no fuel/oil mixing) | Regular fuel and oil changes |
| Noise Level | Quieter operation | Louder |
| Cost | $100-$300 | $250-$3,000+ |
For removing established lawns: Gas-powered engines provide the torque needed to cut through roots and compacted soil.
How to Remove Grass With a Tiller: Step-by-Step Guide
Before You Start: Essential Prep Work
1. Call 811 and Clear the Area
Call 811 at least 2-3 business days before tilling to mark underground utility lines. Walk through your work area and remove rocks, debris, branches, and any metal objects that could damage tiller blades.
2. Mow Grass Short
The #1 mistake DIYers make is leaving grass long. You don’t need to remove grass before tilling — the tiller destroys roots and grass breaks down naturally — but you must mow it short first. Long grass and weeds wrap around tiller tines within seconds, forcing frequent stops to clear tangled vegetation.
Mow your lawn to 1-2 inches (yes, scalp the lawn) or use a weed burner to eliminate all foliage.
3. Mark Sprinkler Heads
Turn on each zone and place landscaping flags at every sprinkler head. If you know their location, mark buried lines with spray paint.
4. Moisten the Soil
Water your lawn 1-2 days before tilling. Aim for slightly moist soil — not soggy, not bone-dry — so the tiller glides smoothly, and breaks up soil cleanly. Test by squeezing a handful of soil; it should hold shape briefly, then crumble apart.
Operating the Tiller
Safety Gear: Wear closed-toe boots, full-length pants, safety glasses, hearing protection, and gloves. Tie back long hair.
Starting Your Tiller:
Always consult your specific model’s manual — startup procedures vary.
Switch the engine to “ON,” open the throttle, and engage the choke. Pull the recoil cord swiftly. If it doesn’t start, let the cord retract and try again. Disengage the choke once the engine fires up.
Setting Tiller Depth:
Press the clutch lever and let the blades dig until they are just below the grass roots (typically 4-6 inches). Adjust the depth setting to lock at this level, then test a small area.
Tilling Technique:
First Pass:
- Work in straight, parallel lines across your lawn.
- Don’t push down on the handlebars — let the tiller’s weight and blade motion do the work.
- Move at a steady walking pace (too fast = shallow tilling; too slow = clogging).
- At row ends, disengage the drive and turn the tiller in a wide arc.
- Overlap previous pass 2-3 inches to avoid gaps and restart.
Note: Leave a 6-inch buffer zone near marked sprinkler heads. Over sprinkler lines, reduce depth to 4 inches or skip the area entirely.
Second Pass (Recommended):
If you still have grass clumps or want better soil mixing, till a second time perpendicular to your original rows. This crosshatch pattern is especially beneficial for front-tine tillers that aren’t as powerful.
Safety Tips While Operating
- Keep both hands on handlebars while operating.
- Release handlebars immediately if tines catch on something — the clutch disengages automatically.
- If you hit an obstacle: stop engine, disconnect spark plug wire, and inspect for damage.
- Never put hands or feet near rotating blades.
| Not interested in DIY lawn removal? LawnStarter’s landscaping pros handle tilling, old grass removal, and site prep for your next project — with professional equipment and zero rental fees. |
After Tilling: Removing Dead Grass and Debris
1. Rake Out Grass Clumps
Use a bow rake to pull up loosened grass, roots, and debris. Leaving dead grass creates uneven soil and weed problems.
2. Remove Remaining Vegetation
Options include raking and bagging (most thorough), using a weed burner (keep garden hose nearby), or gathering up and composting the material (if you have time).
3. Level and Let Settle
Level high and low spots with a landscape rake, then wait 1-2 weeks before planting or installing hardscaping to allow soil to settle.
Where to Rent or Buy a Grass Tiller
For one-time projects, rent from home improvement stores or local equipment rental companies for $50-$125/day. During peak season (March-May), reserve 1-2 weeks ahead.
For frequent use, consider purchasing a tiller from big box retailers, local hardware stores, or lawn and power equipment dealers. Prices range from $250-$3,000+.
FAQs About Using a Grass Tiller
No — wet grass can create heavy clumps that wrap around the tines and stick to the housing, clogging the tiller. Wet soil also clumps instead of breaking apart, causing soil compaction. Wait until the grass is dry and the soil is slightly moist but not soggy.
See Related: How to Test for Compacted Soil
It depends on the grass type and tilling depth. Kentucky bluegrass, Bermudagrass, Zoysiagrass, and St. Augustinegrass regenerate from underground stems. Tall fescue and perennial ryegrass typically don’t regrow from roots.
To prevent regrowth: Till 6+ inches deep, make 2-3 passes in different directions, and remove visible grass clumps. For persistent grasses like Bermuda, combine tilling with solarization.
Get Professional Help With Lawn Removal
Renting a tiller costs $50-$125 per day, but that doesn’t include your time or physical effort. LawnStarter’s vetted landscaping professionals handle removal, soil prep, and disposal, completing the job in a fraction of the time.
Whether you’re preparing for new sod installation or starting fresh with grass seed, get free quotes from local pros and compare pricing before deciding to DIY or hire out.
See Related
– Sod vs. Seed: Which Is Right for You?
– When is the Best Time to Plant Grass Seed?
Sources
“Counter (CRT) vs. Forward (FRT) Rotating Tillers.” Troy Built.
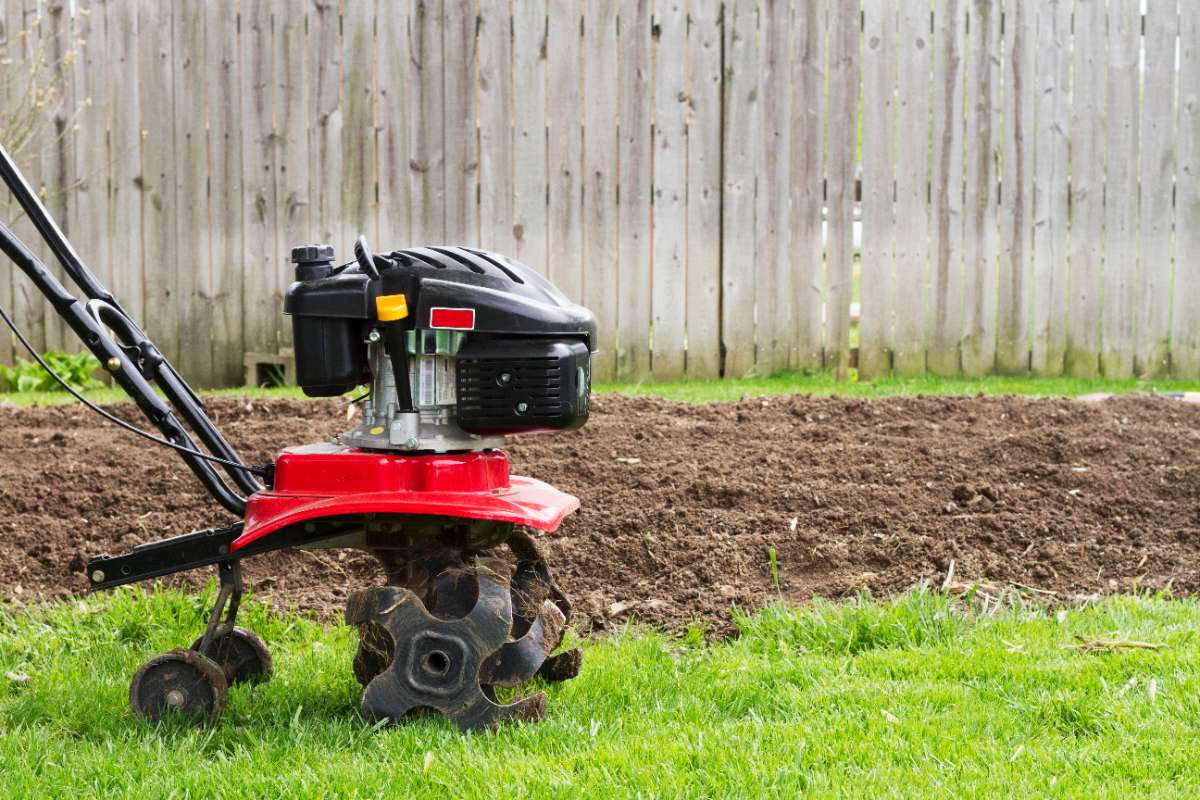
Main Image: Gas powered tiller beside freshly tilled soil. Image Credit: Jon Schulte / Adobe Stock